filmov
tv
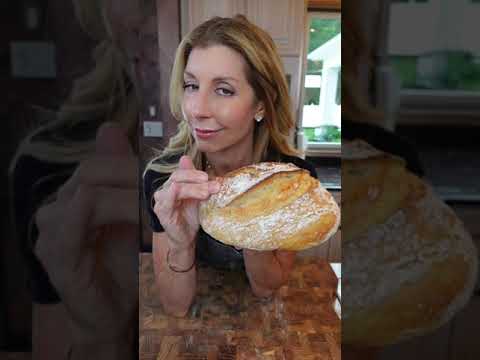
Homemade crusty loaf, with or without a dutch oven

Показать описание
***RECIPE***
2 cups (474mL) water, divided in two
2 teaspoons (10g) salt (based on the Morton Kosher I use)
1/8 teaspoon dry yeast (two small pinches)
bread flour (you'll need maybe 5-6 cups, 500-600g, but this recipe is not based on firm quantities)
a little whole wheat flour, if you want (I like to replace maybe a tenth of the white bread flour with whole wheat — I just eyeball it)
The night before you want to bake, mix a poolish by combining half of the water (1 cup, 237mL) with the yeast and enough flour to get a thick batter / pudding consistency. I think a wooden spoon is the best utensil to use for this, but whatever spoon you use, use something rigid. You can just leave the spoon in the poolish overnight. Cover the poolish and let it ferment 8-24 hours.
About four hours before you want to bake, uncover the poolish and mix in the remaining cup (237mL) of water, salt, and as much flour as you can stir in with a spoon (no hand kneading). Again, you can leave the spoon in there. Cover and let rise/hydrate for about an hour.
Check it again and see if you can stir in a little more flour now that the previous addition has hydrated. When you're done, you can get rid of the spoon. Cover and let rise/hydrate for another hour.
These next steps I do in the bowl, just to keep the mess contained, FYI. Sprinkle the dough with a little flour to keep it from sticking to you. Grab one side of it and pull it out until just before it's going to tear, then fold it back in on itself. Rotate the dough 90 degrees and repeat until you've done this four total times. Position the dough so that the seems are on the bottom and the smooth surface is on top. Cover and let rest for about 20 minutes.
Do the whole folding and stretching procedure again, rest 20 minutes, and then do it a third time.
The following instructions are for baking this with a dutch oven. If you're using a baking sheet with a heat-safe metal bowl, skip to that part now.
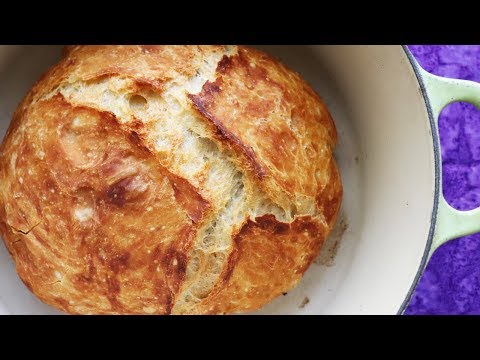
Get a sheet of parchment paper, crumple it up into a ball, un-crumple it and stuff it down into the bottom of your dutch oven. Transfer in the dough, smooth-side up. Cover the dutch oven (but not with the lid). Put the lid in your oven and get it heating to 500ºF/260ºC (some people get better results with slightly lower temperatures, but every oven is different). Let the dough proof for about a half hour while the oven heats up.
When the dough is looking puffy, score the surface — I find a few quick, confident slashes with a serrated knife work ok. Put the dutch oven over a burner on your stove, turn the heat on high, and cove it with the hot lid from the oven. When the side of the dutch oven feel hot (it should just take a couple minutes), transfer the whole situation to your oven and let bake for a half hour undisturbed, so as to not let any steam escape.
Carefully remove the hot lid, reduce the heat to 450ºF/230ºC and let the surface of the bread brown while the interior finishes baking, 10-20 more minutes. You can test the interior with a thermometer — anything in the neighborhood of 200ºF/93ºC is good. Let the bread cool before slicing.
The following instructions are for doing this with a baking sheet and a heat-safe metal bowl.
Line a baking sheet with parchment paper. After you've done the whole folding thing three times, position the dough on the baking sheet, smooth-side up. Cover it with a heat-safe metal bowl that's big enough to not touch the dough as it rises and/or bakes. Get your oven heating to 500ºF/260ºC (some people get better results with slightly lower temperatures, but every oven is different). Let the dough proof for about a half hour while the oven heats up.
When the dough is looking puffy, score the surface — I find a few quick, confident slashes with a serrated knife work ok. Move the whole pan/bowl rig into the oven and let bake for a half hour undisturbed, so as to not let any steam escape.
Carefully remove the hot hot bowl. If your oven has a convection fan, turn it on. If not, just crank your oven to its highest temperature, if it can go any higher. Let the surface of the bread brown while the interior finishes baking, 10-20 more minutes. You can test the interior with a thermometer — anything in the neighborhood of 200ºF/93ºC is good. Let the bread cool before slicing.
 0:13:49
Homemade crusty loaf, with or without a dutch oven
 0:00:25
The easiest most foolproof artisan bread✨
 0:01:00
Artisan-Style Bread
 0:01:44
World's Easiest Homemade Bread - Crusty Artisan style!!
 0:00:24
The Easiest Loaf of Bread You'll Ever Make
 0:00:32
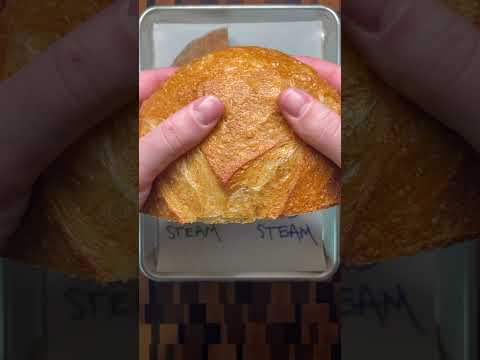
The Effect of Steam When Baking Bread
 0:00:17
How to make No Knead Bread
 0:01:00
How to make homemade bread. #bread #homemadebread
 0:00:50
World's Easiest home made crusty bread/ Best bread recipe/No knead bread
 0:13:30
How to Make Crusty Artisan Bread | Easy Homemade Bread | Beginner Artisan Bread | Heartway Farms
 0:01:00
Bread machine that might replace my grandmother! #bread #breadmachine
 0:03:05
The Easiest Crusty Bread Recipe (4 INGREDIENTS)
 0:00:31
The easiest 4-ingredient no-knead crusty bread
 0:01:01
THE EASIEST FOUR INGREDIENT NO KNEAD BREAD RECIPE #asmr #bread #shorts
 0:00:29
Making a small batch of crusty bread just for me!!! #breadrecipe #breadmaker #breadrecipes
 0:01:00
Secrets bakeries don't tell! I only make bread like this!
 0:02:08
Crusty Homemade Bread 4 Ways
 0:01:00
Easy No-Knead Bread Recipe!
 0:07:18
Faster No Knead Bread - So Easy ANYONE can make (but NO BOILING WATER!!)
 0:03:35
Easy Crusty French Bread With a Stand Mixer
 0:00:58
ARTISAN BREAD WITHOUT A SOURDOUGH STARTER
 0:00:23
Crusty Bread…It’s so Easy to Make!! #madefromscratch #bread #homemade
 0:05:16
ARTISAN BREAD | NO KNEAD BREAD | Homemade Dutch Oven Bread | Crusty Bread |4K| Juicing Peaches
 0:13:27
Farmhouse Crusty Loaf (Handmade, Quick, Simple & Delicious)
Комментарии