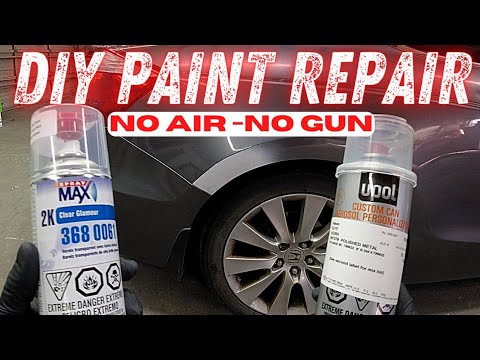
How to SPOT PAINT a car with SPRAY PAINT and CLEAR for amazing results!

preview_player
Показать описание
In this episode of Garage Noise, Diy auto paint continues as we answer the question of how to spot paint a car with spray paint and clear and achive amazing results. No special tools in this episode no compressor not even a paint gun. I explain how you can repair your cars paint at home in your garage. The results are quite impressive! using Aerosol paint and spray max 2k clear coat Follow the step by step procedures to repair your paint.

My amazon affiliate store : Tools and materials categorized to help you find what your looking for
CLICK HERE
⬇️⬇️⬇️⬇️⬇️⬇️⬇️⬇️⬇️⬇️⬇️

In this video(affiliate links)
⬇️⬇️⬇️⬇️⬇️⬇️⬇️⬇️⬇️⬇️⬇️

800 grit sanding sponge

spray max 2k clear

paint dabber

upol clear blender

automotive masking plastic

masking tape

foam tape

assorted scuff pads

assorted sndpapers

If you find this video helpful be sure to let me know in the comments. I welcome your feedback and questions

SUPPORT THE CHANNEL
⬇️⬇️⬇️⬇️⬇️⬇️⬇️⬇️⬇️

LIKE AND SHARE VIDEOS

SUBSCRIBE!

COMMENT!

AFFILIATE LINKS!

Follow us on Instagram and get the scoop on upcoming projects!

Follow us on Tik tok

CHECK OUT MY OTHER HOW TO VIDEOS
⬇️⬇️⬇️⬇️⬇️⬇️⬇️⬇️⬇️⬇️⬇️⬇️

Autobody repair made easy

how to prepare primer for paint

using body filler to repair a dent

How to repair body damage on your car

how to save a bad paint job

How to repair and paint your bumper

How to remove fisheyes from your paint job!

How to save a bad paint job

Disclaimer:
Due to factors beyond the control of Garage Noise, it cannot guarantee against unauthorized modifications of this information, or improper use of this information. Garage Noise assumes no liability for any property or personal damage that may arise from doing a repair on your vehicle after watching any of my repair video's. Due to factors beyond the control of Garage Noise, no information contained in this video shall create any express or implied warranty or guarantee of any particular result. Again Any injury, damage or loss that may result from improper use of tools, equipment, or the information contained in this video is the sole responsibility of the user and not Garage Noise.
Рекомендации по теме
Комментарии
Автор

I really like how you go over the steps from cleaning to sanding the clear coat and primer. I'm learning from you!

leomartinez
Автор

a bit late but for anyone who watches this, proper technique and good repair, but please please please wear a respirator when using the clear coat, that stuff is pretty nasty for your lungs.

TheKnyghtblade
Автор

This has given me the confidence to tackle my project soon. Many thanks.

scottca
Автор

Excellent video I’m going to reference your videos at work as a professional training video . You need to seriously understand how well your skill is valued and your explanation is simple .

acuramdx
Автор

Just getting ready to fix a scratch on the right side cargo door of my 2013 E 250 van. Found Duplicolor and Spraymax clear at local parts paint store. Thanks for the update and info.
Dan C
St Charles, Mo

danconley
Автор

I have the exact same job needed to be done on both sides on my Focus st. this video made that job look less scary to do in my garage. great video!

Fredrik_ST_wagon
Автор

wow man did you know that u r the only one help me returned shine to my car with almost no money 😍😍😍and much more i safe about 3 days at workshop to done what i done in 3 hours wow and all with very comfortable easy todo it my self thanx very much from now on iam ur loyal follower and looking to learn more from you please🤗🤗🤗

nashaatsalah
Автор

Great video. Just what I needed. I have a 2000 Silverado with clear coat issues, and you did a great job of explaining each step. I'm definitely doing this.

okladoma
Автор

I'm going to repair a plastic bumper cover that I need to remove to fix a hole. Once I get it smoothed out and primed, I may do this method with the bumper cover off the car. Thanks for this video. It was super helpful!

scotchbudmeister
Автор

I've used the SprayMax clear (and color coats as well) and had very good results.

sgnt
Автор

Ive used aerosols many times but never seen any perform as good as those, the fan and pressure is really good.

simonfreeman
Автор

I’ve been doing ok with body and paint repair and in the years I’ve been doing it I’ve never had paint mixed at any retail auto store normally it’s duplicolor or nothing that’s amazing

harrydemetro
Автор

It's amazing what you can do with spray bombs these days. I thought for sure you were going to get a run out of that as well, I was super surprised that you didn't, these spraybombs are pretty dern impressive. I haven't spray painted in a while so basically just from watching this video I've decide to paint my son in laws truck rear wheel arch's with spray bombs.

fonhollohan
Автор

I'm a keyboard nut but I have an '87 GMC S15 that is starting to bust rust. This was a great confidence booster. I recognize the need for a good foundational cleaning, proper surface prep, and keeping the can moving. Please go back to the original repair description and link this video. TY

anthonyrhodes
Автор

Thank you. I bought a project truck knowing I'd get to learn some new things. You've answered some questions and really helped boost my confidence.

jude.v
Автор

Thanks much! These are the exact steps I've been following. Today...application of the aerosol clear coat. Wish me luck!

danvaught
Автор

Great video! We have a 2006 RAV4 that has one area where the paint is bubbling (and coming off) plus some areas that need minor repair (dings from parking garages, etc). There are only 120, 000 miles on the car and it runs great, but paying for a professional paint job on a 17-year-old car doesn't make sense to us. She's been good to us, but seriously, how much paint does a woman need! :) We'll give your instructions a try. If it works for amateurs like us, then you're a hero.

davidd
Автор

Morning brother man, before even opening the YT app I thought to myself hmmm perhaps he released spraying with can video today ?! What do ya know because you actually did !!! Your a man of your word ! I gotta say that came out looking as if a bodyshop did it ! Great work and explaining as always teach, I can’t wait to tackle my quarter panel !!!! Godbless you for these videos

aimized
Автор

Thanks for the great tips. I'm considering doing a modest repair and paint on my Nissan's front fender and your tips make it look feasible.

rowpilu
Автор

Man I used to blow off the notion of a mask or much less a respirator. Wrong! The usual Rustoleum enamels are one thing, and even then we should protect ourselves, but lacquers are truly dangerous, and that 2k Clear is very strong, but very good, as I’ve used a ton of it. It polishes out well, and has even passed the gasoline spill test. The Dupli-Color version I tried before failed miserably. This can be done. Mostly prep work is very crucial, well, it’s ALL crucial. But application is the make or break. Environment matters big time too. If it’s too warm the paint will start to dry in the air before it hits the surface. So you get closer, right? Too close and it piles on in such a way that is insidious and deceptive. It might look great, no runs, shiny and wet looking, top notch. But later you will see it settle, and on vertical surfaces it’ll run so subtly you won’t see it till your wet sanding it next week. So not so close then. But it MUST look wet by the third coat. First mist coat is crucial, NOT WET. Let it sit just long enough to be tacky, not dry, but flashed off, where all the solvents have escaped, which is a tough call. Because here’s the kicker. If you wait too long, the next wet coat won’t settle into the mist coat deep enough, won’t stick as well, require that much more product, which then induces the next pitfall. If your can spatters, spits, at ALL, shake it and give it a spray elsewhere to see how it’s doing. If you THINK it’s gonna spit, set it aside for a seldom seen area where you might need more depth, and a spatter can be sanded smooth and dealt with, as opposed to the middle of the side of your drivers door. Worse though, is when everything looks good and you let it cure, only to find cracking or “crazing” in your paint in particular places. That’s where the coat beneath cured JUST enough to form a skin or layer, but hasn’t released ALL of its solvents yet, but then you didn’t catch that nearly impossible to detect issue, so you paint a wet coat, let it flash, and another. An hour or so later you excitedly check out out and horror. Crazing. Like dried mud. The first layer is still shrinking even after the second and third coats go on, but those coats cured themselves and are preventing the bottom coat from curing properly, and when it shrinks, cures, settles, moves, whatever, you see the results in the top coats. Bad news. Start over. Spot painting on top of a spot painted spit is no good. Of the grain beneath isn’t uniform then the color coat won’t be uniform. With the OE paint it’s all old and being done by a machine there isnt much grain to see, other than very uniform orange peel. You’ll see the sanding and paint depth differences if you try to just sand away the crazing, and then recount that. At that, you can really sand it for a few hours, regardless of what the directions say. Sanding uncurled paint is a recipe for disaster and a hundred times the work you envisioned. The clear coat can hide SOME things, but that one spot you think is no biggie, will be. I’d say that once the surface is right, and it’s paint time, that spattering or spitting is the one biggest fear and can ruin your day. Learn how to feel for it, keep the nozzle wiped, and keep your hands and fingers well out of the path of spray. If it’s too cold, it takes too long to dry, hits too wet, runs or sags, and has linger time to catch moths and dust. As hard as you’ll try to keep the area bug free, good luck. If it’s too humid, you’ll get cloudy or foggy spots, where it looks whitish, and that’s absorbed moisture sucked into your drying paint, as a sponge to moisture, your paint to the same. Try to dry the air with heat or a dehumidifier, and quickly, but not too quickly, as drastic changes in conditions WILL affect the finished product. Maybe very glancing and subtle applications of a heat gun or hair dryer, but don’t get too hot or it will run or shrink, more problems. To dry, it will be dry before it hits the car. Get it wrong, and you’ve got a high-nap suede paint surface. Which can be sanded but then you’ve got to repost the whole section. Running out of paint is another nightmare. It induces mistakes. Nice overlap strokes, leave no line but if you miss don’t go back and fill it in until it flashes just a hair or it will sag. The right pace of movement, careful attention to exactly what you are doing, real concentration, it all matters. A gun gives you a more uniform supply, a better pattern, more overall control of the paint itself, and repeatable results. But a pain to keep track of mixes, proportions, the mess, the supplies, the compressor going off when you’ve heard enough, and the cleaning of the gun, nozzles and tips, cfm rates, drier, the whole shooting match. To me, it’s still a toss up. I got incredible results on my Magnum in Brilliant Black, sometimes I can’t believe I painted that whole quarter panel, it looks so good. But my moms old Mercedes in simple Black is killing me. Where I swear a gun would make so much better. But I hate needing a big compressor and the whole pile of accessories needed. But, it may be time.

andrewhigdon