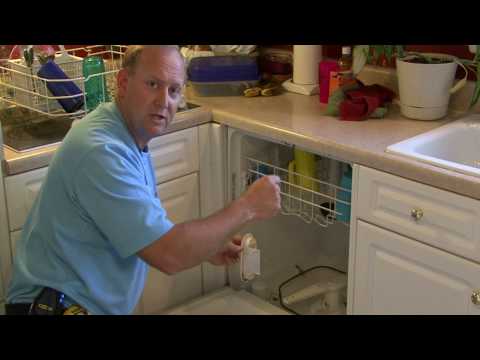
How to fix a Dishwasher That Does Not Clean

preview_player
Показать описание
Dishwasher not cleaning well enough? Learn how to clean out the basin of a Kenmore Elite or Whirlpool or Kitchenaid dishwasher.

Tools Used:

This is a Kenmore Elite but it has the same insides as a recent model Whirlpool and Kitchenaid.

Disclosure: some of the links in this description are affiliate links.
Рекомендации по теме
Комментарии
Автор

Thank you so much for your expertise. I am a 70 y/o single lady in a small town where it is difficult to find someone to help me with my home projects. It is a wonderful service you offer. I DID IT ALL BY MYSELF! Thanks again!

rebeccamoore
Автор

I watched this video and decided to tackle my 10 year old dishwasher.  It had never been cleaned as shown in this video, and it was not longer washing properly.  Often, I'd take clean dishes out of the dishwasher only to discover food particles on some, and a foggy/filmy appearance on glassware.

The video instructions were spot on!  I actually had the screwdriver attachment for my multi-tipped screwdriver, so that was good.  Everything came apart exactly as shown here, and everything went back together easily.  Aside from my back hurting a little from having to lean over the door, it was relatively painless.

I was shocked at just how much debris had collected in the dishwasher.  A chunk of broken glass.  A few lemon seeds.  What looked like part of a chicken bone.  An olive pit.  And, the area underneath the spinner arm was so full of soap residue that I had to make up a batch of cleaning solution to scrub it, even used a soft bristle brush to clean it while wearing rubber gloves.  This part of the cleaning took as long as the disassembly and reassembly.  I then ran the dishwasher with no dishes to rinse it out.

I just completed my first full-load cycle post-cleanup.  Everything came out clean, shiny, and no fog!  I'm back in business with super clean dishes.  And here I thought it was time to buy a new one.  I hope to get more useful years out of this one.

Oh, and I'm a 52 year old woman, and I did it by myself!  Yay, for me ;)  

LinYouToo
Автор

I watched your video yesterday. Our family lives in Toronto. You just saved us at least $200 and the aggravation of waiting for a serviceman to show up. The top rack not getting wet was our issue. I ended up finding an olive pit, a plum pit, about 8 pieces of bone, a shrimp shell, a piece of plastic and a toothpick. Cleaning out the area you so eloquently and thoroughly presented in your video did the trick. Thanks a million. Or should I say 200 bucks!?!

TorontoCanadaGuy
Автор

This fix is for 2013 dishwasher and is valuable big time TY!.... more recent machines are different. Video was very hard to find .... can you bump it? Only problem is sticking naked finger down into cranny by drain flap... yes I found glass there just like you... ouch. If you push the "Cancel" button near Start button the machine will do a short drain cycle and most of that nasty water will go ....

LeeTerranova
Автор

So so helpful!!!! After I cleaned out the basin I was so inspired that I tackeled the rotating water vent at at the top of the dishwasher with a sharp kitchen knife, opening it to discovered the vent holes were clogged, wow! Then on to the the 4 red disk vent cylinders which I pryed open like a clam, just enough to hose out the gunk under the facet. My unit is now like a new one. All the contortionist movements were the hardest. make sure you have a lot of padding under your knees. I am a 73 year old female with a great sense of accomplishment. Thanks guys for your efforts in posting!!!!

RobertaPeck
Автор

Watch this every time my dishwasher stops cleaning!! Best video. Has saved me having to buy a new washer. My partner will makes no effort to fix anything or assist in any way!! Many thanks!!

kathyfrodahl
Автор

Fantastic! I ordered a brand new dishwasher for $1100, yesterday. It was on back order for another 10 days. I didn't want to hand-wash dishes that long, so I decided to try your steps and voila!, perfectly clean dishes again! I am now going to cancel my new dishwasher. You guys just saved me the $1100 I was going to pay! Initially, I had the door open and pushed in the lever to trick the dishwasher into thinking the door was shut. That way, I was able to see how the bottom sprayers were barely shooting up the water and the upper sprayers weren't doing anything. After the fix, I tricked the door again so that I could watch the sprayers. I had to shut it immediately because the water was flying everywhere! Thank you so much!!!

sstarde
Автор

I'm glad the designers of these machines made it so simple to clean a filter!

frankschoenrock
Автор

Third time in six years I have tuned in to this video to clean out the basin-and-beyond of my Kenmore. I am never disappointed to find what is down there causing grit to start sticking to things on the top rack - broken glass, sunflower seed shells, toothpicks, hair, paper labels. The filming, lighting, pacing, audio and level of detail are all excellent. Thank you for all the money we've saved by conducting this simple maintenance task ourselves.

katherinebeck
Автор

Thank you! I spent about 3 hours on my dishwasher...thoroughly soaked, washed and scrubbed every single piece before reassembling it. We were already looking into purchasing a new dishwasher...you saved us $600!

sandrasanger
Автор

THESE instructions are damn good. You can complete the job trusting these instructions.

gotahvcls
Автор

This video is amazing, very well done! Thank you so much. We moved into our house and the Kenmore Elite dishwasher never worked properly. It took me about 45min to follow this video. I found glass, olive pits, broken plastic, nut shells and other gunk. The only thing that differed for me was that the top screws were T20's and the smaller one inside was a T15.

angeladallin
Автор

Our dishwasher started making horrible noises while running the cycle. After searching for a fix, I found your video here. I have two different reviews for this video, my wife's and mine. For her, she hates you because she's not going to get that shiny new stainless steel dishwasher she had been eyeing. For me, you saved me from buying a new DW. Thanks for the great detailed video. After cleaning out the bottom it's working as good as new again.🤗

Gbfaninnm
Автор

11 years later, still useful. Gotta love YouTubers!! I bought me current house in 2012 and have run my dishwasher 1-2x per day since then and never cleaned the internals. Did it today and wow, what a difference!

Spring
Автор

Thank you so much! We have a Kenmore Elite that is about 9 years old and were ready to buy a new dishwasher because it had stopped cleaning the dishes and was actually making them dirtier. Then I found your video, bought the T 15 tool at ACE hardware for a couple of bucks, followed the instructions on your super clear video and now our washer is as good as new! By the way, I found broken glass, 4 long olive sticks, a piece of paper can label, 6 beans and other accumulated trash blocking the flapper. Thank you again for saving me $1, 000.00! Now my wife thinks I am a CHAMP! You are the greatest!

gregoryskip
Автор

These instructions and guidance were absolutely spot on for my Kenmore Elite. Took me about an hour to strip out the parts, clean them with a diluted CLR solution, and clean out the drain which was blocked with a bay leaf (among other unmentionables). My Shopvac definitely made short work of the bits that were hard to reach by hand. Thanks Handyguys! Keep up the great work.

Dukky
Автор

Fantastic video, and much appreciated.  Our top rack dishes were not getting cleaned, and by following this video, I believe I've cleared out the debris (toothpicks, corn kernels, glass shards, etc.) that was likely the culprit.  A few comments:
- As Mike mentioned a few comments ago, my unit required a different size torx screwdriver to remove the chopper housing cover.  Also, when returning the cover to its original position after the job, it looks like there is a notch on the right-hand side that should snap into a slot beside the black rubber flapper valve.  Upon closer inspection, I concluded that it was not possible, so after positioning it as snugly as possible over the chopper and replacing the screw, I was satisfied that I had correctly reinstalled it.
- I found some debris inside the circular filter, but it was easy enough to pop off the screen and remove the debris
- Black rubber flapper valve was more difficult to replace than I imagined it would be.  It took me several attempts of inserting before I was confident it was correctly in place (basically, once I could no longer pinch and lift it with my fingertips)
- I used a wet/dry vac to remove most of the debris, as it became tedious to get my fingers on every little piece of debris.  Of course, I removed the black flapper valve first, to avoid sucking it up
- There are two grey flapper valves midway up the arm that extends from the bottom, along the back, and to the top of the unit.  The upper valve in my unit is stuck in the open position, presumably because we've always positioned the top rack in the upper position, so the flap has always been pushed open.  I noticed these valves were pictured in the video, but both appeared to be closed on your unit.  I was able to disassemble the arm and locate the flapper valves, and it was clear that the rubber was worn to the point where it won't return to the closed position by itself.  I believe this will prevent us from positioning the top rack in the lower position, but we are OK with that.  I just wanted to point this out, in case anyone else has this issue.

Great job with the video!

joshuacraig
Автор

I have been looking everywhere on the web for information on how to clean our Kitchenaid dishwasher. Your video is exactly like our dishwasher. We had a huge calcium buildup that was making our dishes cloudy and covered with grains that looked like sand. We were under warrenty, a repair man fixed it once. Your video made it so I could do the clean myself. It took about two hours because under the screen there was a thick layer of calcium on all the parts. Thanks so much, Works like new again.

alan
Автор

I love you guys! I am a 77 year old woman...tired of repairmen telling me something is not worth fixing so I found your video and began. Got it all apart per your video, found broken glass, pieces of flat wear baskets, plastic, etc., cleaned it all up and found that the gasket for the centerpiece is split on one side so I’ll try to find one that will work to replace it. I cleaned the screen for the chopping blade which was pretty well covered with lint. That was time consuming. Tomorrow I’ll look at the centerpiece and see if it will come apart to get whatever it is from the backside of the screens out. Thanks for giving all of us the option of doing the work ourselves, avoiding replacement and repair costs. Pretty empowering. Tomorrow we’ll see if it works and I’m expecting it will! Thank you. Thank you. Thank you.

Chris-fzxe
Автор

my eleven year old son and I have just done this repair for the second time. This time it took us less than 1/2 an hour. You guys rock (and so does my son!) Thanks much.

simonebloch