filmov
tv
How to Delete Old Windows Update Files

Показать описание
In this video I'll show you how to delete old Windows update files on your computer.
Timestamps:
Introduction: 0:00
Steps to Delete Old Windows Update Files: 0:29
Conclusion: 1:50
More great Windows tutorials:
Video Transcript:
Whenever you update your Windows computer, the necessary update files are downloaded to your machine. The downside is that these files are never deleted, and they just sit there eating up your computer's storage space. Thankfully, deleting your old, no longer needed, Windows update files can be done quickly.
Now let's walk through the steps to delete old Windows update files on your computer.
Step 1. Navigate to your Windows 11 home screen, and then press the "Windows" and "I" keys at the same time. The Windows settings screen will be displayed.
Step 2. Make sure "System" is selected in the menu on the left side of the screen, and then click "Storage" in the list of options on the right side of the screen. The Storage screen is displayed.
Step 3. Click "Temporary Files" on this screen. You'll see a list of temporary files stored on your computer that aren't critical and can be removed to free up space.
Step 4. Click to place a check mark next to Windows Update Cleanup in this list. Review the other types of temporary files, and click to place a check mark next to any of those that you want to remove as well. Click "Remove Files" after making your selections. A Remove Files dialog box is shown, letting you know that the selected files and their data will be permanently deleted.
Step 5. Click "Continue." You'll see a progress bar where the Remove Files button was previously, showing the status of removing your selected files. The progress bar will disappear when the cleanup is complete and the files have been successfully removed.
 0:01:59
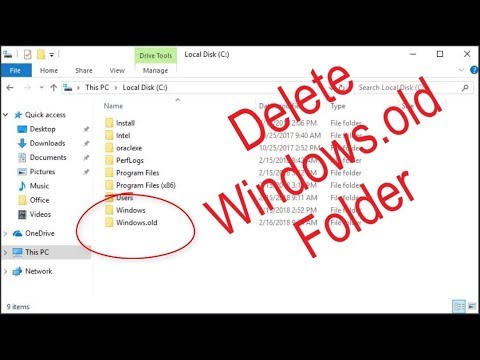
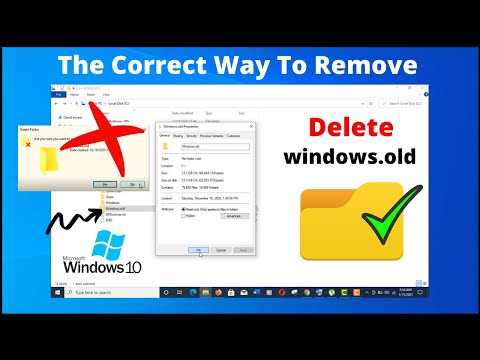
Delete Windows.old folder from Windows 10
 0:03:06
How To Delete Windows.old Folder From Windows 10 Safely 2021
 0:03:02
How to delete the Windows.old folder on Windows 11 22H2
 0:07:37
How to Delete Previous Windows Installation and Free Up Space
 0:02:26
How to Delete an Old Windows Installation from a Second Drive
 0:01:47
How to delete the Windows.old folder on Windows 10 (21H1)
 0:02:31
How to Delete the Windows.old - Windows 10
 0:05:22
How to delete old windows after installing new one
 0:00:50
How to Show internet Speed on Android phone
 0:01:21
After Upgrading The Windows How To Delete The Windows.old Folder In Windows 10
 0:01:39
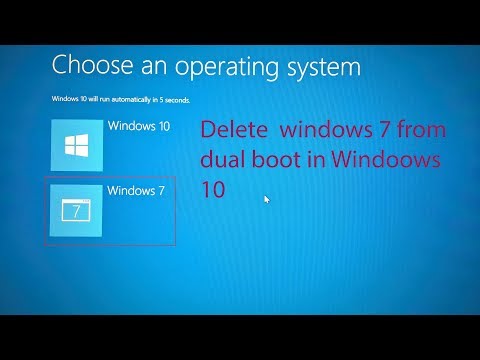
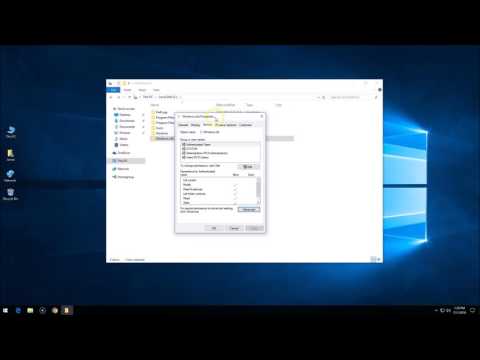
How to remove one windows from dual boot system
 0:02:18
How to delete windows old in windows 11
 0:00:47
How to delete Windows.old in Windows 8
 0:05:38
How To Delete The Windows Old Folder From Windows 10
 0:03:28
How to Delete Windows.old After Windows 10 Upgrade
 0:02:55
How to Correctly Delete the Windows.old folder after updating Windows 10
 0:00:29
How To Delete Windows Update Files | Free Up Space & Boost Performance - Windows 11 PC & Lap...
 0:01:42
How to delete your previous version of Windows
 0:02:39
How to Delete the Windows.old Folder - WINDOWS 10
 0:03:30
How To Permanently Delete WINDOWS.OLD Folder from Windows 11/Windows 10
 0:02:11
How to Delete Old Windows Update Files
 0:02:46
Delete Windows.old via the Command Prompt
 0:01:39
How to Delete Windows.old Folder and Files from Windows 10
 0:00:56
How To Delete Windows.old On Windows 11
Комментарии