filmov
tv
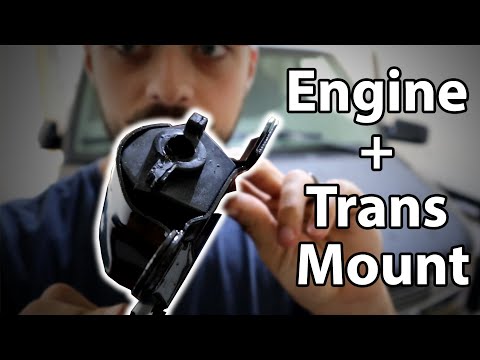
Transmission & Engine Mount Replacement

Показать описание
Learn how to change your transmission mount or your engine mounts on a 3rd GEN Toyota 4Runner. This repair would be similar on a Toyota Tacoma. For this 17 year old 4Runner, the mounts were still in great shape so do your best to inspect the mounts before buying new ones.
**TORQUE SPECS**
*Transmission Mount to Crossmember Bolts: 13lb/lbf
*Transmission Mount to Transmission Bolts: 48 ft/lbf
*Crossmember #3 Bolts: 53 ft/lbf
*Engine Mount Bolts: 28 ft/lbf
*Wheel Lug Nuts: 85 ft/lbf
**PARTS**
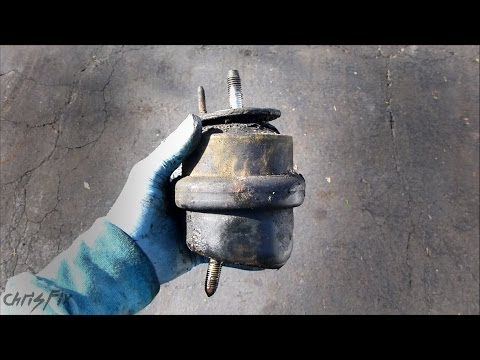
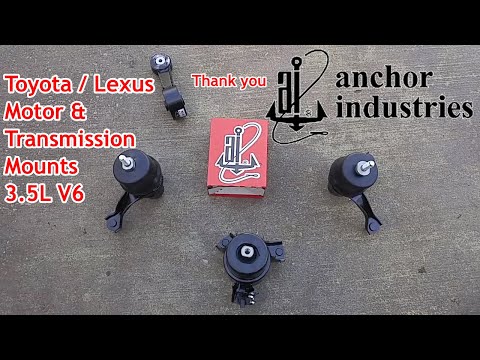
*(2) Toyota Engine Isolators (aka Motor Mounts) #12361 - 62160
(1) Transmission Isolator (aka Transmission Mount) #12371 - 62120
**HELPFUL TOOLS**
*If you're looking for other tools not used in this video, check out Timmy's Master Tool List.*
*Mayhew 5 Piece Prybar Set - (use to check trans mount and to pry off exhaust grommet)
*6 Ton Jack Stands - (strong jacks to support vehicle while you're working underneath it)
*Milwaukee Mi12 Cordless Ratchet - (nice to speed up removing fasteners like the skid pan bolts)
*Milwaukee M12 Battery
*Milwaukee M12 High Capacity Battery
*Milwaukee M12 Battery Charger
*3/8” Drive Regular Extension Set
*3/8" Drive 6 Point Metric Standard Socket Set
*3/8" Drive 6 Point Metric Deep Socket Set
*Dewalt 1/2" Drive Impact Gun - (strong gun for removing lug nuts and other big fasteners)
*Dewalt 3/8" Impact Gun - (nice compact gun for smaller applications)
*Dewalt Batteries
*Dewalt Battery Charger
*Wheel Lug Nut Impact Socket Set - (nice set for all different lug nut sizes)
*3/8" Drive Regular Impact Extension Set
*3/8” Drive Shallow Impact Socket Set
*Harbor Freight 2000 lb Transmission Jack
- (works really well and is affordable)
*Rubber pad for protecting oil pan - (used section of this with trans jack)
*1/2” Drive Breaker Bar - 12” Long - (used for holding cross member bolts firm)
*1/2” Drive 6 Point Deep Metric Socket Set
*3/8" Drive Deep Impact Socket Set
*CDI 3/8" Drive Foot Pound Torque Wrench - (used to torque most fasteners in this video)
*CDI 1/2" Drive Foot Pound Torque Wrench - (used to torque wheel lug nuts)
*Plastic Fastener Removal Tool - (nice tool to remove plastic clips like the ones in the wheel well)
*Flex Head Box End Wrench Set - (used for the motor mounts)
*Tekton Extra Long Flex-Head Ratcheting Box End Wrench Set - (used for the motor mounts)
*1/4" and 3/8" Flex Head Ratchet Set - (3/8 ratchet was used for the 17mm center nut for the motor mounts. these ratchets are super functional and worth their weight in gold)
**As Ebay Partner Network members, we earn commissions from qualifying purchases.
**As Amazon Associates we earn from qualifying purchases.
 0:10:26
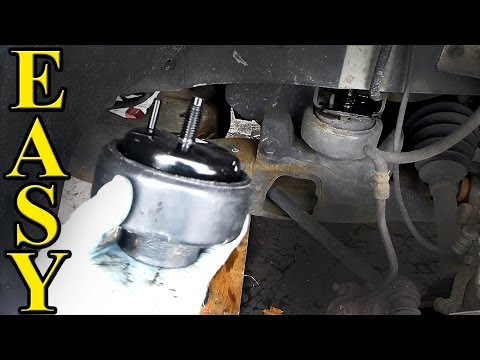
How to replace a Motor Mount or Transmission Mount
 0:10:31
How to Replace a Motor Mount or Transmission Mount
 0:16:16
How To Replace Worn Engine Mount and Transmission Mount
 0:41:03
Transmission & Engine Mount Replacement
 0:09:29
Engine & Transmission Mounts Replacement - Toyota Camry
 0:26:56
BMW E46 Engine & Transmission Mount Replacement
 0:04:14
How to diagnose a bad motor mount or transmission mount
 0:09:21
2014-2020 Mazda 6 & CX-5 Transmission mount Replacement
 0:14:12
How to replace a bad engine mount or transmission mount (2016 Jeep Renegade motor mount replacement)
 0:22:32
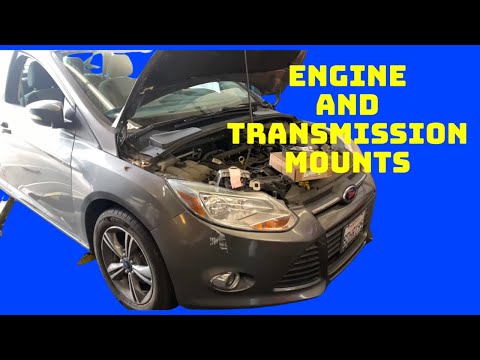
How To Replace All Engine And Transmission Mounts On A Ford Focus With 2.0l Ecoboost Engine
 0:02:51
Mercedes Benz Transmission Mount Replacement | Works on most RWD non 4-matic models!
 0:33:35
BMW 3 Series E46 - Engine & Transmission Mount Replacement DIY - (2001 2006 323 325 328 330 M3)
 0:08:44
How To Replace Bad Engine and Transmission Mounts - Astro Van - EP 17
 0:19:16
How To Check and REPLACE A Bad Engine Mount
 0:07:48
How to Replace Transmission Mount 2003-2008 Toyota Corolla
 0:28:06
Replace Engine And Transmission Mounts On A 2005-2010 Honda Odyssey
 0:02:22
Engine Motor and Transmission Mount Set of 6 - Fits Honda Accord 2.4L with Automatic Transmission
 0:01:36
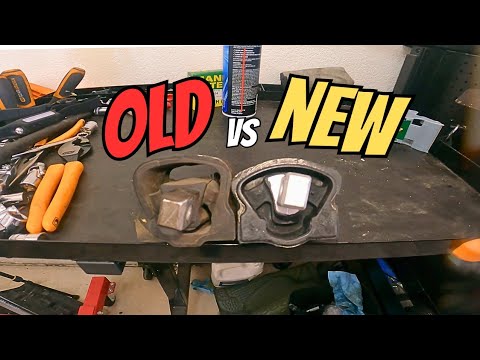
MK6 GTI Engine & Transmission Mount Kit | Before and After (2.0 TSI)
 0:09:32
2013 Mercedes-Benz E350 Coupe | Motor Mount & Transmission Mount Replacement
 0:11:56
Toyota / Lexus Engine & Transmission Mounts Replacement - Avalon/Camry/ES350 - 3.5L V6 2GR-FE
 0:09:48
Replacing Motor Mounts - Mazda 3 Engine and Transmission Mount Replacement
 0:04:32
2004 Honda Civic Transmission Engine Mount Replacement
 0:11:35
Audi A6 Transmission Mount Replacement (3.2, 4.2, & 3.0) | DIY
 0:26:13
How to Replace Transmission Mount 2003-2011 Honda Element
Комментарии