filmov
tv
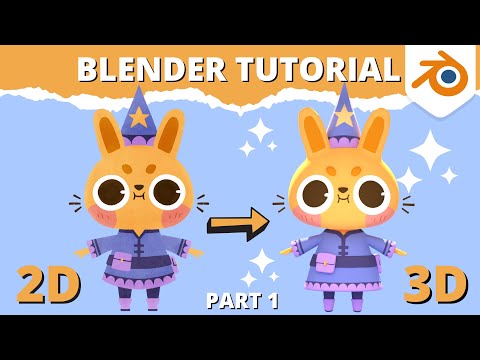
Blender Tutorial - 2D Drawing to 3D Model (Part 2)

Показать описание
In this Blender 2.92 Tutorial I'll show you how to take a 2D drawing and make it into a 3D model!
This is Part 2/2 of this video. This one is a bit more fast paced because I cover way more information in it. In this video I'll teach you how to UV unwrap, texture, light and render your character. In the previous part 1 I showed you some quick basics and how to model your character. If you haven't seen Part 1, make sure to check it out below.
✷BUNNY REFERENCE✷
✷MY NEW COURSE ON SKILLSHARE✷
✷MY NEW COURSE ON UDEMY✷
✷MORE TUTORIALS✷
If you have any questions, leave them in the comments and I'll do my best to help!
Subscribe and turn on the notifications for more useful tutorials!
Below you can find my bunny character concept which you can use if you want to practice what I show in the tutorial.
(Please do not re-post, copy or claim my work as your own. But do feel free to share with me if you model it!)
✷SOFTWARE✷
•Download Blender•
✷DETAILED HOTKEY MANUAL✷
✷MY SOCIALS✷
•Instagram•
•Twitter•
✷VIDEO CHAPTERS✷
00:00 - Intro
00:30 - Prepping the model
1:08 - Assigning a Material
1:50 - What are UVs and UV Unwrapping?
2:53 - Making UV Seams
7:24 - UV Grid Texture
8:33 - Unwrapping the Model
9:37 - Prepping the Model for Texturing
10:48 - Texturing
13:52 - Lighting and Rendering
18:35 - My Light Settings
19:06 - Final Result
#blender #tutorial #3D #3dmodelling
 0:25:55
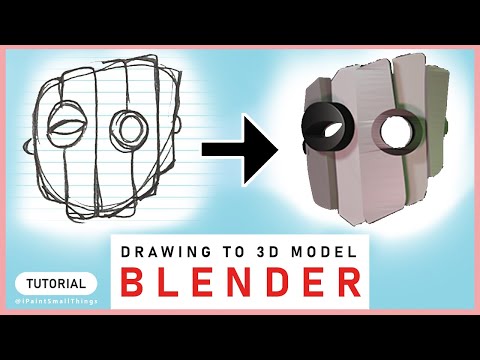
Blender Tutorial - 2D Drawing to 3D Model (Part 1)
 0:50:05
Blender 2D Animation Tutorial for Beginners (Grease Pencil Tutorial)
 0:00:38
Creating a Rigged Grease Pencil Animation in Blender 2.8 - Tutorial Course Teaser
 0:34:35
Learn 2D Animation in Blender With Grease Pencil | Drawing Tutorial
 0:06:12
Blender Grease Pencil Beginner Tutorial - The easiest drawing setup
 0:06:53
Blender Tutorial - Turn Any 2D Image to 3D Model - Quick & Easy
 0:53:43
Blender 2D/3D for beginners, drawing and animating with greasepencil (blender 2.8) - Part 1/2
 0:03:33
Easily Turn a Drawing into a 3D Model in Blender
 0:10:02
History of Blender
 0:29:47
Crash Course: 2D Grease Pencil Animation in Blender [1/2]
 0:01:24
Turn 2D images into Animated 3D Models - Cheat at Blender Tutorial
 0:10:05
Blender Tutorial – How To Create a 3D Model from 2D Files (in 5 EASY steps)
 0:32:25
How to draw a Simple 2D Character in Blender 2.9 Grease Pencil. Blender tutorial (Monster Edition)
 0:18:22
How to draw a Simple 2D Character in Blender 2.9 Grease Pencil. Blender animation tutorial
 0:18:36
2D Artists - you have a 3D SECRET WEAPON in Blender
 0:11:33
Draw character concepts from any angle & any lighting. Gamechanger tools!
 0:27:57
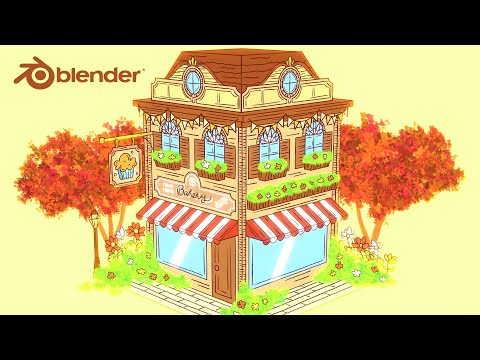
Blender 3D Grease Pencil Tutorial - Bakery Shop
 0:29:43
CAD Modeling In Blender 3.2 | Using CAD Sketcher
 0:04:45
Blender Art Process: BTS of How I Made this Piece with GREASE PENCIL
 0:39:01
Basic Blender Toon / Cel Shader Tutorial 2D Grease Pencil + 3D Modelling
 0:04:04
Switching to Blender for My 2D Animations
 0:04:49
Animated 2D Drawing Effect in Blender
 0:19:31
Blender Tutorial - 2D Drawing to 3D Model (Part 2)
 0:09:43
Smart-Bones🦴 Addon for Blender! - Great for Grease Pencil Workflow!
Комментарии