filmov
tv
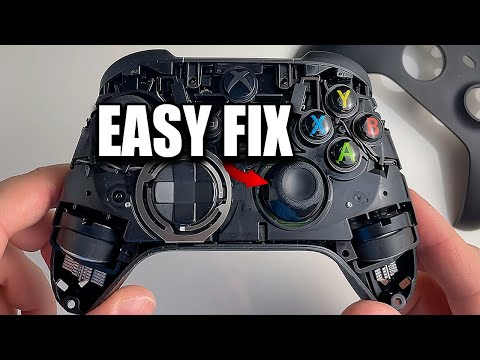
How to Fix Analog Drift on XBOX One or Elite Controller Series 1 (moving on its own, stopping)

Показать описание
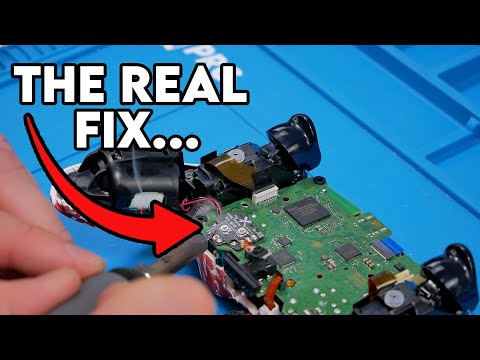
QUICK AND TO THE POINT. The Xbox One controller can experience stick drift when one or more of the analog sticks have problems, causing characters in games to move on their own, or suddenly stop while sprinting. Usually it's because debris gets inside the analog stick, so cleaning mechanisms and sensors can help.
Patreon:
Product Links:
All Amazon links above are affiliate links. I get a small amount of money if you end up using them to make purchase (it does not have to be for the item I link to, as long as you click my link then move to another item, it works)
..........................................................................................................
Timestamps:
00:00 Intro
00:20 Pull and Tap
00:34 Blowing
00:53 Vacumming
01:08 Update Firmware
02:08 Clean From Inside
04:23 Clean Deeper Inside
08:05 Remove Grey Part
08:30 Outro
#repair
 0:08:30
How to Fix Analog Drift on XBOX Series X/S Controller (moving on its own, jittery, wrong direction)
 0:02:03
5 Easy Ways to Fix Drift on ANY Controller (Analog Stick Fix)
 0:01:21
How To Fix Controller Drift PS4! PS4 Analog Stick Drift Easy Fix!
 0:08:08
IS THIS THE UNIVERSAL- STICK DRIFT FIX?🤨
 0:13:04
How to FIX ANALOG DRIFT in PS4 Controller! (100% Works!) (Cleaning Method)
 0:00:59
The Easiest Way to Fix Analog Stick Drift!
 0:01:56
How To Fix Controller Drift PS5! PS5 Controller Analog Stick Drift Easy Fix! (No tools required!)
 0:06:37
How to Fix Analog Drift or Analog Stutter on PS3 / PS4 / PS5 Controller (Cleaning Solution)
 0:07:10
How to FIX PS5 Controller Stick Drift
 0:15:38
How to Fix Joystick Drift Permanently!
 0:11:24
How to FIX PS5 Controller Stick Drift & Moving on its own (Best Method)
 0:01:56
How To Fix Controller Drift Xbox! Xbox Analog Stick Drift Easy Fix!
 0:05:44
How Manufacturers Can Fix Joystick Drift - Permanently!
 0:11:08
How to Fix Analog Stick Drift - 3 Ways
 0:02:42
How To Fix Controller Drift PS4! PS4 Analog Stick Drift Easy Fix!
 0:09:40
How to Repair 🛠️ Xbox One Analog Stick Input ( Stick Drift ) - XB1
 0:02:07
How to fix stick drift PS5 (NO TOOLS) (2023)
 0:03:44
How To Fix Controller Drift PS4! PS4 Analog Stick Drift Easy Fix! (Easy Cleaning Method!)
 0:00:15
another stick drift fix
 0:01:38
How to Fix Xbox Controller Stick Drift! Xbox Series X/S Controller Analog Stick Drift Cleaning Fix!
 0:02:39
How to Fix PS4 Stick Drift | My Most Common Ways
 0:00:48
Why Do Joysticks Drift?
 0:00:58
The TRUTH Behind Joystick Drift
 0:08:52
How to Fix Analog Drift on XBOX One or Elite Controller Series 1 (moving on its own, stopping)
Комментарии