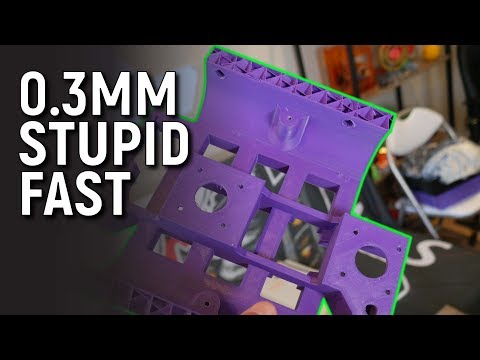
Simple Slicer Change Helped Prevent Warping

preview_player
Показать описание
Love the channel? Consider supporting me on Patreon:

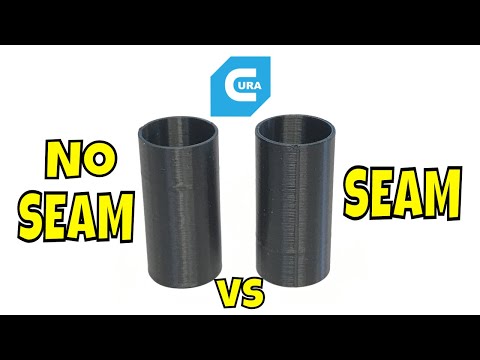
In todays video we take a look at the Z Seam. I have recently been printing quite a bit of ABS parts for the Voron Switchwire build and ran into some serious issues with some of the parts. After trying quite a few things I was able to narrow down one huge cause of the issue and the solution was quite simple.

(´∀`)♡ As an Amazon Associate I earn from qualifying purchases:

Lets Get Social!
Рекомендации по теме
Комментарии
Автор

Very interesting finding. The seam will create a stress point that can nucleate delamination from the bed.
My favorite technique to completely prevent warping when printing ABS/ASA is to print the first layer on a flat PEI sheet in PETG before switching to the ABS/ASA. The PETG adheres to the PEI and the ABS/ASA. It prevents warping every time. The only downside is if you abort the print early, it can take some scraping to get the layers off the bed (the final print has more stress, so comes off with a few flex plate bends). The skirt can take some scraping too.
It definitely will shorten the PEI surface life, but when using a thick-ish PEI sheet stuck to a flex plate the surface can be replaced when needed.

JonS
Автор

That is very interesting. Been having issues with warping. Never crossed my mind that the seem could be a problem. Going to try it! Thanks a ton!

LuxGamer
Автор

I love trying different slicer settings. I’ve had to reprint parts for both my 0.1 and 2.4 and some have been much more accurate tHan others. I’m going to try the seam location out the next time I’m printing ABS parts. Thanks, as always, for the clearly explained tips for 3D printing!

FilamentStories
Автор

Maybe using per model settings and having the seam in the rear for the first 4 or 5 layers and then switching to corner seams will be the best of both worlds, no warping and hidden seam after 4 or 5 layers, its probably happening because it is cooling faster where the slight break in the print at the corner is, maybe random for the first 4 or 5 layers might look better as you could knock the seam boogers off on those first layers

AndrewAHayes
Автор

Seems to have solved my problem printing long rectangle parts. Thanks for the tip! Now I'm subscribed.

sftzclem
Автор

you nailed it on the seams! 3d printed a PLA-CF faceplate i designed recently, and I put all the seems in the bottom right corner... guess which corner had an issue with warping, and ONLY that corner... the one with the seems. This finding of yours will let me fix that by simply moving the seams to a straight section. orca-slicer lets me draw where i want the seams to be placed.

digitaltoaster
Автор

I like the wider lens! It never occurred to me you can move the seam around; will definitely keep that in mind in the future

therick
Автор

Nice find! Thank you for the tip, will try for warp sensitive issues!

shenqiangshou
Автор

For others struggling with ABS or ASA, I found the same results a while back. I also only print parts out of ASA to assemble the only product my company sells, and they have a small radius on the bottom that is a cosmetic feature, so they have to stay. I haven't tried any other glues or bed adhesion products so i can't comment on them, but using magigoo has allowed me to print over the entire bed of my ender 5 plus's (with enclosures, kept at 108F) with no more warping. It's been running like this for a couple months now and a few thousand parts. For ASA I run 100C bed, 260 nozzle with standard Prusaslicer .010mm presets except for the seam location.

garlicbutter
Автор

I have a pretty basic printer, 100x100x100 build volume, single z axis, no heated bed... At first when I got 2kgs of petg (it was really cheap for some reason), it went fine. Then, some models started quickly curling up and I couldn't understand how could I solve it. Right now I'm doing a print that I'm trying some things with, like using glue and reducing the active cooling a bit. I hope the model would turn out good, as the one before it (just glue) had warped a bit on the bottom (but only after I removed it from the bed), which is where two halves would connect. Thanks for telling about that possible tweak! I'll try it next time if the problem stays.

JTCF
Автор

Good catch ! There are so many settings in Prusa slicer that I am overwhelmed by the complexity.

cybair
Автор

Very timely video! I'm getting ready to print parts for my new Rat Rig and want to use ABS, but have always had trouble with it in the past. I'll give this and the draft shield a try. I'm using S3D for my slicer and the options are random and a specific point.

woodwaker
Автор

I literally just started having this issue with pla+ I noticed it wash ending on the corner and I thought that was it but I’m new so didn’t know what to change. This might save my frustrations! Can’t wait to try out!

TheAngusmaximus
Автор

Someone recommended this for my petg issues. Make sense and hope it helps.

JeffLewistennis
Автор

I had the same problem with PETG, just changed the seam to Random, seems I never had any problems anymore.

fdt
Автор

it makes sense to a noob like me..
the tight bends in the corners is where i get my lifting on large objects.

👌🏼

DursunX
Автор

Oh this is good to know.

I also love how you can just paint the seam on in Prusaslicer.

Also i want to yeet ABS filament off the edge of the planet. I have gone to HIPS and i'm not looking back. In my mind there's purely no reason to print ABS.

SianaGearz
Автор

Thanks for the video. Currently building my switchwire and while have parts printed in PETG I decided to do it right and print them in ABS and have been having the same issue. Its not a huge warp but enough that I notice it. Been trying to figure out why and maybe this will fix my issue.

tactikool
Автор

I have actually had this issue on particular pla parts. I too noticed the corners where the Z seam was would curl up especially if it was an overhang.

Kyrazlan
Автор

I would think this seam issues would have to be tied to the nozzle spending more time starting and stopping in that location. Wonder if changing your acceleration would also have an impact. Makes me think that is why it shows up more on the smaller parts too (you'd be in the acceleration zone more comparatively on them).

seanday
join shbcf.ru