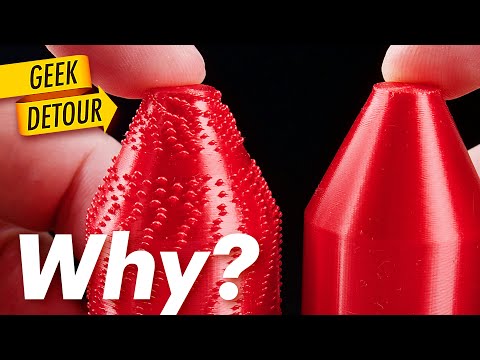
5 Slicer defaults I ALWAYS change #3DP101

preview_player
Показать описание
Slicer defaults are handy, but are they the BEST settings for your 3D Printer? These are the top 5 settings I change first when using default profiles. Don't miss number 4!

TIMESTAMPS:
0:00 Intro
1:10 Downloading Slicer Profiles
3:08 Perimeters
4:52 Infill
6:58 Elephant Foot Compensation
8:44 Seam Placement
11:36 Ensure Vertical Shell Thickness
14:58 What settings do you change?

Рекомендации по теме
Комментарии
Автор

I got a job at a facility where we prototype and manufacture medical products using FDM and SLA 3d printers. I can honestly say I wouldn't know the slightest bit of what I'm doing at my job if it wasn't for your channel. my very first day on the job, I was tasked with repairing 5 broken ender 3's. I repaired 2 the first day. I literally play with 3d printers for a living now and am in love with my work.

TheLazzarus
Автор

In Cura:
The Cubic support can be done in a similar way with essentially any infill using the infill subdivision feature. A separate setting also works on supports that get denser at the top (not roof, the support structure itself).
Starting with a version several months back (I think 4.11), seam placement is (finally!) also nicely visible.
Seams: nothing like the aligned that I know of, but sharpest corner+smart hiding works quite well most of the time. In some cases, I set my own seam coordinates. Still, seam painting in PS is clearly superior.

Settings I changed in Cura:
(Ender 3, but most apply anywhere)
Infill - grid is fine for visual parts, cubic or gyroid anywhere else.
Connect infill lines (for prints that I want strong), sometimes I drop in infill line multiplier too (IMO works better than high infills >30%).
Initial layer line width to 150% for materials where adgesion is notoriously poor.
Combing - on, but with max comb range 10mm and "not in skin" setting.
Regular fan speed from 3. layer (2. is then 50% of set fan speed), minimum layer time 6s.
Low jerk on first layer (10, with some materials even 5). Helps prevent ripping of at sharp corners etc. Acceleration tuned down a bit too.
Increased travel to 200mm/s, including on first layer.
Support density 15% (but depends on project), support roof 100% density concentric, 1mm thick. Z gap 1-2 layers depending on model needs (1 is fine under flat surfaces but can be hard to remove on complex shapes).
Support brim on.
Support overhang angle 50-60° (but can go to 70° in some cases).
Support skin fan speed 100% (cools stuff above support so it can be easier removed, useful when your base speed is not 100%, like PETG etc).
Often Conical supports or even tree supports can work wonders, reaching over structures to support stuff above, without building supports on top of parts of the model.
Unless brim needed, skirt with just 2 lines.

Huh, that was quite a lot :-D

Tomaskom
Автор

Really helpful video!
Quick suggestion: it would have been very interesting for you to show the cube printed once with the default settings, and once with the improved settings at the end.

mlonenmuffin
Автор

"Ensure vertical shell thickness" is now called "Extra perimeters on overhangs" and is off by default as well as being marked as Experimental.

bertram-raven
Автор

Another one to save your bacon in case you use variable layer height is minimum shell thickness. If you reduce the layer height of the top of a dome for example, you might only have 3 top layers at 0.1mm which is very thin, but the rest of the print is at 0.2mm so 3 layers is plenty. setting minimum shell thickness to 0.5mm will ensure that if you reduce the layer height anywhere you don't accidentally create holes. Otherwise it changes absolutely nothing, so no hurt in enabling it just in case.

DarkArtGuitars
Автор

Miss these tips and tricks videos, Thank You, always learning new helpful concepts and approaches here!

rotarypower
Автор

Instead of a third perimeter I like to use Cura's "Connect Infill Lines" feature (probably available in other slicers). This greatly strengthens infill by linking sections together where they connect to walls, reduces the number of retractions you need to make, and provides a modest improvement to wall strength without printing a full third perimeter. For a similar reason I also use the zig-zag top/bottom pattern instead of lines; I don't have the equipment to measure improved mechanical strength, but logically it should be more robust to have a single undivided line of extrusion rather than many separate ones.

Another option is Cura's "Alternate Extra Wall" feature, which adds an extra wall every second layer. I don't imagine this is very useful on its own, but combined with "Connect Infill Lines" it uniquely sandwiches infill and perimeters together, noticeably improving strength. On some occasions I've used these two features together and only used a single regular external perimeter. For my parts at least, this is obviously stronger in the hand than just having regular unconnected infill with 2 perimeters, while printing much faster and using less filament. Cosmetically it won't be as attractive though since the infill will show through.

To both make my seams less noticeable and improve print speed, I print external walls narrower (and a bit more slowly), say 0.44mm for a 0.4mm nozzle, and internal ones wider depending on desired strength. 0.8mm or even 1mm is fine for a 0.4mm nozzle. This technique doesn't harm external appearance in any way I've been able to notice. Printing wider than your nozzle opening (but no wider than the nozzle tip) is a good way to improve layer adhesion and strength, as it sandwiches the plastic together across a wider surface and forms a *much* stronger bond to the previous layer.

Wider infill can also a good idea for reducing print time without sacrificing strength but it's not always practical, it depends on the structure of the part you're printing. Sometimes you want lots of small supports in thin spots, while other times you have a big space to fill and printing wide infill has no downside. If you use a low infill percentage this may not be beneficial as it greatly increases the gap between infill lines.

Before using wider extrusion you should check to see how fast your hotend is capable of melting filament or else you could have hidden underextrusion in your internal walls.

Also when using wider top/bottom lines, I recommend specifying a custom top skin line width and selecting 2 "top surface skin layers". In Cura this is an experimental feature and I use 0.4mm. It greatly improves surface finish, ensuring the top of prints are as flat as possible with virtually no blobbing.

I don't use it very often since it leads to an inconsistent and unattractive surface finish with glossy filament, but if that doesn't matter I like to use Adaptive Layers. I normally use 0.24mm base height with 0.08mm variation in both directions, so when I'm printing an angle or a curve it's smoother (0.16 layer height), but if I'm printing a flat section it's much faster (0.32 layer height).

AFistfulOfK
Автор

My 3D printer came as a gift, rather than a planned purchase. My primary use is to print miniatures for tabletop RPGs. Currently, I'm focused on improving the quality of my prints, after which I hope to learn how to speed up printing. Any videos you have already done and would like to direct me to, or any new videos in this vein would be appreciated. You're one of the better Youtubers for 3D printing - thank-you for your work.

DalePoole
Автор

The "ensure vertical thickness" algorithm has changed recently in PrusaSlicer (I think in either 2.6.0 or 2.6.1). Instead of all of the short moves perpendicular to the perimeters, they are now generated parallel to the perimeters. Much less print-induced vibrations.

Sembazuru
Автор

notes for myself 😊
number of walls :4
cubic infil 20%
elephant's foor compensation 0.2
alligned seams
ensure vertical thickness : disable it

dScience
Автор

This is why I love that my printer has community driven profiles for it in prusaslicer which always gives me optimal prints

rgbok
Автор

The seam in cura recently is really cool. Its called smart hiding and it aligned for the sphere like in your example but instead of protruding outward in goes in like a nice zipper and I find it a step better and smoother. Thanks again for your tips.

tjschramm
Автор

The seam thing can also be caused by a printer saving the progress so that if the power goes out it’ll automatically start from where it left off.

nexus_keeper
Автор

Vertical shell thickness!
I’ve been wanting those purple lines to go away.
Thanks again Angus.

codymusgrave
Автор

Im REALLY surprised. I finally bought feeler gauges (after blindly using whatever is preset from facrory in sparkplug world <3) and you know what? your guide on bed 'leveling' is true miracle. Spot-on, perfect, flawless first layer. No more Z Axis inconsistency, my Ender is now within 0.04 mm in every dimension. Thanks dude!!

MrCyssiek
Автор

Personally I have found that each different print may require some tweaking of the settings, one setting never does it all.
I do agree the "3 wall parameter" setting is a great over all setting, that I don't mess with much.
And on a side note, I'm really impressed how many options and how great that Prusa slicer works. I've been a hardcore Simplify 3d user, but slowly starting to switch over now

MrSweetHart
Автор

Great advice! Thank you!

FYI: SuperSlicer 2.3 equivalent settings are:

Infill
Infill -> Support Cubic -> Connected
Perimeters & Shells
-> Advanced -> Seam -> Seam Position -> Aligned [Default is "Cost Based". Have you tried it?]
-> Quality -> Avoid Crossing Perimeters -> Uncheck

Cannot find any setting for "Elephant Foot" in SS.

Your experience on "Speed" and "width & Flow" settings will be a great future subject; maybe?

Cheers!

NikosSprocket
Автор

Angus, as ever your videos are fun and informative - I use Cura, but I completely agree with your observations about seam positioning, I do a lot of repeat printing of the same parts, as I make 3D prints commercially, putting the seam in the same place every time removes those seemingly random blobs from surfaces that should be smooth, walls too - many of my parts are handled by customers, one part in particular was breaking until I increased the wall count to five and the top and bottom thickness to 1.6mm - its a handle for a lever arm, and people turn it, so we had a few breakages in the early days, not any more. No amount of infill solved the problem, I hardly ever use infill at greater than 30% - and gyroid is my go-to. As for elephants foot, everything I print has a 45 degree or steeper chamfer at the bottom, and if its a cuboid, every edge has a chamfer, same with cylinders and holes. The finished parts look way better and take a lot less finishing. As I use OpenSCAD its just been a question of building / finding the right code to do the heavy lifting..
Great job.

rogerwhiteley
Автор

I like me some Cubic, but man, Gyroid is SO NICE.

DPrintingNerd
Автор

Aligned seams also makes sense since we are used to seeing seams on the injection molded items

devrim-oguz