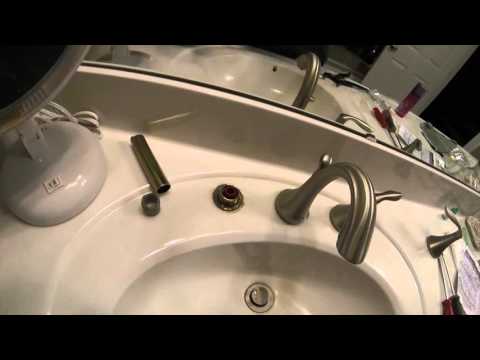
Replacing Moen 1224 catridge in my Moen bathroom faucet

preview_player
Показать описание
Turn of hot and cold water to faucet

Getting the replacment cartridge seated took me 3 or 4 tries. Once cartridge is seated, the red or blue extension should stop turning after quarter turn in either direction.

MOEN 1224 Replacement Faucet Cartridge
Moen 14272 Cartridge Retainer Removal Tool

#leakyfaucet #drippingbathroomfaucet #replaceingmoencartridge
Рекомендации по теме
Комментарии
Автор

Played this video in a loop until I got the job done. One of the best videos. Thank you!!

jojof
Автор

One of the best diy videos I have watched!

pozhang
Автор

This is an EXCELLENT How-To video. This is the ONLY video you will need to replace the Moen Faucet Cartridge. Put downward pressure on the Moen Tool when beginning to loosen the retaining ring so you do not strip the notches. As MON points our fitting the cartridge tab (notch) into the brass tube is a bit tricky. Thank you !!!

JHain-bhro
Автор

Thank you for this excellent video! So often YouTube videos don't show the sticking points in a job and don't offer the tricks to overcome them. You shoe them all. Seeing someone make a mistake or have difficulty with something and solve them is golden. The only other problem I had, and you didn't, was getting the faucet handle trim to unscrew because of some lime deposits. I had to loosen the faucet nut below the countertop a little bit to release the trim and retighten the nut in order to avoid damaging the trim. Great video!

bdp
Автор

Great video. You explained it better than anyone

amylembke-windler
Автор

Thank you very much for taking the time to make this excellent video. The hardest part for me was lining up the notch on the new cartridge with the brass fitting on the sink.

It only took you 2 times, me about 10. But once locked in it was smooth sailing after. Thank you again!

anthonyb
Автор

Great video. For anyone out there needed to replace one, I recommend replacing both while you're at it. If you don't, you'll end up doing it sooner or later anyway and you'll have to relearn the procedure all over again.

eyeofhorus
Автор

Thank you so much for this fantastic demo & tips. I finally was able to get my cartridges seated after hours and hours of failed attempts. I have watched countless videos and read all Moen instructions only to repeatedly fail to find the cartridge spinning & spinning without fully understanding why. Yours is the only method that inserts & assembles the cartridge & stem extension in this particular sequence. This sequence makes so much more sense than any other demo. It allows stronger manual control upon inserting the cartridge plus you are able to tell exactly the on and off positions of the cartridge . I do not have the special tool to tighten the plastic nut but had no problem with alternate tools. I had to knock the first cartridge out from the bottom but using your method with the screw, board & small pry bar got the second one out with ease. Eureka!!! I read about this method but couldn''t visualize it until you showed us how to do it! I used some plumbing grease on the second cartridge's O rings which also made it easier to position. I loosened the plastic nut by inserting the tips of long needle nose pliers from above into the grooves of the plastic nut and turned cc to get it loosened then a wooden skewer for the rest of the rotations. God Bless. you for taking the time to post a thorough tutorial.

rpingleton
Автор

This video was very useful particularly the part about lining up the tab on the cartridge with the notch in the body.

mikehealey
Автор

Best video I have seen so far for this procedure.

scottschuett
Автор

Thank you for the tip on pulling out the old cartridge, I was stuck at that point...

RHanneman
Автор

Awesome tip to use the wood for leverage. That is exactly where I was stuck. I used a threaded screw hook.

johnconboy
Автор

Thank you for this video. I didn’t know of the notch and was having issues until I watched this video.

rickrago
Автор

Thanks. This is so much better than the Moen video especially putting the new cartridge in properly.

johnmccormick
Автор

The screw/crowbar/2x4 trick was a lifesaver!!! I used the nail-remover end of a hammer since I don't have a crowbar, and it worked great.

JanieJane
Автор

Loved the long screw and pry bar trick. Some of these can be stubborn to pull!!!

markturvey
Автор

Thank you. The pry bar trick worked like a charm.

GlennOgden-um
Автор

Thank you!! This was tricky, but I followed your directions, including the crow bar idea to the T. Perfectly done, sir!

shabbs
Автор

Thanks for posting. I could not have done it otherwise. As some others have commented, the most challenging part was lining up the tabs with the brass notch. It required patience, something that dissipates quickly during my plumbing projects.
Regarding the tool for removing the plastic part that holds the cartridge in place, I called Moen and they sent me the tool (part # 14272 and two replacement cartridges free of charge under their lifetime warranty.

mrjimmyb
Автор

This is one of the best how to videos ever! Thank you so much for making it! You saved me at least two hours. 🙂

reformedchurchtintonfallsn
visit shbcf.ru