filmov
tv
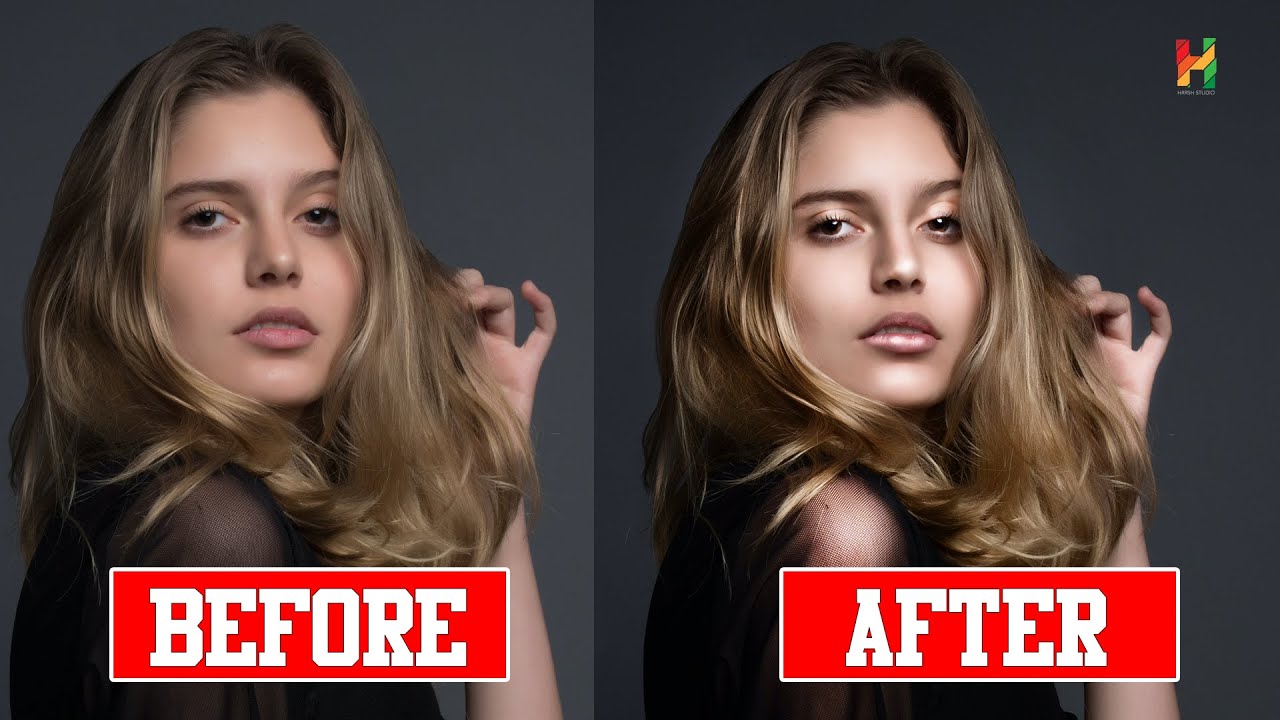
Simple Dodge & Burn Technique in Photoshop - frequency separation - Photoshop tutorial

Показать описание
First what is dodging and burning, Dodging and Burning is an extremely powerful technique that can sculpt, contour, and enhance the details of your subject.
This is a very popular process that give prominence to the existing highlights and shadows in subject’s face, and gives the face lots of depth and dimension for a really pleasing look.
I take the extra time to do this to nearly every image I retouch, so for me, it’s almost like a “finishing step” that gives the image that extra depth.
This method requires a great deal of skill to improve a photo but i made it lot more simple and easier.
Ok let's get started.
First duplicate background image.
Rename the layer to "DODGE"
Change the layer blending to screen. This step lightens the overall image.
Now double click on the layer to open blending options.
Go to blend if section. The important slider here is Underlying Layer.
we need to minimize the lighten affect from the shadows.
and keep the affect on forehead, nose, cheek bone, chin etc.
So drag the black triangles to the right until you will see that the particular lighten areas are influenced.
see now we selected the specified highlight areas.
Now Hold Option or Alt Key clicking on the triangles splits them so you can feather the blending effect.
Keep an eye on the image and slowly drag the black handles to add depth to the highlights.
click ok to apply the changes.
Duplicate background layer again. Rename layer to BURN and move the layer to top.
Change the layer blending to MULTIPLY. This step darkens the overall image.
Now double click on the BURN layer to open blending options.
This time we need to minimize the darken affect from the highlights.
So drag the white triangles to the left until you will see that the particular influenced areas to appear.
Once we selected the specified shadow areas.
Again Hold Option or Alt Key clicking on the triangles splits them so you can feather the blending effect.
Keep an eye on the image and slowly drag the white handles to add depth to the shadows.
click ok to apply the changes.
That's it. We're done.
————————————
*Photoshopping YOUR Things*
————————————
MY GEAR↓↓↓
————————————
————————————
DREAM GEAR / GEAR I AM LOOKING AT GETTING ↓↓↓
————————————
Let me know in the comments what your dream gear is.
————————————
MY EDITING SOFTWARE↓↓↓
————————————
What i use for Video: Premier pro & after effects
what i use for Photos: Photoshop & Lightroom
What i use for Architecture: Archicad, Revit & Sketchup
What i use for Stop Motion: DragonFrame 4
————————————
Things That happen in this film:↓↓↓
————————————
In this tutorial, we're going to learn how to create a watercolor painting in Adobe Photoshop. Other things that happen in this tutorial watercolor, watercolour, how to paint, Photoshop, manipulation, tutorials, watercolor photoshop action, watercolor photoshop action free, watercolor photoshop brush, watercolor photoshop cc, watercolor photoshop effect, watercolor photoshop tutorial, how to watercolor portrait, portrait watercolor, portrait watercolor painting tutorial, watercolor portrait, watercolor Painting Effect, Photoshop Tutorial, darren barnard, watercolor tutorial, Serge Ramelli Photography, iLLPHOCORPHICS
 0:07:40
 0:03:51
 0:00:56
 0:09:03
 0:00:58
 0:01:00
 0:02:40
 0:00:50
 0:18:02
 0:03:45
 0:04:33
 0:05:06
 0:04:16
 0:00:59
 0:01:27
 0:14:26
 0:03:51
 0:02:42
 0:00:59
 0:05:21
 0:00:47
 0:02:43
 0:06:00
 0:08:27