filmov
tv
Esp8266 WiFi Module setup using Arduino Uno || ESP8266 Blynk || IoT Project || uElectroPro

Показать описание
Hi! In this video I will show you how to getting started with esp8266-01 WiFi module and make a simple LED light controlling project using Arduino, ESP8266 and Blynk App
00:37 Circuit Diagram
00:42 Remove Atmega328P
Remove Atmega328P Because we directly want to communicate with esp8266 through serial monitor(as USB to serial convertor), not from the atmega328p
00:55 Make connections (for esp8266 communication)
01:18 Check Arduino Board and port
01:30 Open Serial monitor (set baud rate and Both NL & CR)
By reconnecting the GND wire of Esp8266, it will print the "ready" on Serial monitor that means now it is ready for AT commands. First I write some AT commands to test esp8266 and then changed the baud rate of the ESP8266.
02:04 Change Baud rate of esp8266, write AT+UART_DEF=9600,8,1,0,0
03:07 Download the Blynk App and Libraries
06:21 Make connections for final setup
07:26 Setup the Blynk App
09:19 Source code
10:50 Make some changes in code and upload
13:15 Done!
Note: If you are getting esp not responding then first check the TX and RX connections and make sure wires are not loose and broken. Second check the baud rate.
Schematic for communicating with esp or changing the baud rate:
Schematic for final setup:
I hope you Like this video. If so
don't forget to Subscribe and if you have any question related to this topic then feel free to comment
uelectropro
-------------------------------------------------------------------------------------------------------------
esp8266 tutorial,
esp8266 arduino,
esp8266 projects,
esp8266 wifi module arduino,
esp8266 code,
5$ arduino wifi module,
esp8266 01
 0:09:06
How To Setup And Connect The NodeMCU ESP8266 12-E Development Board To Your Computer and Wifi
 0:05:41
5$ Arduino WiFi Module!? ESP8266 mini Tutorial/Review
 0:08:10
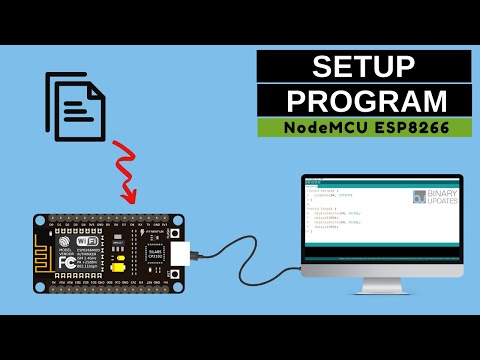
How to Setup and Program NodeMCU ESP8266–Complete Guide
 0:04:35
How to use Esp8266 with Arduino Uno
 0:13:59
Esp8266 WiFi Module setup using Arduino Uno || ESP8266 Blynk || IoT Project || uElectroPro
 0:06:04
How to Program ESP01 WiFi Module | Arduino IDE | DIY
 0:01:24
Install the ESP8266 Board in Arduino IDE in less than 1 minute (Windows, Mac OS X, and Linux)
 0:05:14
Connecting Arduino Uno and ESP8266 WiFi Module
 1:08:53
Smart Farming: Real-Time IoT Implementation in Agriculture Systems | 5-Day FDP 🚜🌱
 0:05:50
ESP8266 in 5 minutes
 0:09:24
How to setup & test ESP8266 with an Arduino UNO
 0:02:43
HOW TO CONNECT ESP8266 TO WIFI NETWORK | Ut Go
 0:03:15
NodeMCU ESP8266 Wifi connect tutorial
 0:09:47
Arduino UNO & ESP8266 and control using smartphone
 0:09:20
ESP8266 Basic AT Commands using Arduino | Name Password Change of ESP8266 using AT Command
 0:06:58
How to Program #Esp8266 using Arduino uno.
![[how-to install] ESP8266](https://i.ytimg.com/vi/pC9CqDVP2Rs/hqdefault.jpg) 0:00:47
0:00:47
[how-to install] ESP8266 WiFi Connector library for an Arduino IDE
 0:12:15
How to program ESP8266 wifi module using Arduino UNO in easy steps || ESP8266 module || ESP-01
 0:44:25
Arduino Mega 2560 with ESP8266 (ESP-01) Wifi, AT Commands and Blynk
 0:08:21
Wifi Smart Home Automation system with Manual Switches using NodeMCU ESP8266 & Blynk | IoT Proje...
 0:09:49
Programming ESP-12E / ESP-12F / NodeMCU Over Wi-Fi
 0:09:46
How to program ESP8266 ESP-01 with Arduino UNO and FTDI232
 0:13:51
ESP8266 + Arduino + database - Control Anything from Anywhere
 0:07:08
How to setup Blynk 2.0 app step by step | Nodemcu ESP8266 with Blynk App
Комментарии