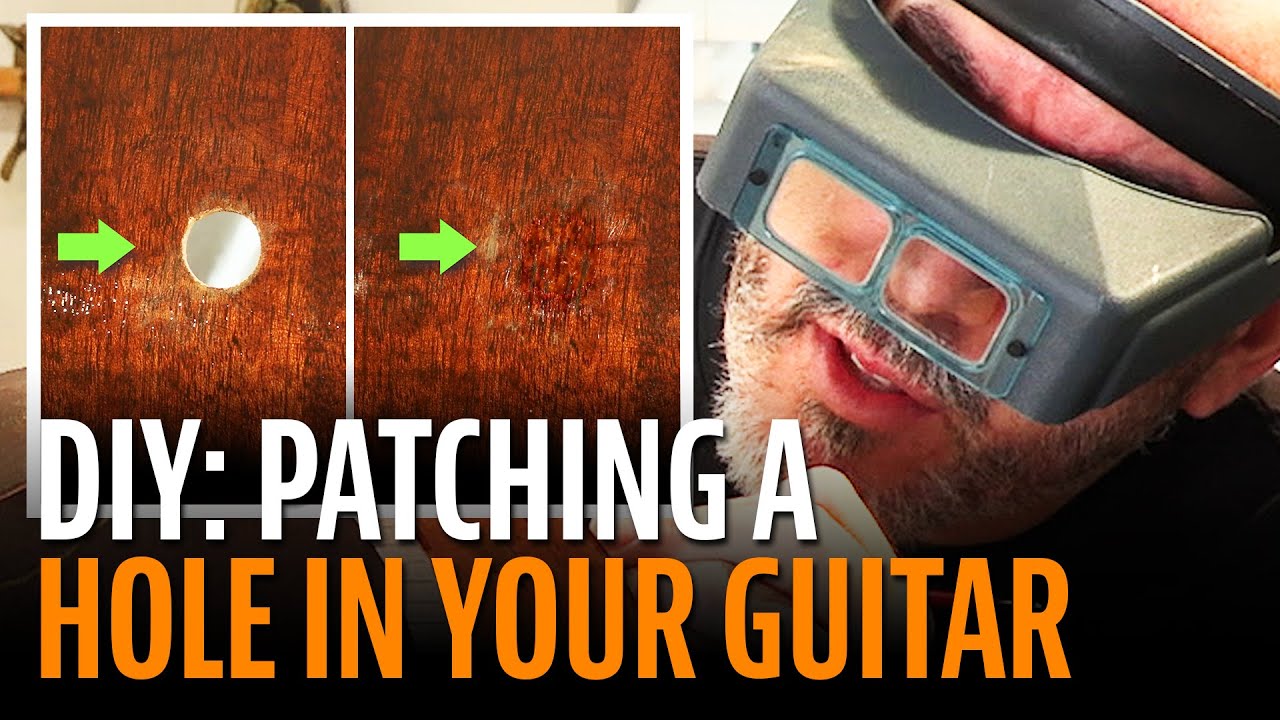
How to Patch a Hole in Your Acoustic Guitar

preview_player
Показать описание
Special guest Ian Davlin from Lark Street Music in Teaneck NJ shows us how to patch a hole in an acoustic guitar body. Ian uses an epoxy putty that he mixes with ColorTone pigments and dyes, then paints on top of it to make a beautiful disguise. Ian shares some great pro tips for sanding as well.

ColorTone Liquid Stains

ColorTone Liquid Pigment for Waterbase Lacquer

3M Stikit Gold Abrasives

Zinsser Clear Aerosol Shellac

Guitar Finishing Step-By-Step Book

Mixing Cups, Set of 10
- - - - - - - - - - - -
StewMac has everything you need to set up, repair or build guitars.
Everything is 100% guaranteed. Fast worldwide shipping.

Instagram: @StewMac_Guitar
Рекомендации по теме
Комментарии
Автор

Not only is this an incredible patch job, this video exemplifies just how awesome a master luthier Dan is for being excited about and willing to learn a new technique from someone else. A true master never stops being a willing student. :) You da man Dan!

DonCrowder
Автор

I really like the clear plexi sanding block. One trick I've learned with epoxy puddy is that it's easy to carve with a razorblade before it fully sets so you could actually take a sharp blade and cut off most of it. With a flush surface like this it should make for an even easier fix.

knedy
Автор

I could watch these vids all day long. They make fixes that seem difficult look attainable to the common DYI guy. Keep them coming!

kcave
Автор

I followed this to the letter and filled a large round unsightly hole on the front of my acoustic guitar. It now looks great, but the strings don’t make any sound anymore....

peterlawson
Автор

That was artwork man! Thanks for sharing your awesome videos, especially these quick tips and tricks! Best regards and love from Athens Greece!

ScrapwoodCity
Автор

Anybody that has tried matching such a patch with the surrounding medium knows how much talent is required to achieve a good result. The artwork here is superb.

TheBinaryWolf
Автор

Oh, Dan and his ancient epoxy putty... ;)

SentientSeven
Автор

Clear sanding block is clever!

Milliput is a good brand of epoxy putty, the white stuff takes the dye well but it comes in a teracotta colour too that might be a good starting point.

lemagreengreen
Автор

great tips as usual. Always know it will be good if dan appears in the video. Even when someone else is the work ! This particular gentleman did a good job of demonstrating a relatively simple way to patch a hole and still make it look good.

gregmartin
Автор

-"Shellac out of the can".
*Dan sighs slightly in the back* -"Kids these days ..."

Nevertheless, great vid as always.

ignaciorossi
Автор

Love your videos, too few, must have more, I’ve got a fever and the only prescription is more StewMac videos!!

fjb
Автор

Clear acrylic for sanding ~ what a GREAT idea. Thank you. (And New Jersey - YAY!)

runningwithscissors
Автор

Woooo! Dan Stewmac videos! I love how thoroughly he explains everything he does and shares his wisdom through his craft

xicx
Автор

I used a product called Aves Apoxie Sculpt around 15 years ago to fix several large holes from a steel toe cowboy boot that had penetrated a lovely 70s Guild F512 jumbo 12 string with sunburst finish. (Don't ask, just think "Cowboy Bar".) The Apoxie worked really well, and I got an oil-painter artist friend of mine to copy the sunburst pattern so well that from a foot away you couldn't even tell there was a 3" hole in the top. The side holes were pretty much invisible. I've also used the Apoxie Sculpt to replace areas on the top of a couple 60s B-25 Gibsons where aggressive strumming had completely worn away some spruce right up to the rosette area by the soundhole. Was easily able to patch a missing 1 1/2" piece of spruce and have it look very good, with no noticeable effect of the tone at all. Once you work with the stuff, you get a feel for what you can get away with in the blending and shaping; even mimicking the surface grain texture of the worn out spruce right next to the missing bits. It might be sacrilege to do this to a valuable vintage collectible, but for a player's workhorse guitar it functions great and costs a fraction of trying to do it properly with wood patches. I've also used it to fill old obsolete routs on electric guitars where I needed to fill old areas of routs so they won't interfere with the new pickup configuration I'm putting in. It tools real good, takes paint and finishes, and can even be machined for screw threads, etc. It will work for cracked and fragmented pickguards or knobs, and replacing clay dots too. And it's non toxic. ;)

PaisleyPatchouli
Автор

This was really good information, and a great demonstration. I wish I could have attended the workshop. It reminded me of something similar on Gilboys channel. They do furniture restoration. They also have some great information on french polishing and patching. Thanks for the great upload.

louisgarbi
Автор

You guys are good at this! Thank you for sharing this technique 😲🙂

anastasiocatalan
Автор

That is absolutely fantastic. I wish I could have made the trip. Love the plexiglass sanding trick, using that soon!

bbmade
Автор

Amazing video as always.
That plexiglass sanding block is awesome, thanks! .

chipolmstead
Автор

Wow! I have a ding I want to repair on a Fender Stratocaster, and seeing this gives me the confidence to try the spot repair myself.

bobdixon
Автор

That plexiglass-trick is amazing! So simple and effective! Thx a lot!

frama