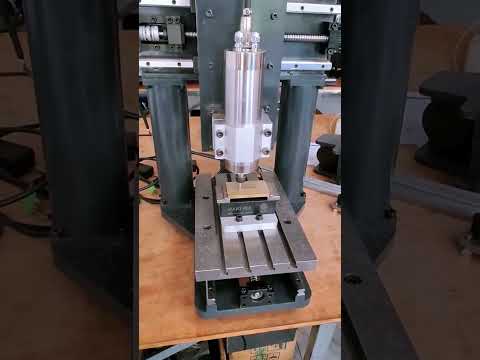
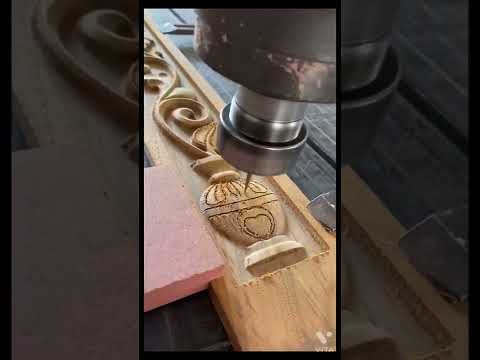
This DIY CNC can cut wood and aluminum and it cost less than you might think

preview_player
Показать описание
Is it possible to get into CNC woodworking without spending over $5,000? The answer is absolutely YES! Below are a couple of links to some options that I've used. Today's video focuses on the PrintNC. It has a working area of 23" x 33" and costs around $1,000. It still uses 3d printed parts, but not at critical junctions like the MPCNC. You can also upgrade the printed parts with aluminum to produce even more rigidity.

I hope you enjoy this video. Please let me know if there is a project you'd like to see me make and I will do my best to do it. Thank you for all the support you have shown me and the channel!

If you're interested in purchasing products I've made, check out my website:

Jude 1:20 (NIV)
But you, dear friends, by building yourselves up in your most holy faith and praying in the Holy Spirit

Ack's Abrasive & Polishing Paste
Use WOLF15 at checkout to get 15% off your order

Starbond
Use WOLF15 at checkout to get 15% off your order

Taytools

MATERIALS/EQUIPMENT/SOFTWARE (affiliate):

Tools I use (affiliate):

Please leave a comment if there are any questions you have.

FOLLOW ME HERE

Ed Parker
P.O Box 1893
Queen Creek, AZ 85142

Disclosure: Some of the links above are affiliate links. This means that, at zero cost to you, I will earn an affiliate commission if you click through the link and finalize a purchase.

#cnc #cncprojects #diycnc
Рекомендации по теме
Комментарии
Автор

Nice job. I have a PrintNC, very similar dimensions to yours. Just to note, to soundproof you need to add mass. Those foam tiles are to diffuse reverberation e.g, in a studio, to reduce echo. They are to improve a recording environment by treating flat surfaces. To soundproof, you need to add some high density material. A good option for high mass in a small package is plaster board. You can actually buy gypsum boards that are designed to add sound proofing. That's what I used to line the inside of my PNC enclosure.

AG-cglk
Автор

I just found your channel today while looking for DIY CNC designs. I'd be very interested seeing a video walk through of all the main components, how the frame was built, what you decided upon for linear motion, etc. I've been wanting to build a CNC router for a very long time. Your video is inspiring me to build one this winter. Great job!

michaelh.
Автор

Fantastic! I love the time you spent explaining everything.

xoversprayurfacex
Автор

Brother I liked and subscribed just in hopes in gives you a tad bit more revenue. Thanks for the helpful info and walking us through your own build. Was awesome and gave me some insight to do my own.

glenns
Автор

Great stuff mate, i am looking at getting in to this very shortly

glenncol
Автор

Sir. You did A lot with a little. Love this particular design. Great job explaining and demonstrating. I’m strongly considering this design. A lot of these benchtop cnc machine are expensive for a semi built kit. If you’re handy you can save more than half with better results.

JD_Manufacturing
Автор

love the i like your choice of the AIO i considered this and had one then sold it LOL now i have touch laptop i snapped in half no keyboard on arm, if i could get a newer AIO i would do that hands down !!!!

GigaVids
Автор

As someone who had to buy a cnc router as I lack the equipment or skills to really be able to make one, this is all real awesome to me. That being said, my only input would be that you may want to rethink the foam for noise mitigation. That kind of foam isn’t designed for absorbing and mitigating sound energy, it’s designed to help prevent reverb, in the same way that the panels on the f-117 are designed. Not by absorbing it and trapping it, but deflecting it away from the source. The pyramids basically just make sure that whatever sound wave that hits it, gets reflected into a direction away from where it originated, but the sound is still there. It’s great when you’re trying to record really clean audio, but if you’re trying to sound dampen the enclosure around the CNC, then it’s going to be less effective than if you had just had a solid piece of foam, the same thickness as the heights of the pyramid and stuck that on.

The thing you need to do to quiet it down, is dampen/deaden the vibrations that the machine, the bit, the workpiece, and the frame all have travelling through them. An easy way to do that, is to increase the mass of the whole cabinet thing the CNC is in, (this is why industrial CNC’s have multi tonne cast iron bases), an easy way for me to do this would be to get some sand, make a box that the CNC can be mounted to, put the box in the cabinet, fill the box with sand, mount the CNC to the box, and the box to the cabinet. Since you seem to be American, I’d suggest it would be more beneficial for you to use lead shot, as it’s got far greater density and more favourable mechanical properties for vibration dampening than plain old sand. Bolt it down to something a lot heavier and more stable than it, (which is why Industrial CNC machines can pretty easily have multiple feet of reinforced concrete poured specifically for them, and then bolted to it), and increasing the area where the machine interfaces with the table/cabinet thing, and where the whole table/cabinet thing interfaces with the floor that it’s on. That way there’s essentially more “stuff” pressed against any surface that is trying to vibrate. Also, either, putting the machine on top of something that would isolate it from the frame of the cabinet (a high density, thick rubber sheet for example) would prevent any vibrations from the CNC resonating in the frame and making more noise, or, you could buy an off the shelf epoxy granite/experiment and try to make your own epoxy granite, and use it like a cement to bind your machine together with your cabinet. Which one is right for you, depends on how overly rigidly you’ve built the cabinet.

I know this is a stupid long, kinda rambling comment that’s a bit late, but I hope I’ve been able to help or provide some ideas on how to improve that pretty awesome little situation you’ve got :)

dylanshandley
Автор

Hello, do you have a link for your electronics cabinet ? Thanks

BRJR
Автор

A DIY CNC is NEVER complete... and I'm totally ok with that

henrymach
Автор

Hi mate just wondering what controller board and aio your upgraded options are? Also if you have them up and running now?

Itsfranklyfrank
Автор

great video. Id love to build oneslightly larger 4x8 myself. Ill be mostly using it for planing table tops. Any idea where to find drawings and list of products needed?

OOAK-Ireland
Автор

Good stuff. I love that you're using LinuxCNC instead of Mach3/4 (its free & way better if anyone else is considering a DIY CNC project).

I built a pretty serious fully custom DIY CNC mill a couple of years back (~2 tonnes of machine) running LinuxCNC, and based on the motors I can see in the vid it looks to me like you get get those feeds way up with some tuning of your driver timings. Not sure what serial board you're using but that ethernet board looks like a Mesa one very similar to the one I used on my project, we could easily push over 10m/min with proper configuration.

Since it looks like you're using open loop stepper motors rather than servos you will need to watch out for drift if you push it too hard, my machine started with steppers and we ended up swapping them out with stepper-servos, which replaced the drift issue with E-Stops when they couldn't keep up, which helped a lot with tuining it to the absolute limit of it's ability but is definatly not needed for a smaller build like this. Your machine looks plenty rigid enough to cut wood at least 20x faster, so those nice cutting shots could be real time!

I should note that all the timings do also get limited by the CPU on the host computer as well, so it's basically a must that you have an RT kernel, and worth adding CPU pinning just for linuxcnc if you've got the cores to spare, I ended up buying a cheap new ryzen for my machine that was previously using a 1st gen intel NUC, and that made a pretty big difference in my headroom to push more steps/second.

thomasmiles
Автор

Great video Ed! I’m getting ready to order a printnc. I had a question I about “work area” I’m guessing that’s the actual cutting area. I need to be able to fully cut in both directions 48”. I’m assuming I need to order a 48”x48” work area? Also approx how much extra space do you have outside the “work area”? 2-3 inches per side would you say? More or less? Also approx how much did your Z axis plates cost? I think I’ll order some of those.

I joined discord but I’ll be honest it’s a little difficult to navigate and find the answers I’m looking for, that’s why I figured I’d ask you lol😂

thedude
Автор

Cool video. I've thought about getting a CNC but the cost scares me a bit. LOL. 👍

daveporter
Автор

What is the new control board you are using?

chrismiester
Автор

Sure, I'm planning to get a CNC engraving machine for my home. Do you happen to know if those soundproof panels actually absorb the noise?

aaronwang
Автор

I'm glad I happened upon your video today. I have an MPCNC too, but lately I've been getting frustrated with using Estlcam and Repetier-Host. the other day I finally bit the bullet and got VCarve Pro but realized I needed to use a hacked-up version of a Postprocessor in order to make it work. It's not perfect, but neither was Estlcam (which makes doing inlays REALLY tough). So seeing your video makes me think it may be time to do a similar upgrade. Seeing as it's been 9 months since this video, do you still recommend going the PrintNC route or would you have gone a different direction? Would love to see a "lessons learned" video too (haven't looked at your video catalog yet, but I will do so next).

spencerjw
Автор

Does anyone know how this compares to a Bulkman QueenBee CNC or to an OpenBuilds Workbee or Lead CNC ? Thanks :)

T.J
Автор

Thanks for the video. Where did you source the electrical cabinet and how much was it?... Just the cabinet itself, not any of the components within it.

richardspahn