filmov
tv
Fix Open Miter Joints | 10 Clever Tips for Beginners

Показать описание
This video shares how to fix open miters and 10 clever tips for beginners
#fixopenmiters #diy #homerepairtutor
Fix Open Miters | 10 Clever Tips for Beginners
0:00 How to fix open miters
0:29 How to properly pull baseboard off walls
0:53 DryDex is the first option to fix open miters
1:09 Use a 3-inch knife to apply DryDex
1:32 Apply blue painter's tape to hardwood floors
2:04 Use your index finger to tool DryDex into the open miters
2:11 Use the putty knife at a 45-degree angle to remove excess spackling
2:49 Always try to find the paint that matches your trim work
3:00 Use a damp sponge to feather the DryDex and rag to dry the surface
3:10 Prime and paint the baseboard or woodwork
3:44 Use Bondo to fix open miters in high traffic areas
3:59 Wear a silica dust respirator when sanding Bondo
4:08 Protect carpet and hardwood with old cereal boxes
5:00 Wear protective gloves when using Bondo
5:06 Use spreaders to feather Bondo
5:15 Mark the grit on the side of sanding sponges
5:34 Lightly sand baseboards with sanding sponges to remove paint
5:56 Remove dust and debris from sanded baseboard
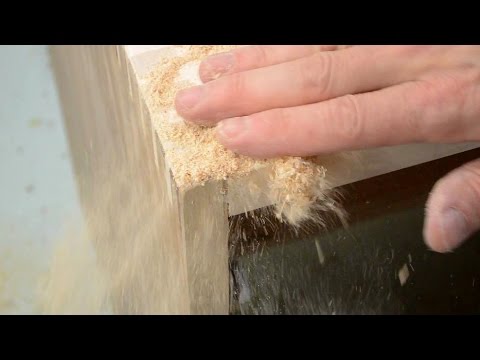
6:08 How to mix Bondo to fix open miters
7:21 How to apply Bondo to open miters
These supplies were used in our video:
Sundstrom Silica Dust Respirator
Cheerios Box :)
Some product links may be Amazon affiliate links. As an Amazon Associate, we earn from qualifying purchases at no additional cost to you.
Want our newest DIY videos? Subscribe to our channel and hit the notification bell to see every upload. We upload new videos every Saturday.
Disclaimer:
Videos produced by Home Repair Tutor are provided for informational, educational, & entertainment purposes only. Some of these projects, materials, and techniques may not be appropriate for all ages or skill levels. Home Repair Tutor does not make any claims of the safety of the projects, techniques, or resources listed on this site and will not take responsibility of what you do with the information provided by this site. Viewers must be aware by doing DIY projects on their homes they are doing it at their own risk and Home Repair Tutor cannot be held liable if they cause any damage to their homes. Home Repair Tutor cannot claim liability with all applicable laws, rules, codes and regulations for a project.
#fixopenmiters #diy #homerepairtutor
Fix Open Miters | 10 Clever Tips for Beginners
0:00 How to fix open miters
0:29 How to properly pull baseboard off walls
0:53 DryDex is the first option to fix open miters
1:09 Use a 3-inch knife to apply DryDex
1:32 Apply blue painter's tape to hardwood floors
2:04 Use your index finger to tool DryDex into the open miters
2:11 Use the putty knife at a 45-degree angle to remove excess spackling
2:49 Always try to find the paint that matches your trim work
3:00 Use a damp sponge to feather the DryDex and rag to dry the surface
3:10 Prime and paint the baseboard or woodwork
3:44 Use Bondo to fix open miters in high traffic areas
3:59 Wear a silica dust respirator when sanding Bondo
4:08 Protect carpet and hardwood with old cereal boxes
5:00 Wear protective gloves when using Bondo
5:06 Use spreaders to feather Bondo
5:15 Mark the grit on the side of sanding sponges
5:34 Lightly sand baseboards with sanding sponges to remove paint
5:56 Remove dust and debris from sanded baseboard
6:08 How to mix Bondo to fix open miters
7:21 How to apply Bondo to open miters
These supplies were used in our video:
Sundstrom Silica Dust Respirator
Cheerios Box :)
Some product links may be Amazon affiliate links. As an Amazon Associate, we earn from qualifying purchases at no additional cost to you.
Want our newest DIY videos? Subscribe to our channel and hit the notification bell to see every upload. We upload new videos every Saturday.
Disclaimer:
Videos produced by Home Repair Tutor are provided for informational, educational, & entertainment purposes only. Some of these projects, materials, and techniques may not be appropriate for all ages or skill levels. Home Repair Tutor does not make any claims of the safety of the projects, techniques, or resources listed on this site and will not take responsibility of what you do with the information provided by this site. Viewers must be aware by doing DIY projects on their homes they are doing it at their own risk and Home Repair Tutor cannot be held liable if they cause any damage to their homes. Home Repair Tutor cannot claim liability with all applicable laws, rules, codes and regulations for a project.
 0:08:51
Fix Open Miter Joints | 10 Clever Tips for Beginners
 0:07:45
How to Fix Open Miters
 0:02:49
HOW TO FIX GAPS IN MITER JOINTS OPEN MITER JOINTS BIRCH WOOD GLUE TITEBOND SANDING DUST QUICK FIX
 0:03:23
How to Fix Open Miters - Fill Large Gaps in Baseboards
 0:00:37
Fix open miter joints in seconds with this simple cleanup trick!
 0:00:41
wood joint gap fill trick
 0:01:39
Woodworking Quick Tip #16- A fast fix for mitered corners!
 0:02:56
Miter Fix - The Fix with Jory Brigham
 0:05:29
Old School Tricks To Make Bad Mitres Look Amazing!
 0:01:58
Filling Gaps In Mitered Corners
 0:07:45
How to Fix Mitered Corner Joints // Making a Memory Box Part 2
 0:05:30
A new way to fix the GAP in mitred joints! DONT USE SAWDUST AND WOODGLUE ANYMORE
 0:05:15
The Easiest Way to Get Perfect Miters Every Time!!!
 0:12:35
Three Gluing Techniques for PERFECT Miters
 0:00:02
Fixing a 'Not so Perfect' Mitered Joint
 0:05:43
How To Permanently Fix Baseboards Cracks!
 0:07:09
How to Fix Open Miters (baseboard)
 0:01:30
Closing the gap in a miter joint 5 YEARS LATER!
 0:09:22
How To Fix Baseboard With BIG GAPS Or Doesn't Meet Up! Tips And Tricks Tutorial DIY For Beginn...
 0:03:41
The ONE Trick they Don’t Teach at Carpenter University!!!
 0:05:25
Why Your Miters Suck - And How to Fix Them
 0:05:01
Get Perfect Inside Corners the Easy Way (No Coping!!!)
 0:11:51
Closing Gappy Mitres in Picture Frames
 0:08:25
4 Steps to Easy and Strong Miter Joints | Woodworking Tips
Комментарии