filmov
tv
Raspberry Pi LESSON 45: Using the Raspberry Pi Camera in Bullseye with OpenCV

Показать описание
Announcing the Most Awesome Raspberry Pi Lessons of All Times! This time we RUMBLE!
In this class series, we will be using the most excellent Sunfounder Ultimate Raspberry Pi kit, available here: (Affiliate Link)
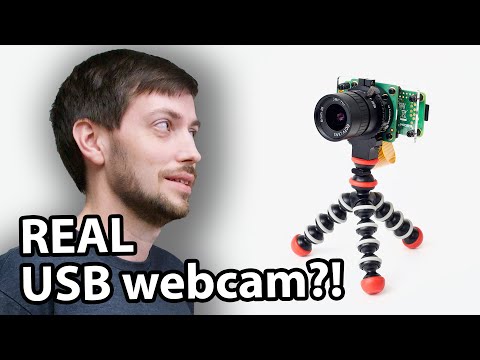
In this lesson I will show you how to use the Raspberry Pi camera on the Bullseye operating system, in either 32 bit or 64 bit mode. I will show you how to operate the camera using OpenCV.
If you want to grab those cool little straight jumper wires I am using to keep my breadboard builds neat and clean you can snag a box of them here:
If you guys are interested in the oscilloscope I am using, you can pick one up here (affiliate link):
You guys get your hardware ordered so you can follow along at home!
You will also need a Raspberry Pi. I suggest the Raspberry Pi 4. If you do not already have one, this is the most suitable gear I could find:
The Raspberry Pi's are sort of pricy right now, so you can look on ebay or elsewhere to see if there are any deals. You will need a SD card. If you do not already have one, this is a good one:
I like using a wireless keyboard and mouse to have fewer wires. You can certainly use your USB keyboard and mouse, but if you want a nice wireless one, this one works on the pi. We demonstrate this by using a button switch to control a LED.
You guys can help me out over at Patreon, and that will help me keep my gear updated, and help me keep this quality content coming:
#bullseye
#opencv
#raspberrypi
In this class series, we will be using the most excellent Sunfounder Ultimate Raspberry Pi kit, available here: (Affiliate Link)
In this lesson I will show you how to use the Raspberry Pi camera on the Bullseye operating system, in either 32 bit or 64 bit mode. I will show you how to operate the camera using OpenCV.
If you want to grab those cool little straight jumper wires I am using to keep my breadboard builds neat and clean you can snag a box of them here:
If you guys are interested in the oscilloscope I am using, you can pick one up here (affiliate link):
You guys get your hardware ordered so you can follow along at home!
You will also need a Raspberry Pi. I suggest the Raspberry Pi 4. If you do not already have one, this is the most suitable gear I could find:
The Raspberry Pi's are sort of pricy right now, so you can look on ebay or elsewhere to see if there are any deals. You will need a SD card. If you do not already have one, this is a good one:
I like using a wireless keyboard and mouse to have fewer wires. You can certainly use your USB keyboard and mouse, but if you want a nice wireless one, this one works on the pi. We demonstrate this by using a button switch to control a LED.
You guys can help me out over at Patreon, and that will help me keep my gear updated, and help me keep this quality content coming:
#bullseye
#opencv
#raspberrypi
 0:36:23
Raspberry Pi LESSON 45: Using the Raspberry Pi Camera in Bullseye with OpenCV
 0:41:50
Raspberry Pi Pico W LESSON 45: Calculating Height from a Dropped Object in Freefall
 0:19:21
Raspberry Pi 5 Setup: Getting Started Guide (Step By Step)
 0:26:34
Raspberry Pi LESSON 44: Getting Ready to Master the Raspberry Pi Camera
 0:06:02
Raspberry Pi Tutorial 45: How to use Screen (Linux)
 0:11:45
Raspberry Pi 4 - How to Setup & Get Started (Best projects for beginner)
 0:38:51
Building the Ultimate Retro Console! Raspberry Pi 4 (8Gb) Retro Pi Tutorial
 0:00:34
Waveshare Ethernet / USB HUB HAT For Raspberry Pi, with one RJ45 Ethernet Port, three USB Ports
 0:32:14
The ULTIMATE Raspberry Pi 5 NAS
 0:11:24
Display, Keyboard & touchpad for Raspberry Pi & much more. Crowview note 14.
 0:00:14
Spotpear Raspberry Pi Zero to 3B/4B interface adapter to Pi3/Pi4 Expansion Board Pi0 USB HUB RJ45
 0:24:43
Raspberry Pi 5: Getting Started
 0:07:26
Raspberry Pi TSL45315 Ambient Light Sensor Python Tutorial
 0:13:09
| UNBOXING | 45 Sensor Module Board Kit For Arduino/Raspberry pi
 0:48:40
Raspberry Pi GPIO - Getting Started with gpiozero
 0:00:14
Spotpear Raspberry Pi CM4 to Pi4 Adapter expansion board Compute module 4 IO Board
 0:45:45
Raspberry Pi LESSON 4 : Understanding and Using GPIO Pins
 0:11:59
Raspberry Pi Zero is a PRO HQ webcam for less than $100!
 0:00:14
Spotpear Raspberry Pi CM4 Industrial IoT 5G/4G Wireless Expansion Module M.2 Slot With UPS Module
 0:00:16
Raspberry Pie (pi) build
 0:00:14
Spotpear Raspberry Pi 4 Model B 4B R800C GSM / GPRS HAT 2G Communication for Arduino/Jetson Nano
 0:00:14
Spotpear Raspberry Pi Compute Module 4 NAS Multi-functional Mini-Computer Network Storage
 0:00:42
His laptop died so he used his TYPEWRITER. 😭🤷♂️ #shorts
 0:05:16
Raspberry Pi A+ Tutorial #1 – Setup without PC
Комментарии