My 4-Day Fire Pit Patio Build [Full DIY Project]

preview_player
Показать описание
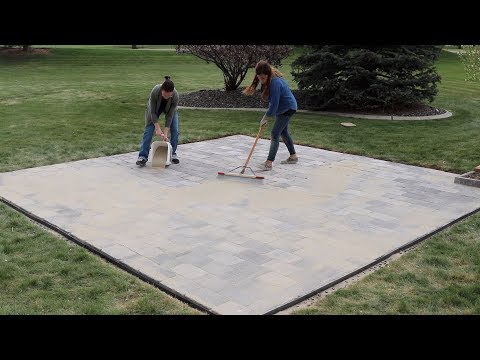
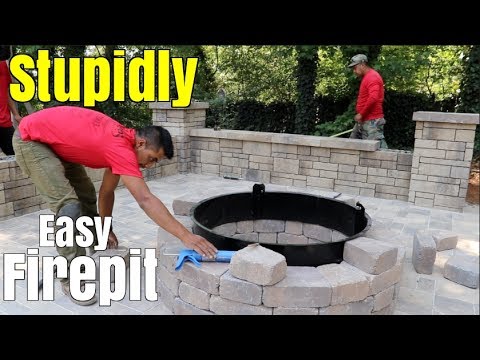
Building a round patio from a paver kit SEEMS simple, but it's also a ton of work! In this episode I'll show you step-by-step how I measured and dug out the sod, raked and tamped a solid base of gravel, added sand, and then placed each paver (oh, and added a fire pit on top, too!) You'll also see the REALLY dumb mistakes I made along the way, and how I fixed them.

DIY difficulty level: Medium - just because it's a lot of digging and hard labor. It's not rocket science, but you WILL be sore at the end!

PAVER PATIO INFO: Italian Renaissance Circle kit from Basalite in Positano color

FIRE PIT INFO: Grand Fire Pit kit from Basalite in Positano color

CAPSTONES: We got from a local cement artist who was selling them at the landscaping place.

Total cost for the kits and the capstones was $1400 (plus we also paid for way too much gravel mix and sand, so your own costs there may vary).

Intro: (0:00)
Measuring the circle: (0:17)
Digging up sod and dirt: (0:46)
Tamping gravel base: (2:02)
Adding sand layer: (3:03)
Laying pavers: (4:01)
Building the fire pit: (10:26)
Finishing details: (11:03)

#BroBuilds #BrosNotPros #BackyardProjects
Рекомендации по теме
Комментарии
Автор

Should have posted this video before you built it so that you could have taken advantage of all the comment suggestions.

Sparky
Автор

This dude is literally the “i don’t know the answer, lets find out together” type of person and I love it

grungekng
Автор

My favourite thing about this video is that you pointed out how a half inch gap looks stupid. And then went ahead and built without it. This gives me the confidence to do the same when I build mine.

shaidyn
Автор

"He'll watch anything at this point, just give him firepit DIYs." -YouTube

luciferjho
Автор

When digging up all that sod & soil, this might be a great time to use them as filling for a thigh-high raised garden bed or two! Put the sod upside-down at the bottom, along with old leaves, twigs, and other yard trimmings--ideally some rotting wood or aged wood chips, too, to act as a hugelkulture fill that will soak up water and help keep the bed from drying out when it hasn't rained enough. You can also layer in some kitchen scraps or partially made compost to help provide nutrients for your plants as they fully compost over time. Then fill in the remaining dug-up soil on top, and when it's full, plant the raised bed with just about whatever you like!

ladyofthemasque
Автор

Remember when 2x4s were so cheap that we used them to level sand instead of keeping them in a bank vault? Good times. ;)

henrywinterbottomii
Автор

It's good to know I am not the only one that makes a few bonehead mistakes during a new project. I like how you took it in stride, corrected the issue, and moved along. Great job.

jamesvitale
Автор

“We’re bros, not pros”!!! My new catch phrase!!! 🤣🤣🤣

charlieromero
Автор

Im late to the party but as a former professional installer here are a few tips for circle kits. To start, plan the size accordngly. 12' is small. think about how many people you entertain or how large your family is. youll want plenty of room around the fire pit to sit as well as have the ability to move back away from the fire as needed without sitting in the lawn or tipping over. When it comes to fire rings, size does matter. three or four foot depending on what you want to burn. however, i always told my customers. this is not a brush or couch fire type of fire pit. heat will discolor and ruin the concrete if you arent careful. which brings me to the first thing I always did differently than this install. i reccommend not installing or buying the center of the circle kit. install the pit on gravel first and build the patio around it. no need to buy pavers only to bury them under the pit and burn on top of them. plus a fire on the gravel makes for easy cleanup. This also allows you to "set" the pit in the gravel and glue each course up. Also try to always use a fire ring inside with an air gap to protect the block. as far as the pavers go; on larger patios, longer screed bars of 1" conduit is the go to but we usually use shorter sections. we always set stakes, rest the bar on the stakes and check with a level to make sure we hit whatever pitch or direction we want the patio sloped to. rarely should a patio ever be dead level so that it sheds water. He is spot on. for a patio like this. 4" tamped angular gravel. class 5 limestone is common. and 1" washed sand. Pro tip; dont dig deeper than you have to. for one its useless digging, and two you would then have to fill that void with more tamped gravel. you never refill with loose soil. its easy to start setting circle kits around the fire ring. No matter how many you lay though it rarely ever lays perfect the first time and some times its necessary to cut one in each course to fill a smaller void. A cut paver is better than big/wide gaps. Concrete saw is the way to go. or for a homeowner a concrete blade on an angle grinder may work for a small job with only a few cuts. no need to hammer the pavers individually your sand should be firm and level enough that theyll sit in place. laying usually works best with one person laying and another feeding. once the pavers are laid. Always install a "soldier course" or border. immediately install a paver restraint on the outside border. this will keep them from shifting. typically a plastic stick in an L shape that you nail into the gravel with large spikes, about 8". one spike every foot to two feet apart as needed. youll want to make sure you leave about 4-6" of extra tamped gravel beyond the last paver to allow for this. now you should tamp the pavers into place and add your joint sand. some people tamp then sand, some spread sand then tamp. ive done both. either way i highly recommend a poly sand that will set up like a grout. prevents too much water from washing out the patio. helps a ton with ants and weeds. never install the poly sand on wet or damp pavers. follow the instructions well. last tip is to seal the patio to protect it long term and make it look a ton better, but wait for the patio to cure for a year or so after install before doing so. most pavers arent fully cured when sold and over time and youll most likely see efflorescence. you dont want that sealed in. Last few tips. buy quality pavers and flat shovels work way better than spades for this work and youll regret not renting the plate tamper. good luck.

PolkCoAngler
Автор

I use to be the one to do all the stone patio kits for my old Landscaping company. This is the same procedures I did step by step except when I laid my gravel then sand I would give it a 1% slope from the center to the edge so rain could run off towards the sides and not build up on the patio itself. I also used a certain kind of sand for filling in between the stones that when wet turns into an almost concrete type material for extra strength. I kinda miss this work.

vergy
Автор

Ahh, to live in a place where rocks don't grow like potatoes. Digging anything close to an even hole is a nightmare here.

bucketofsunshine
Автор

wow, the fact that this video has 20 million views and you still actively respond to comments is amazing

martalius
Автор

My grandparents built almost an identical one in their backyard.

Lovely stuff.

oswaldrabbit
Автор

For those looking to do this, consider installing a 1 inch metal pipe under the fire pit pavers which turns 90 degrees to lead inside the fire pit. try to make it concealed but fire need oxygen to breathe. otherwise all you will get is smoldering embers and smoke. I learned the hard way.

rodrigoruiz
Автор

This the kinda thing where you really want your friends help but you feel like shit making them stay there and deal with it 😂

shaurps
Автор

The best part about this video is your transparency of the mistakes you made. Thank you for the great video!!

gillliife
Автор

Pro tip: don't use sand, use stone dust. Also, don't fill the cracks with regular sand. Instead use polymeric sand which will last for years and years to come

ixCGAMExi
Автор

Your voice over made me feel like I was being read a bed time story. Needless to say I enjoyed this video

JherrellCharles
Автор

That patio looks really good and good job on it. When I started working I actually worked for a landscaper specializing in stone work and one thing that I seen him do that works very well is once the patio is in instead of just sand and tamp he used a mixture of silica sand and cement powder. Mixed it dry broomed it into the cracks then plate tamped it in and then when you wash it it hardens the cement sand mix and seals it completelly in

kenstockton
Автор

the biggest challenges to these type of projects is approaching the inevitable mistakes and issues that arise as challenges to overcome and not extreme frustrations

jessegladney