EEVblog #415 - SMD Stencil Reflow Soldering Tutorial

preview_player
Показать описание
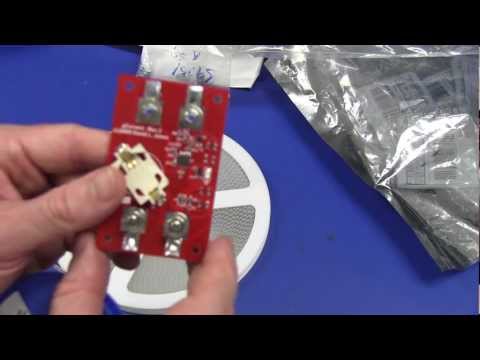
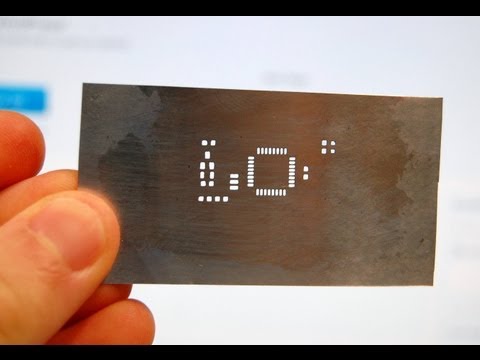
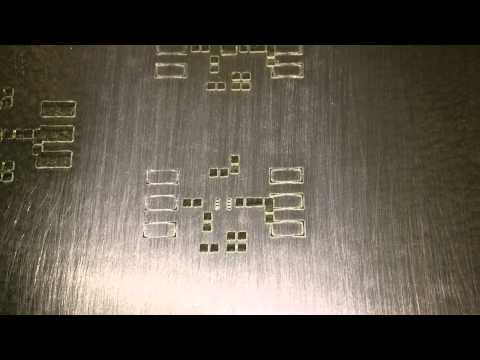
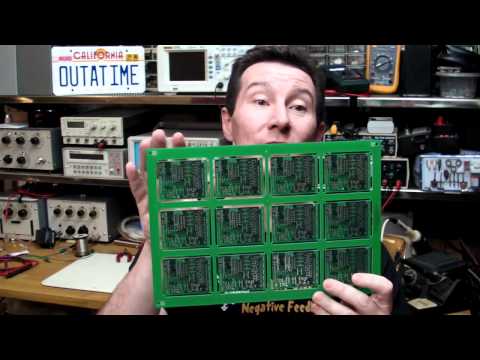
Dave shows you how easy it is to do surface mount SMD reflow soldering with a solder paste stencil and a hot air gun:

Hints and tips for quick and easy component placement, solder paste application, and reflow soldering using cheap easy to get tools.

EEVblog Main Web Site:
EEVblog Amazon Store:
Donations:
Projects:
Electronics Info Wiki:
Рекомендации по теме
Комментарии
Автор

I make "free" stencils for almost all of my SMD projects. The lab I work in has a cheap, hobby-level, laser cutter that I use. I cut open aluminum cans, sand of the inner plastic layer, spray paint the can, laser off the part of the spray-paint mask that I want to have solder on, and then etch the aluminum in standard PCB etchant. It takes a half hour tops.

michaelmolter
Автор

After 6 years, your adventures are still actual and give help to others.

ZsomborZsombibi
Автор

Thanks Dave, your video collection needs to be held by the National Library.

michaelpiotrowicz
Автор

The solder mask working along with the hot air is so satisfying.

catharperfect
Автор

Dave, I know this video is well over a year old now but I wanted to add that in a pinch I find an old credit card makes a good squeegee for my stainless steel stencils. Has a good sharp edge, is very stiff while able to give some bend under high pressure and doesn't scratch the stencil.

jwiegley
Автор

Thank you. I didn't know anything about reflow soldering other than the Gigabyte motherboard tour.

This vid takes the mystery out of it and leaves no questions unanswered.

jerryschroeder
Автор

The titanium Centurion, or "Black" AMEX Card works the best!

EEVblog
Автор

This video is even more interesting than usual because I got the same hot air tool. Never did a stencil work nor did a whole board with reflow, just some single ICs. Thanks Dave.

Joru
Автор

Never seen this done before, pretty amazing the way the solder melts and reforms into an efficient shape.

BenjaminGoose
Автор

if you apply the past in multiple passes it goes under the stencil edges and it ends up next to the pads, if you do it in one pass you get nice sharp edges. Might not be a big deal in some cases but when using IC's with very close pin spacing shorts will form between them.

ynzeselders
Автор

I was told a story about a group of people soldering LEDs on boards for emergency exit signs. Someone screwed up on which way the LEDs go and placed it the wrong way, and everyone trusted that guy so they put them on the way he did. And no one paid attention, because they were busy talking about weekends and wife and kids and stuff. And it wasn't until the next day they realized that they have to throw away all the 5000 boards because the LEDs were put on the wrong way!

henrikaleksandernilsen
Автор

The paste issue you had with it not sticking onto the pads when wiping is due to the paste either being too warm or not kneaded enough. Knead it on an aluminum plate to where it becomes the consistency of peanut butter, for a few mins till it's very smooth, then apply it. But like you touched on, the paste should re-flow once in the oven too.

Been an SMT Operator producing class 3 PCB's for a few years now, and always see this issue whenever someone doesn't prep the paste.

It's awesome to see people producing PCB's right at home. Feel free to ask any other questions, love teaching and passing info to people who like to learn.

CyrusEpion
Автор

I'd like to say this once again - it's a good practice to preheat the board from the bottom. In Russia we even used an iron sometimes (yes, the one your wife uses to iron the clothes). Just put it upside down, place the board on it and enjoy. Soldering is much easier in this case, because board doesn't take so much heat anymore. And the chance to overheat your chips is also much less now.
Well, iron is weird, it's better to use IR heater.

ScramblerUSA
Автор

Correct. It's also why the paste should be kept in the fridge, so the solder balls don't all fall out of being suspended in the paste.

EEVblog
Автор

I usually don't shake doing this stuff. It's the combination of the camera angles with the tripod in the way etc and having to stand up doing it reaching further than normal, and also talking at the same time.

EEVblog
Автор

Whenever I'm soldering LED's, mostly in monitor backlight boards, I heat the borad from below so the solder melts before the temperature gets to the LED's.

stefan
Автор

A dramatic and emotional soldering video 😂
I want to cry happily to see it. we like your video. thank you for sharing

CAXRAMEDIA
Автор

The flux is included in the solder paste. AFAIK that's the main reason for the shelflife and the time parts can be placed after applying the paste. The solvent of the contained flux will evaporate and the paste will go hard.

superdau
Автор

You can use old credit card or similar plastic or metal sheet to apply stencil paste. Also a thin squeegee from local hardware show will do job perfectly. It is important that edge is smooth and material isn't to flexible. I work with smd every day at my job. For printing stencil we use LPKF stencil printer for bigger series of boards, but for prototypes I just make frame like this one on video and I attach metal mask with some tape on one side to create sort of hinge.

krist
Автор

If you don't keep it in the fridge then the solder balls that are suspended in the flux paste will all settle and gunk up. You can try remixing it though.

EEVblog
join shbcf.ru