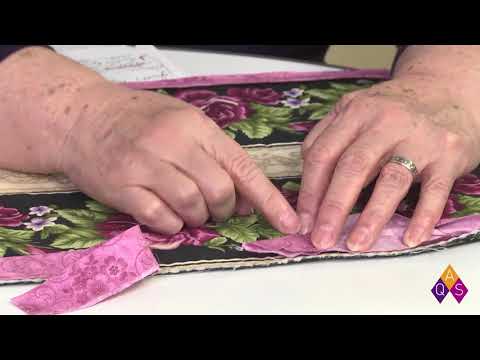
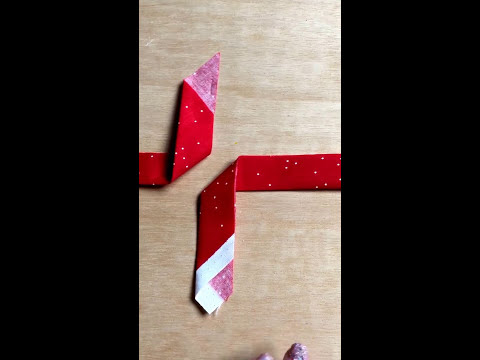
Quilt Binding Connecting the Ends

preview_player
Показать описание
Here is a super easy way to join your quilt binding ends, here at Heirloom Creations we refer to this method as "Edna's Binding". Stop by the blog for additional information,


Heirloom Creations
3800 S Western Ave
Sioux Falls SD 57105
(605) 332-4435
Рекомендации по теме
Комментарии
Автор

This is the easiest method I've used! Thank you Edna for sharing this with the world.

RNXOMing
Автор

Love this idea.  Just finished a binding using this technique.  Worked perfectly.  Wish I had known this sooner but will use going forward on all my quilts.  Thanks for sharing.

lovetojournal
Автор

Brilliantly simple! Thanks so much. Love the tree blocks too.

sharonnaylor
Автор

Can only concur with others, so simple, worked the first time! Thanks

cnilsson
Автор

Short & sweet video, it's clear & easy to follow, thank you 2:54

bridgetrcooney
Автор

The only part of quilting that makes me crazy...thanks for the video!!!

snydmom
Автор

I want to say THANK YOU for sharing "Edna's Binding" with all of us in need of a simple technique! Unfortunately I must agree with some of the other commenters and here is why. The technique is explained easy enough but some of us quilters are visual learners and need that final step of "twist" slowed down and shown in slow motion or something for our brains to get that step down in our brains, or should I say UP in our brains. haha I am determined to learn this simple technique once and for all so it is engrained in my ever loving brain! ;-) With that being said, I have watched your video and written the instructions as I watched your video, as my go-to reference, that I think will work for me & just might be what your other viewers need as well. If you approve these written instructions, maybe you could make a reply comment here so others see this and can try your method in written form? Thank you so much for sharing "Edna's Binding" technique.

This is written simply because I understand quilting terms so I already know my binding is folded in half AND that I have already sewn 3 sides on my quilt piece so this is simply to connect the two ends of binding as my final step. Here is my written instruction from your video here:
1.Place a straight pin in edge of binding
2. Divide WOB in 1/2. Lay binding over pin and cut the determined 1/2 measurement of binding on either side of pin (left lays to right of pin for cutting & right lays to left side of pin for cutting. For 2 1/2" binding your determined 1/2 measurement would be
1 1/4" on either side of pin)
3. Lay each side of binding flat on quilt, THEN . . . Left side = open so WRONG SIDE faces up & right side is still flat on quilt
then ………………. Right side =open binding so RIGHT SIDE presses against the right side of the
left you already have open.
4. Now you will stitch the 2 pieces together diagonally from lower left corner up to the upper right corner, mark the stitch line if
needed. (Just a note NOT TO CONFUSE YOU, your pinned pieces should appear as though the
Left piece is twisted upward while the Right piece lays open with wrong side facing out. This helped me.)
5. After sewing your stitch line lay flat and check to make sure it lays correctly before trimming 1/4" from your seam. Ta-da ;-)

Hope this helps some of you and does not confuse you more. The other advice I can give is to have your pieces in front of you and watch the video as you work with your piece to "see" the direction. GOOD LUCK!!

AGAIN, THANK YOU TO HEIRLOOM CREATIONS FOR SHARING "EDNA'S BINDING" tutorial with all of us viewers!

vanessamonteith
Автор

Finally, a tutorial that makes sense. Please give my heartiest thanks to Edna.  Every time I attempted this using other tutorials I ended up seriously questioning my sanity.  Bravo Edna.

luanndavidson
Автор

I would really like a clear of you of after you cut the strips ..I get that fine.... but I can't see which direction you fold the strips to get the right sides together it usually takes me at least twice and we watching the video several times and I can't seem to get it into my head which way it's done a clear view slow motion demonstration would be appreciated I love the method but it's frustrating cuz I can't see

ruthfreeman
Автор

This is a nice way to connect the ends, but it would be easier is you would press a triangle into the beginning of the strip. Then you could cut off the ending strip at the base of the triangle and it would be the right length.  You would also then have a pressed line to show you where to stitch that last seam.  No math.  Works every time.

maviskwoodathome
Автор

Hi Lesley, Glad we could help! You are welcome to share this video with your other quilting friends. We have many other videos too. Enjoy! ~Sara~

HeirloomCreations
Автор

This is awesome! I've been trying for years to calculate the right length to cut the strips so the ends meet properly. Did not know there was such an easy formula. Never too old to learn!

annhodgson
Автор

Simply the easiest way to connect binding ends that I have ever experienced.   I have bookmarked this tutorial to review each time I bind a quilt.   Thanks so much for this easy (no ruler) method.    

Bernina
Автор

Hi Denis, Thanks for commenting on how much you love this technique. :) Happy Sewing!

HeirloomCreations
Автор

OH. MY. GOODNESS!!! Many, many compliments and my eternal gratitude to Edna!!! I have fought with getting the ends of a binding to meet so many times and only ended up frustrated, with a binding that didn't look right. This is simple and best of all WORKS! Thank you so very much!

normatanner
Автор

Hi Sara, what are those scissors you are using ?

darrenpotton
Автор

I struggle with this every time!!! This is the easiest way I've found!! Thanks so much!!!

leebrinkley
Автор

Hi Angie, We digitized the tree design using the Bernina Designer Plus software.

HeirloomCreations
Автор

I have taken a binding class...used a binding tool... and mostly just did a cheater method to get my bindings done.  I did this one tonight and it worked fantastically!  It was just a hair too long but I can remember and adjust for the next time.  Thank you so much for this method.  I was starting to think I was never going to find a method that worked for me!

brendajos
Автор

Hi Susan, Yes, the video will go up this coming weekend. :) Thanks for your interest. Please subscribe to our YouTube channel if you are not already. ~Sara~

HeirloomCreations