filmov
tv
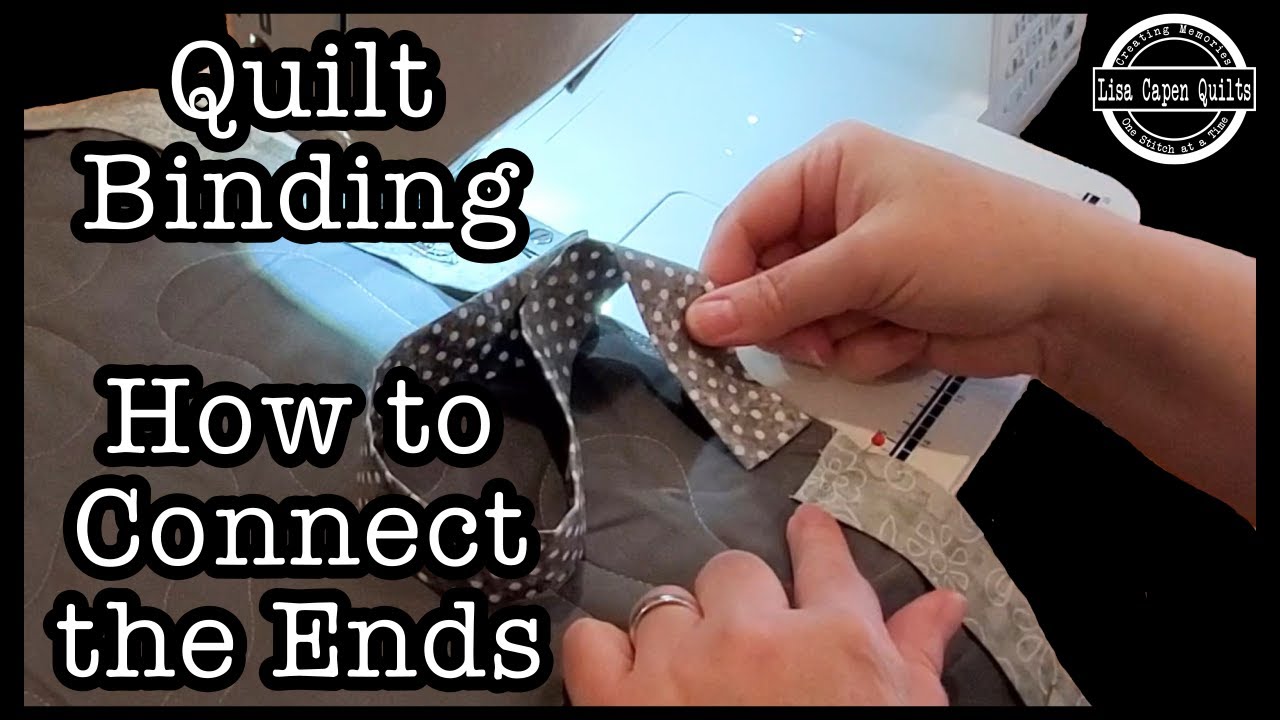
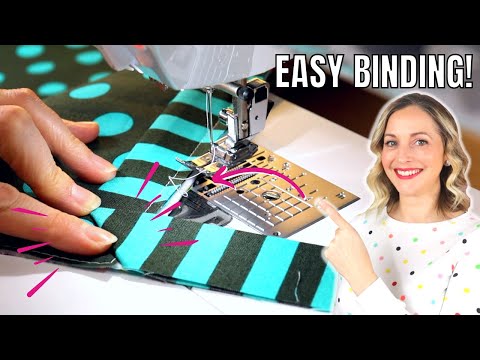
Quilt Binding - Easy way to connect the ends WITHOUT special rulers - Super QUICK
Показать описание
Hey everybody! Today I'm going to show you how I machine sew my binding, connecting the two ends WITHOUT using any special rulers. This is a quick way to finish up your binding with perfect results. Thanks for watching!
To view some of my most favorite quilting and journaling supplies, check out my Amazon page here:
*** I am an Amazon Affiliate and purchasing products through provided links may result
In a small commission which helps makes these videos possible, thank you!!
To view some of my most favorite quilting and journaling supplies, check out my Amazon page here:
*** I am an Amazon Affiliate and purchasing products through provided links may result
In a small commission which helps makes these videos possible, thank you!!
 0:05:09
Binding for Beginners- Easy Way to Finish Your Quilt Projects
 0:06:57
How to Bind a Quilt - 6 Simple Steps
 0:18:45
Let's Cheat and Finish the Binding an Easy Way
 0:13:11
HOW TO BIND A QUILT - BINDING HACK TO YOU NEED TO HAVE
 0:04:53
Add Binding with an Easy Invisible Join
 0:04:47
How to Join the Ends of Binding
 0:02:54
How to Bind a Quilt: Foolproof Tips for Great Results | Quilting Tutorial
 0:09:26
💥 HOW TO BIND YOUR QUILT ON A SEWING MACHINE BINDING 3 METHODS
 1:01:45
QUILTING and BINDING TRICKS UNVEILED
 0:09:31
Quilt Binding - Easy way to connect the ends WITHOUT special rulers - Super QUICK
 0:23:00
The No-Fuss Quilt Binding Tutorial!
 0:03:40
Quilt Binding Connecting the Ends
 0:12:58
How to Machine Bind a Quilt
 0:05:23
How to bind your quilt with the backing fabric
 0:00:57
Brilliant Last Binding Join For Your Quilt
 0:07:29
How to Bind a Quilt for Beginners, using a Sewing Machine!!
 0:05:21
How to Join Your Quilt Binding Ends
 0:10:58
Easy way to Join the Binding on a Quilt
 0:08:56
DIY How to Make Quilt Binding // TUTORIAL
 0:05:22
Easy Mitered Corners for Quilt Binding
 0:08:27
Bind a Quilt in 5 Easy Steps
 0:01:45
How to Join Binding Strips | Quilting
 0:11:07
Have you seen this binding method? | learning from an old quilt | sew along with me
 0:13:08
How To Bind a Quilt on a Sewing Machine with Jenny Doan of Missouri Star (Instructional Video)
Комментарии