filmov
tv
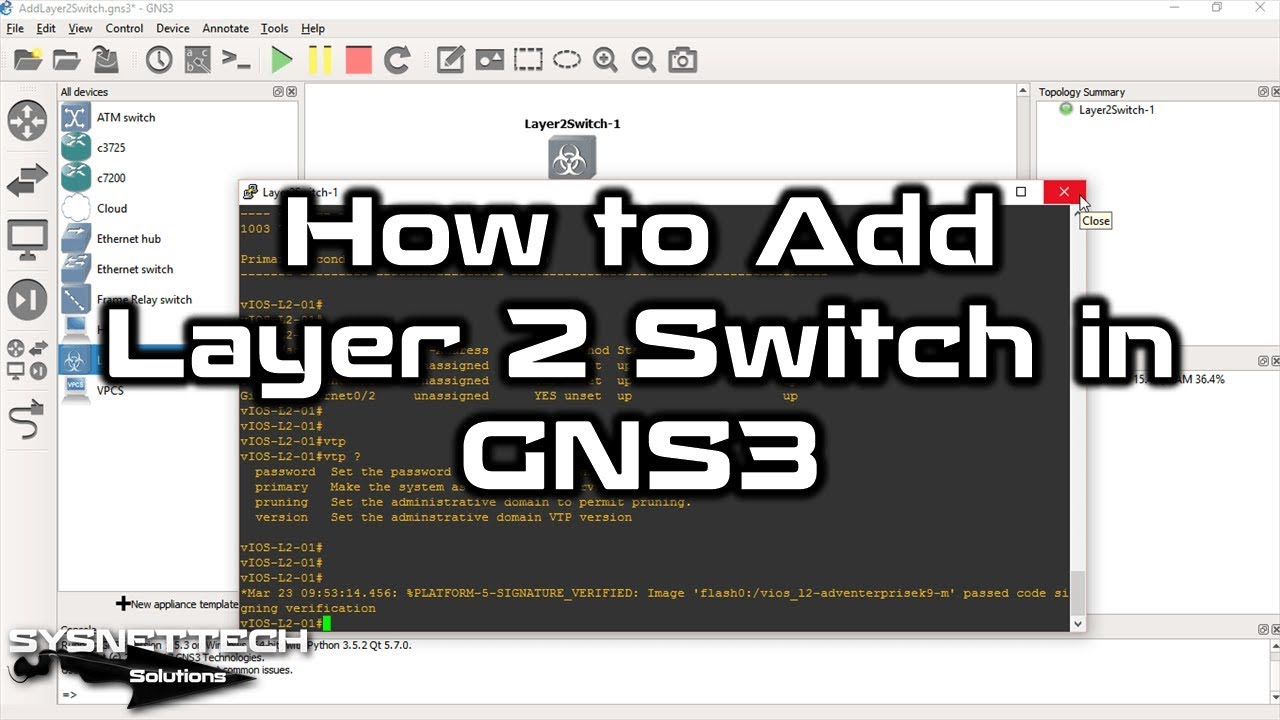
How to Add Layer 2 Switch in GNS3 | Cisco L2 Switch IOS vIOS-L2 | SYSNETTECH Solutions
Показать описание
This video tutorial explains configuring a Cisco Layer 2 Switch using the GNS3 network simulator, commonly used to train for Cisco Switching courses.
Suppose you're preparing for a Cisco Switching exam or looking to improve your networking skills. At that point, this video will show you how to set up a Layer 2 Switch using the GNS3 network simulator program.
In this tutorial, we'll guide you through each configuration of the L2 Switch device. We'll also provide helpful tips and tricks to make the process as smooth and straightforward as possible.
To get started, you'll need to download the L2 Switch IOS image from the link provided in our article. After installing it, you can add the Cisco Router or Cisco Switch IOS image to your GNS3 program.
Then, follow the step-by-step instructions in this video to add the Layer 2 Switch, configure its symbol, and set the number of interfaces in the Network section.
Whether you're a beginner or an experienced networking professional, this video tutorial is a must-watch for anyone examining to enhance their Cisco networking skills and knowledge.
Ensure you immediately subscribe to our YouTube channel to access our extensive Cisco networking training videos. Take advantage of all essential information. Moreover, watch our related content to gain more helpful tips and tutorials. We guarantee that our resources will help you stay ahead of the curve.
To add and use the L2 Switch:
Step 1: First, build GNS3 on Windows, Linux, or macOS. Additionally, you can browse the following videos for the setup.
Step 2: Add a Cisco Router or Cisco Switch IOS image after the setup.
Step 3: To add a Cisco Router, visit the video below.
Step 4: If you want to add and use a #Layer2 #Switch, download the L2 IOS file from the link we shared in our article.
Step 6: Click Edit / Preferences in the open window and New on the QEMU tab option.
Step 7: In the screen for creating a new QEMU VM template, enter a name for the Switch and click Next.
Step 8: In the next stage, select the relevant option if your operating system is 32-bit or 64-bit.
Step 9: Set the RAM size for your PC's hardware performance for the Layer 2 Switch.
Step 10: In the Disk Image screen, click Browse to add the L2 image you downloaded to your PC.
Step 11: After adding the L2 Switch, click the Finish button.
Step 12: To configure the symbol of it, click on the Switch in the Devices area and click Configure Template.
Step 13: Choose the Switches area from the Category section in the Layer2 Switch window. Then, click Browse in the Symbol area, select a symboSwitchthe switch from the open window, and click OK to save the settings.
Step 14: It's possible to configure the port number of the L2 Switch by increasing the number of interfaces in the Network section.
Step 15: Now you can run a Cisco Layer 2 Switch on GNS3!
───────────────RELATED VIDEOS───────────────
➊ How to Use VPCS
➋ How to Configure the Cisco Switch
➌ How to Add L3 Switch
➍ How to Backup IOS
➎ How to Backup Configuration File
───────────────FOLLOW US───────────────────
✔ Facebook
✔ Twitter
✔ Pinterest
✔ Instagram
✔ LinkedIn
███████████████████████████████████████████
Suppose you're preparing for a Cisco Switching exam or looking to improve your networking skills. At that point, this video will show you how to set up a Layer 2 Switch using the GNS3 network simulator program.
In this tutorial, we'll guide you through each configuration of the L2 Switch device. We'll also provide helpful tips and tricks to make the process as smooth and straightforward as possible.
To get started, you'll need to download the L2 Switch IOS image from the link provided in our article. After installing it, you can add the Cisco Router or Cisco Switch IOS image to your GNS3 program.
Then, follow the step-by-step instructions in this video to add the Layer 2 Switch, configure its symbol, and set the number of interfaces in the Network section.
Whether you're a beginner or an experienced networking professional, this video tutorial is a must-watch for anyone examining to enhance their Cisco networking skills and knowledge.
Ensure you immediately subscribe to our YouTube channel to access our extensive Cisco networking training videos. Take advantage of all essential information. Moreover, watch our related content to gain more helpful tips and tutorials. We guarantee that our resources will help you stay ahead of the curve.
To add and use the L2 Switch:
Step 1: First, build GNS3 on Windows, Linux, or macOS. Additionally, you can browse the following videos for the setup.
Step 2: Add a Cisco Router or Cisco Switch IOS image after the setup.
Step 3: To add a Cisco Router, visit the video below.
Step 4: If you want to add and use a #Layer2 #Switch, download the L2 IOS file from the link we shared in our article.
Step 6: Click Edit / Preferences in the open window and New on the QEMU tab option.
Step 7: In the screen for creating a new QEMU VM template, enter a name for the Switch and click Next.
Step 8: In the next stage, select the relevant option if your operating system is 32-bit or 64-bit.
Step 9: Set the RAM size for your PC's hardware performance for the Layer 2 Switch.
Step 10: In the Disk Image screen, click Browse to add the L2 image you downloaded to your PC.
Step 11: After adding the L2 Switch, click the Finish button.
Step 12: To configure the symbol of it, click on the Switch in the Devices area and click Configure Template.
Step 13: Choose the Switches area from the Category section in the Layer2 Switch window. Then, click Browse in the Symbol area, select a symboSwitchthe switch from the open window, and click OK to save the settings.
Step 14: It's possible to configure the port number of the L2 Switch by increasing the number of interfaces in the Network section.
Step 15: Now you can run a Cisco Layer 2 Switch on GNS3!
───────────────RELATED VIDEOS───────────────
➊ How to Use VPCS
➋ How to Configure the Cisco Switch
➌ How to Add L3 Switch
➍ How to Backup IOS
➎ How to Backup Configuration File
───────────────FOLLOW US───────────────────
███████████████████████████████████████████
 0:01:52
How to Create a Layer 2 VLAN in 60 Seconds | NETGEAR
 0:07:14
How to Add Layer 2 Switch in GNS3 | Cisco L2 Switch IOS vIOS-L2 | SYSNETTECH Solutions
 0:04:27
HOME NETWORKING BASICS - HOW ALL LAYER 2 SWITCHES WORK!
 0:00:56
How to Merge Layers in Photoshop (2019 Tutorial)
 0:02:04
AutoCAD How To Add Layers
 1:00:07
Layer 2 Switching & VLANs | Cisco CCNA 200-301
 0:00:36
How to Merge and Unmerge Layers in Photoshop
 0:01:12
How to Open Multiple Images as Layers in Photoshop
 0:08:13
How to Open Images as Layers in Photoshop
 0:08:20
Add CISCO L2 and L3 images in EVE-NG.. COMPLETE INSTALLATION!!!
 0:00:55
Photoshop CC - How to Add Another Image to an Image
 0:19:36
DO NOT design your network like this!! // FREE CCNA // EP 6
 0:00:40
how to copy one layer to another file in Photoshop
 0:13:43
Establishing Layer-2 connectivity between a traditional network and ACI
 0:04:09
HOW TO LAYER VINYL DECALS PERFECTLY and add registration marks in Cricut Design Space | EASY!
 0:01:53
How to Merge Layers in Illustrator
 0:03:44
How to create Multiple Layers Multiple Colors | Cricut | Contour
 0:01:02
Resolume Video Training: 2.3 Layer Structure
 0:01:00
Assign ip address to cisco switch / Assign ip address to vlan
 0:07:09
OSI Model Layer 2 - Data Link
 0:01:44
How To Merge Layers In Procreate
 0:06:51
Setup Cisco IOSvL2 15.2 Image for GNS3 2.2.14
 0:12:15
Palo Alto Firewall | Layer 2 Interface With Subinterfaces VLAN Configuration
 0:01:55
Photoshop Layer Masks Explained in 2 Minutes
Комментарии