filmov
tv
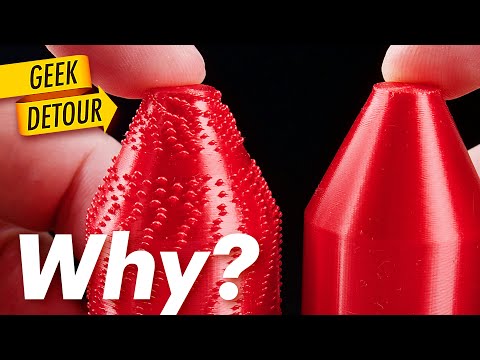
Triple (x3) your Layer Strength by Annealing 3D Prints in Plaster!

Показать описание
In the past, I've already tried many different techniques to fuse 3D printing layers together by annealing or coating but never had great success. This time I embedded PLA and PETG 3D prints in plaster and then annealed them at temperatures over their melting point to see if we can fuse the layers together and how their heat resistance changes. Let's find out more!
💚 Support me 💚
Join as a YouTube member!
🎙Check out my PODCAST with Tom Sanladerer
🎥 Related videos:
🛒 Equipment used in this video (Affiliate Links):
⚙ My gear (Affiliate Links):
🎥 CAMERAS & LENSES
🎙AUDIO
🔴 LIVE STREAMING
Chapters:
00:00 Introduction
01:50 Test Setup
02:50 Embedding
03:56 Drying
05:00 Promo
06:34 Plaster Removal
09:00 Mechanical Tests
12:50 Temperature Tests
13:56 Summary
14:21 Outro
DISCLAIMER: This video was sponsored by Autodesk.
 0:15:00
Triple (x3) your Layer Strength by Annealing 3D Prints in Plaster!
 0:19:07
The STRENGTH of 3D prints REMELTED in SALT
 0:00:43
OH NO! Another Source of Z Wobble ?
 0:00:34
Bambu Lab P1P NASA fabric (TurboDork)
 0:01:00
printed WITHOUT support #shorts
 0:04:14
Stop 3d printing so slow!!! 🤯 (how to print faster)
 0:14:37
Stronger 3D Printed Parts with Electroplating
 0:15:27
5 Slicer defaults I ALWAYS change #3DP101
 0:00:20
This is not sped up.
 0:00:11
Repair of Pelvic Floor Muscle | One Simple Move #shorts #pelvic #kegel #women #girl #workout
 0:00:31
20% TCA Chemical Peel - Wait until the end! Results before your eyes. Melasma & acne scar treat...
 0:12:11
PCTG - The Isotropic 3D Printing Filament?
 0:00:41
When You Use Too Much Cube Lube… #shorts
 0:01:00
Dry vs Moist TPU in 3D Printing
 0:11:38
Stronger 3D prints at higher temperatures? (strength test!)
 0:05:06
How to Choose the RIGHT Window Tint | Don't Make A Mistake
 0:08:27
3D Printer Blobs: a mysterious problem you won't guess how to fix 🤔
 0:00:10
🔥 BEST PADEL SERVE? #shorts - the4Set
 0:00:26
Avoid these retinol mistakes | dermatologist explains
 0:00:25
You’re Using Hyaluronic Acid Wrong #shorts
 0:00:30
STOP THIS to Lose Belly Fat! #Shorts
 0:00:15
engine overhaul|| engine head reface ||head gasket replacement ||engine overheat||#shorts #reels.
 0:00:14
LCD & OLED Display Comparison
 0:14:16
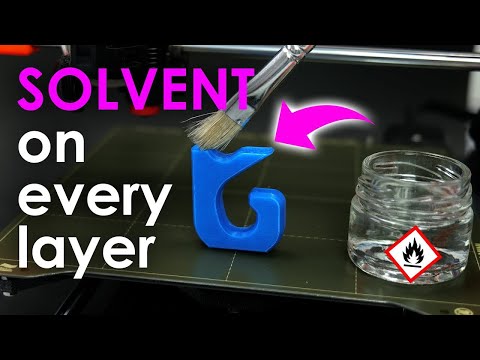
Perfect Layer Adhesion if you Brush Solvent onto every Layer of your Print?
Комментарии