filmov
tv
How To Make And Use 3D Printed Router Templates / DIY Router Templates / Woodworking Hacks

Показать описание
In this video I will show you another way to use a 3D printer in your workshop. The primary focus is is how to use 3D printed templates to expand what you can do with your router. Router templates can allow you to make repeatable shapes and designs using a flush trim bit.
Links:
Links:
 0:00:45
Make & Do - English In A Minute
 0:15:58
How to Use Make and Do in English
 0:03:11
Can you use hot glue to make molds? (yes, yes you can)
 0:11:51
When & when NOT to use “MAKE” in English
 0:02:00
How to Make and Use an Egg Wash | Baking Basics
 0:12:53
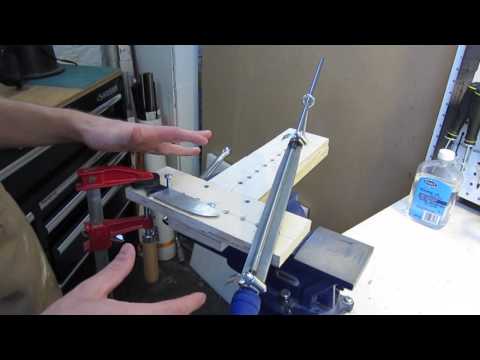
How to make and use a filing jig for knife blades.
 0:04:54
How To Make And Use A Roux
 0:01:18
How To Make and Use SIMPLE SYRUP for your CAKES! AND Where To Find My BOTTLE!
 0:00:13
Use disposable paper cups to make beautiful creative handmade flowers #diy #parent #handmade
 0:00:52
How To Make & Use A Double Boiler | Just The Tip | Steve Konopelski
 0:01:01
How to use a French Press to make a Latte | CREMA COFFEE GARAGE
 0:14:29
How to make and use a simple trimmer table
 0:11:11
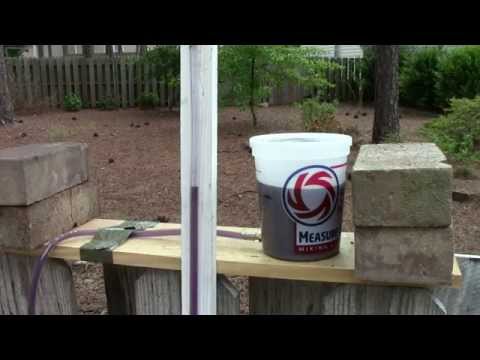
How To Make And Use A Water Level
 0:12:16
HOW TO MAKE AND USE A WET PALETTE: A Step-By-Step Guide
 0:01:00
How To Use AI To Make Faceless Videos In Less Than 5 Minutes
 0:16:19
How to Make Whey and Five Ways to Use It
 0:10:44
Water level basics – How to make and use one
 0:12:37
How to make and use a simple trim router table
 0:05:11
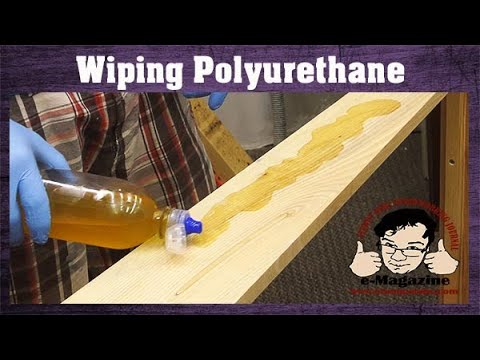
Don't buy wiping polyurethane! (How to make AND use it properly.)
 0:01:21
How Do I Make & Use Batter Boards? | DIY Basics
 0:05:40
How To Make And Use Simple Syrup | Keep Cakes MOIST!
 0:08:58
How to Make and Use an Animatic
 0:06:12
How to Make and Use Preserved Lemons
 0:23:03
How to Make and Use Fruit Powders | Dehydrating Blueberries | The Purposeful Pantry
Комментарии