filmov
tv
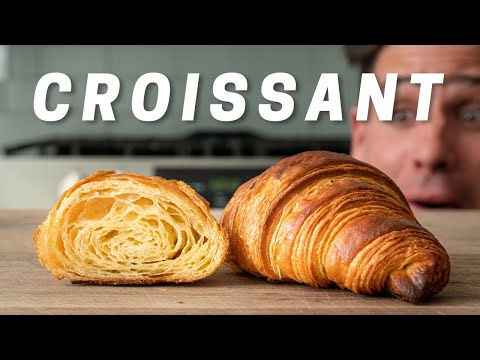
Make bakery-quality croissants at home using plain flour

Показать описание
You can make bakery-quality croissants with just plain flour!
#croissants #homemadecroissants
Follow me on Instagram!
You can send me pictures or ask questions. I check'em every day!
Pastry sheeter (Not used in the video)
Timestamps
0:44 Croissant dough
0:53 DDT (Desired dough temperature)
2:08 Butter slab
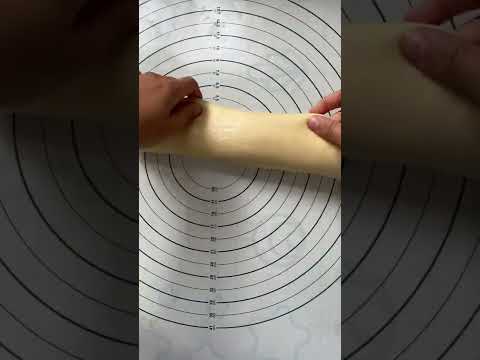
3:57 3-4-3 fold preparation
4:18 lock-in butter
5:15 Double turn
5:37 Release pressure
5:57 Single turn
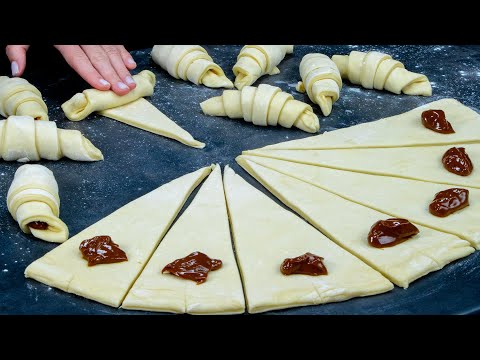
6:43 Cutting & rolling croissants
7:31 Proofing croissants
7:49 Wobble test
8:08 Baking croissants
8:19 Final product
Croissant dough
500g Flour
50g Sugar
10g Salt
250g Water
100g Soften butter ( At least 80% butterfat )
24g Fresh yeast (10-12g instant dry yeast)
250g Unsalted butter for lamination
Note that you may need to increase or decrease hydration to suit the flour you are using.
#croissants #homemadecroissants
Follow me on Instagram!
You can send me pictures or ask questions. I check'em every day!
Pastry sheeter (Not used in the video)
Timestamps
0:44 Croissant dough
0:53 DDT (Desired dough temperature)
2:08 Butter slab
3:57 3-4-3 fold preparation
4:18 lock-in butter
5:15 Double turn
5:37 Release pressure
5:57 Single turn
6:43 Cutting & rolling croissants
7:31 Proofing croissants
7:49 Wobble test
8:08 Baking croissants
8:19 Final product
Croissant dough
500g Flour
50g Sugar
10g Salt
250g Water
100g Soften butter ( At least 80% butterfat )
24g Fresh yeast (10-12g instant dry yeast)
250g Unsalted butter for lamination
Note that you may need to increase or decrease hydration to suit the flour you are using.
 0:09:26
Make bakery-quality croissants at home using plain flour
 0:08:54
How To Make The Best Croissants At Home
 0:15:31
How To Make Proper Croissants Completely By Hand
 0:20:25
Complete guide to classic hand-rolled croissants!
 0:29:56
Make Perfect Croissants With Claire Saffitz | Try This at Home | NYT Cooking
 0:06:59
How to make croissants from scratch?
 0:13:39
FLAKEY HOMEMADE CROISSANTS (Beginner Friendly)
 0:03:24
I was looking for a long time! A perfect dough recipe for croissants
 0:10:30
French Bakery-Quality CROISSANTS Recipe with Few Ingredients | The Recipe To Keep FOREVER!
 0:02:18
The Croissant to Share!
 0:05:34
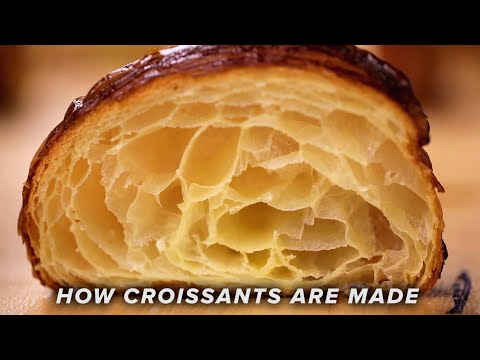
How Croissants Are Made • Tasty
 0:00:55
Why Croissants are so hard to make
 0:00:58
The anxiety of making croissants #simplerecipe #homebaker #baking #croissant
 0:10:20
Make bakery-quality croissants at home using plain flour
 0:13:29
How to Make Croissants | Recipe
 0:00:22
It is so easy to make #croissants at home, of course, with some practice Details are in description
 0:00:30
Easy to Make Almond Croissants Hack #shorts
 0:07:31
CROISSANT Recipe / Flaky & Crisp Butter Croissant
 0:13:12
How Authentic Croissants Are Made In France | Regional Eats | Food Insider
 0:26:52
How to Make CROISSANTS Like a Pastry Chef
 0:00:37
Homemade croissants 😍 #asmr #food #asmrsounds #cooking #satisfying #asmrfood #asmrvideo #baking
 0:00:11
NUTELLA CROISSANTS🤩🥐 #shorts
 0:26:36
How to make Various Croissants, Chocolate, Ham&Cheese, Creme Diplomat flavors - Korean food
 0:59:23
How to make perfect croissants at home - Hand lamination (full tutorial)
Комментарии