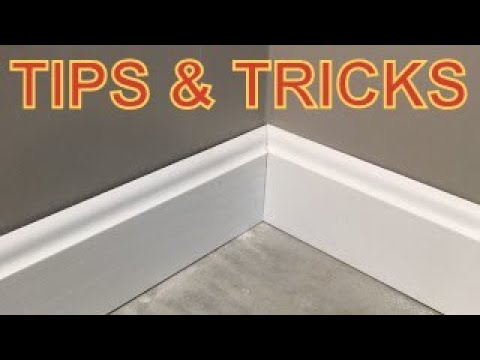
How To Cut Baseboard Corners That Look Great

preview_player
Показать описание
In this video I will show the method I use to cut and install baseboard corners that look great
Рекомендации по теме
Комментарии
Автор

This is called coping. That's why it's done with a coping saw. This is the way this type of joint should be done and has been done for hundreds of years. Mitered corners are really only for outside corners. This was a good explanation.

ammerconsulting
Автор

I was taught this method about 5 years ago by a friend I had just met, he was somewhat of a mentor to me when it came to home improvement and he sadly passed away about a year ago from cancer. Thank you for helping me with a great video and I’m happy to say this method worked perfect for me.

michaeldaniels
Автор

This is the work of a true craftsman. Thank you for sharing this tip.

audreybowles
Автор

I will try this method out in a few weeks!...I started being the 45 degree Guy with caulk as "my friend".  Then I graduated to coping with the miter saw fully and the results started to be come amazing.  I started to become less reliant on the need for caulk.  This method brings in the saw and miter saw together.  Thanks for sharing!

MrLutzyboy
Автор

Yes. I needed this. Now I understand that it’s not just my home’s corners that aren’t perfect…. Going to try doing this later this week…thanks for this turorial!!!!

GataMiau
Автор

I am a 63 years old lady trying to learn how to cut baseboards corners your explanations is fantastic I'll try it.

nydiaarauzsalazar
Автор

Finally!!! A video on coping that I understand. Thank you!!

juliejules
Автор

So glad I went on YouTube because I was just gonna cut two 45 degree angles I have no experience in rebuilding a house from the inside crazy and sad I had to push myself because I can’t afford these contractors who overpriced and screw people over cuz there greedy so thank you so much kickass video I will be looking at more of your stuff to see if I can use them 🤘🤘🤘

JosephOconnor-mp
Автор

Ah, I'm in the presence of skilled carpenters. Bravo sirs. -)

mj-lsqrxpn
Автор

Thanks for the tutorial! Can't wait to try this this week. I've got to do it for my entire house haha

shakennoterick
Автор

I have a huge job to do with about 50-60 corners to do... Seems like this is tedious, but will yield much better results than just cutting 45's and trying to fill with caulk. Thanks for sharing!

jeffbateman
Автор

Thanks for the lesson. It takes a little longer at first, when you're doing something a different way. But when the finished joint looks so much better and tighter it's worth it. Plus a person gets faster and better with practice.

waynemiller
Автор

Thank you for explaining the back side cut. I have seen it done in other videos but it wasn’t as well explained and I couldn’t see as well as what you provided in the video.

lillithjones
Автор

Great video!

I had no idea this could be done. It's a bit advanced for my skillset, so I'll have to practice first.

haydenhodges
Автор

Thanks brother, I have a small project this weekend, your video helped a lot

gilbertochavez
Автор

Thank you so much. I'm about to go mess up my trim now. LOL 😂🤣❤

itsreginatv
Автор

Omg!! This is sooo much simplier and easier! I am definitely going to try this and let you know!! Thanks for the tip

denisecatalan
Автор

This was interesting, I'm going to have to try it. I normally use a digital angle finder on the corner, then cut the two corner pieces based on that angle. I haven't been unhappy with the outcome, but will give your method a shot. Thanks

Xlatty
Автор

5 years later, you finally finished all 4 corners lol

peterkay
Автор

You are a life saver Bob! I have the 2 drawer DC224 2 drawer file cabi9net and your video hopefully will allow me to assemble and install the drawers. One issue I have is the side pieces that "click" into the "T" bracket, clicked on upside down. How can I release it from the "T" bracket to reinstall it correctly? Thank you. Pat

patrickcunningham
join shbcf.ru