filmov
tv
PUSH START & STOP BUTTON installation | No Splicing of Wires | VIOS Gen 3
Показать описание
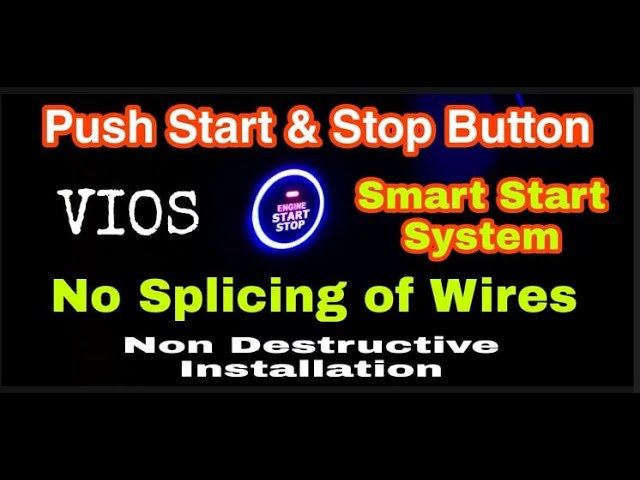
PUSH START & STOP BUTTON installation | No Splicing of Wires | VIOS Gen 3 is a detailed tutorial on identifying, testing and matching each of the wires in the stock ignition harness of a Toyota Vios Gen 3 for a non destructive installation of an RFID-based Smart Start System module.
The video walks you through the preparation process of the wire connectors and installation of the push start and stop button kit as an upgrade to the current key ignition system. The principles used may be applied to other vehicles as well.
The non destructive approach of this installation preserves the integrity of the stock wiring and makes everything 100% reversible in case you want to go back to the original key ignition set up. With this method you won't have to worry about splicing the wires and potentially causing short circuits later on due to exposed or improperly insulated cabling.
The car used for this video tutorial, a 2015 Toyota Vios, has no built-in immobilizer and the keys are not chipped. This upgrade to an RFID-based push start and stop system provides extra security to this car against unauthorized use or theft.
By the time you finish this tutorial you will have a better understanding of how the stock Vios Gen 3 ignition key harness was set up. Each wires are repeatedly identified and shown up close to help you get familiarized with each of them.
As always, please use caution and common sense if you wish to perform this or any modification to your car. Always put safety first and seek the help of a professional whenever necessary.
Please bear in mind that this is for educational purposes only. VIOSIFIED Car DIY shall not be held responsible for any damage, injury, or loss that may be incurred or caused by the misuse or improper application of the information in this video.
Recommended Tools/Products:
#PushStartButton #PushStartAndStopButton #Viosified
 0:00:30
Push Button Start - Quick Guide Animation
 0:03:25
Toyota How-To: Push to Start Button | Toyota
 0:02:01
RETROFIT: How to install Mercedes-Benz Engine Start Stop Button (replacing key) in few simple steps
 0:00:18
KESSY with Push Button Start/Stop | New Volkswagen Taigun
 0:09:47
contactor self holding with push button|start stop button|on off button|ELECTERCA
 0:07:45
how to install push to start system button in car or truck
 0:03:18
Why Not to Buy a Keyless Car (Push to Start Button)
 0:00:30
Iron Man Universal Car Engine Start Stop Push Button Switch Cover Interior Decorative Installation
 0:00:43
Relay Latching Circuit Wiring | Relay Holding Circuit
 0:04:47
How the Push Button Works || Electrical Simulation
 0:00:16
Did you know this about the push start button in cars (Mercedes S Class cool feature)
 0:00:39
How To Override The Push Button Start
 0:04:23
Start and Stop the Motor by Using Only One Push Button @TheElectricalGuy
 0:10:18
Always Press This Button Before You Start Driving Your Car
 0:14:26
Install Push Start button in any car at Home | DIY | Telugu
 0:00:42
VW FAQ - How To Use Your Push Button Starter
 0:00:19
2012 Jaguar XJL Pulsing Engine Push Start-Stop Button
 0:00:57
Leavens VW FAQ - Volkswagens Push Start/Stop Button
 0:04:22
Mercedes Benz Start Stop Button - Keyless Go Button Installment Tutorial
 0:15:33
How to fix and replace your push Start/Stop button
 0:01:44
How To Turn Push Button Start Off Into ACC
 0:00:28
Engine Start Stop Spin Button Cover Push to Start Button Ignition Protective Cover
 0:04:21
How To Start A Car With An Engine Start Button-Tutorial
 0:02:46
#TataAltroz #PushStartStopButton - How to start engine using Push Start Stop Button ?
Комментарии