Learn How to Photo Transfer with Mod Podge

preview_player
Показать описание
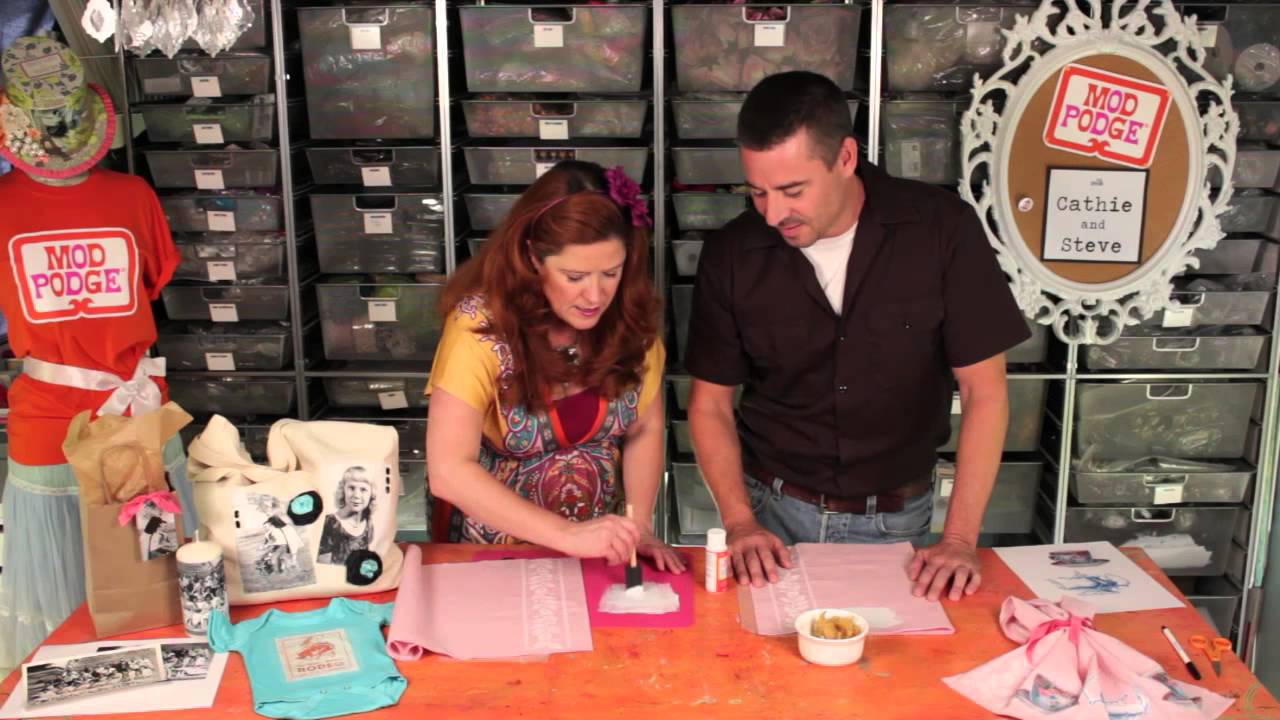
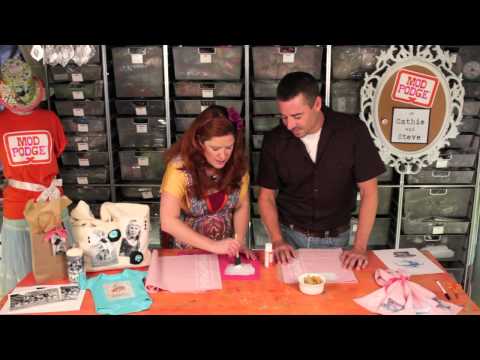
In this video, Cathie Filian and Steve Piacenza will show you how to transfer any color, or black/white, photo onto a craft surface using Mod Podge photo transfer medium. This amazing technique looks great on totes, onesies, candles, and more! ** Important: Please note that the Mod Podge Photo Transfer must be used with a Dry toner copier ONLY.**

Plaid’s channel offers inspiration and ideas for creative living. Use our trusted techniques and how-to’s, crafts, entertaining, holiday projects and more to add a dash of DIY to your life!
Рекомендации по теме
Комментарии
Автор

I use a different technique that works great for transferring images onto both glass and wood. I wanted to use an image to put onto an old bottle, but we only have an inkjet printer. Images/ink can run when printed using an ink jet printer, so I bake the images first (electric oven) to set the ink. Put printed image into cold oven, set to 175 degrees, then once the oven has reached 175, turn it off and leave printed image in for 20 minutes. Using Mod Podge Gloss, brush on a coat (not too much) of the MP directly onto your image and let dry. Some people simply use white school glue, but MP is my preference. Please note that some ink may still smear. I personally put on 3-4 layers of MP, letting it dry in between each coat. Cut out your image leaving a small border and then put image side down on a flat surface. Using a damp washcloth or clean rag, dampen (not soak) the back paper side of the image and let sit for 2 minutes. With a dampened washcloth, gently work in circular motions on small sections at a time and begin to remove the damp paper backing. It's important to use only gentle pressure while rubbing the paper off. Your fingers can help, as well. Soon you'll begin to see the clear image, but it's important to note if your image has a white background, the white color background will likely be removed, too. The whole process of removing the paper background typically only takes about 5 minutes depending on how large it is. You'll be left with what looks like a vinyl sheet with only your image that's still coated with Mod Podge. Make sure your image isn't too wet, trim the border, then prepare the project surface (in my case an old wine bottle) with a thin layer of Matte MP. Carefully position your image onto your project surface and begin to smooth it out working from the center outward to prevent air bubbles. A sheet of plastic wrap stretched out while pressing down can help this step. Wipe off any excess Mod Podge that may ooze out from beneath the image. Allow to dry and then put a coat or 2 of either Matte or Gloss MP over your image to seal it. Although the MP will act as a sealant, some people like to add a layer of spray acrylic sealer, as well. Hope this helps!

marybirder
Автор

Good toot! Specific info, not loaded with useless chatter, and the waiting times/drying times are good guides for us newbies.

thomasdillon
Автор

Wow :) thank you so much for this wonderful demonstration :) I'm just about to go into business transfering old theatre posters etc onto t-shirts, cushions and everything if I can :D and this is a great demonstration to watch to get the ideas flowing :) Thank you again xx

nekodaisy
Автор

** Important: Please note that the Mod Podge Photo Transfer must be used with a Dry Toner Copier only. Thank you for watching and we apologize for any inconvenience. 

plaidcrafts
Автор

the clearest method ive seen (and ive watched a few) great after care advise too btw - thank you

jackyh
Автор

Love watching you guys. I miss seeing your crafting show. I use to watch you when I lived in Texas about 10 years ago. I’m glad I found you site on you tube.

sherryrector
Автор

Lol! At 4:12 I thought he was going to say 2 months! 😂😂

rm.makes.me.smile_
Автор

Never thought I’d buy mod podge. Today I did because you guys kept giving me lots of cute crafting ideas haha. Thank you ❤

shaunah.creations
Автор

Thank you for this tutorial super helpful, just getting into mod podge and so very excited to learn all these amazing things that can be done with it!❤

steph
Автор

Finally a video that specifically tells you how to do it. Thanks so much!

susanadaribel
Автор

WOW! Thanks y'all, I've been wondering how to do a transfer thats simple.

collettecaraway
Автор

Hi, It needs to be a toner copy of the image. You will most likely have to do this at a kinkos type place. It can be a black or white copy and it works best on plain paper (not the thick kind).

HandmadeHappyHour
Автор

Can you do this technique with an image from an inkjet printer or does it have to be from a laser printer?

janehouck
Автор

I just bought and used this product to transfer a photo I printed on regular computer paper to a t-shirt. it worked I wish I could upload a photo of the shirt to show you!

stvnixrcks
Автор

Hi Cathie & Steve; just wondering a couple of things; you printed the image on regular copy paper?  Also, if I wanted to transfer a photo to a metal tin or acrylic piece, would you seal it with Mod Podge as well?

AbbyAvon
Автор

Awesome presentation. Thanks for sharing. Haven't thought of doing it on cloth.

philippmorris
Автор

Does it have to be a laser print or can it be inkjet print to start with the image?

Fancylooks
Автор

 One of the best "how to" videos

msscappoose
Автор

How many washes before the color disappears ?

sheyl
Автор

Thank you for the video! It was super helpful! The transfer worked on cold press watercolour paper nicely!

semiraselman
join shbcf.ru