filmov
tv
How to Install an Insinkerator Garbage Disposal - PlumbersStock.com

Показать описание
Instructions:
0:23 – Overview
0:31 – Prepping the Unit for Installation
0:39 – Installing the drain gasket/seal, setting the drain
1:15 – Installing the Quick-Lock mounting system
1:33 – Installing Fiber-Gasket, Backup-Flange and Mounting Ring
1:53 – Installing Trimming Plumbers Putty Seal (if used)
2:06 – Installing Tail-Pipe Gasket
2:14 – Installing Discharge-Tube and Flange
2:37 – Identifying Dishwasher Drain hose insertion/how to prepare it to receive a dishwasher
3:09 – Information about (pigtail) Electrical Cord Note: install of cord will be in another video
3:35 – Mounting the Insinkerator unit to the sink via the Flange Body and Mounting Flange ring
4:06 – Align the Insinkerator drains to the plumbing
4:12 – Installing the plumbing
4:22 – Final instructions/plugging in the unit
What you'll need for install:
Plumbers Putty:
Garbage Disposal Jam Buster Key:
Channellock Wrench:
Multi-tip Screwdriver:
Utility Knife:
**If you're understand how incredible Milwaukee products are and would rather use the Fastback Flip utility knife (discounted) use the following link.
**If your garbage disposal unit lacks a power cord, this is what you'll need.
*** If you have removed the knockout plug to the dishwasher by mistake, plug with a dishwasher kit and threaded PVC plug, linked below.
In this video West shows us how to install a garbage disposal from Insinkerator. Insinkerator garbage disposals have long been the preffered brand by many homeowners because of their solid construction, quiet operation and dependable performance.
Transcript:
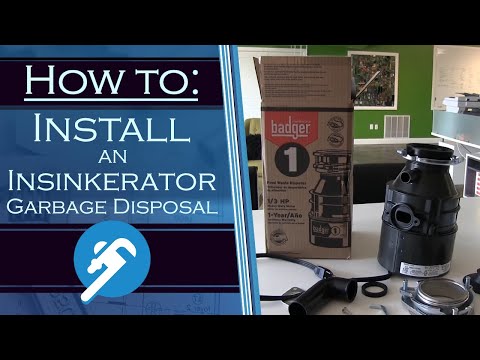
Welcome to our garbage disposal installation video. In this video West Harris shows us how to install an Insinkerator Badger One 1/3 horsepower garbage disposal. This garbage disposal features a powerful 1/3 horsepower engine, a rugged steel construction and an effective sound reduction system.
Start by removing the clip ring and fasteners from the bottom of the garbage disposal drain. You have the option to use the included gasket for your drain or plumbers putty. Using putty over the included gasket may provide a better seal and last longer than the gasket.
Clean sink to prevent debris from interfering with the seal under drain. Once the drain has been seated in the sink you may need help for this next part. Ask someone to hold the drain in place from above while you slide the fasteners into position and reattach the clip ring. Tighten the fasteners down, don't over tighten. If you used the plumbers putty instead of the gasket, clean off any of the excess putty from around your garbage disposal's drain.
Now that the drain is installed we can turn our attention back to the garbage disposal itself. We will start by installing the rubber insert into the drain on the side of the garbage disposal. Then we will slide the chrome fastener plate onto the elbow pipe that is included with our garbage disposal. The flared end of the pipe will be installed into the rubber insert that we just installed inside of the garbage disposal. The metal plate can then be fastened to the disposal to form a tight fit that will prevent leaks.
Above your elbow pipe you may notice a small barbed pipe. If you have a dishwasher, the dishwasher drain pipe can be installed onto this fitting. However, since there is no dishwasher involved in this installation we are going to simply let it be.
It is now time to install the garbage disposal. Installation is simple but be careful since garbage disposals are very heavy. Simply slip the disposal into place. If you are looking at the disposal from below, the disposal attachment fitting will rotate on in a clockwise direction.
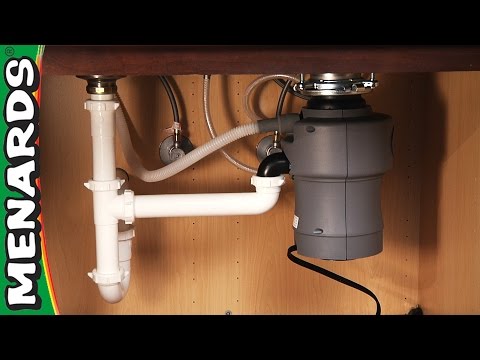
Attach your Garbage disposal drain to your P trap using the hand fasteners. You should now test your connections by running some water down your garbage disposal drain. If no leaks are present, you are now ready to plug in your disposal and test it.
We hope you enjoyed this brief tutorial.
If you find this video helpful, "Like" and "SUBSCRIBE."
Share and Recommend this video to friends on Facebook, Twitter etc.
 0:02:16
How to Install: InSinkErator Food Waste Disposal
 0:04:53
How to Install an Insinkerator Garbage Disposal - PlumbersStock.com
 0:06:55
How to Install: InSinkErator Food Waste Disposer
 0:06:37
Garbage Disposal Installation
 0:00:32
installing an insinkerator garbage disposal
 0:00:45
InSinkErator EZ Install 2023
 0:11:03
How To Install A Garbage Disposal | InSinkErator Badger 5/500 Series
 0:01:01
installing an insinkerator disposal and p trap #plumber #plumbing #diy #oateyambassador #oatey
 0:01:00
How to install InSinkErator Badger 5 Garbage Disposal #diy
 0:02:32
How To Install A Garbage Disposal
 0:02:01
How to install InSinkErator Badger 5 - Shouldit Garbage Disposal Series
 0:04:48
Install ANY Garbage Disposal In 5 minutes!
 0:08:07
How To Install a Garbage Disposal
 0:11:53
How to Replace a Garbage Disposal - Easy, Step-by-Step
 0:02:52
How To Install Instant Hot Water Dispenser - InSinkErator
 0:01:39
How to correctly install an Insinkerator food waste disposal unit in your home - Appliances Online
 0:01:01
how to swap a garbage disposal #plumber #plumbing
 0:32:27
How to install a garbage disposal
 0:07:42
How to Install a Garbage Disposal - Insinkerator Evolution
 0:04:52
How to install replace garbage waste disposal insinkerator 45+ with new model 46
 0:04:14
How to Install insinkerator Garbage Disposal Power Cord - FAST & EASY
 0:07:37
DIY - How to Replace a Garbage Disposal Insinkerator
 0:03:36
How To Install a Garbage Disposer | Menards
 0:08:16
Replace an Old Badger Disposal with a New One Fast!
Комментарии