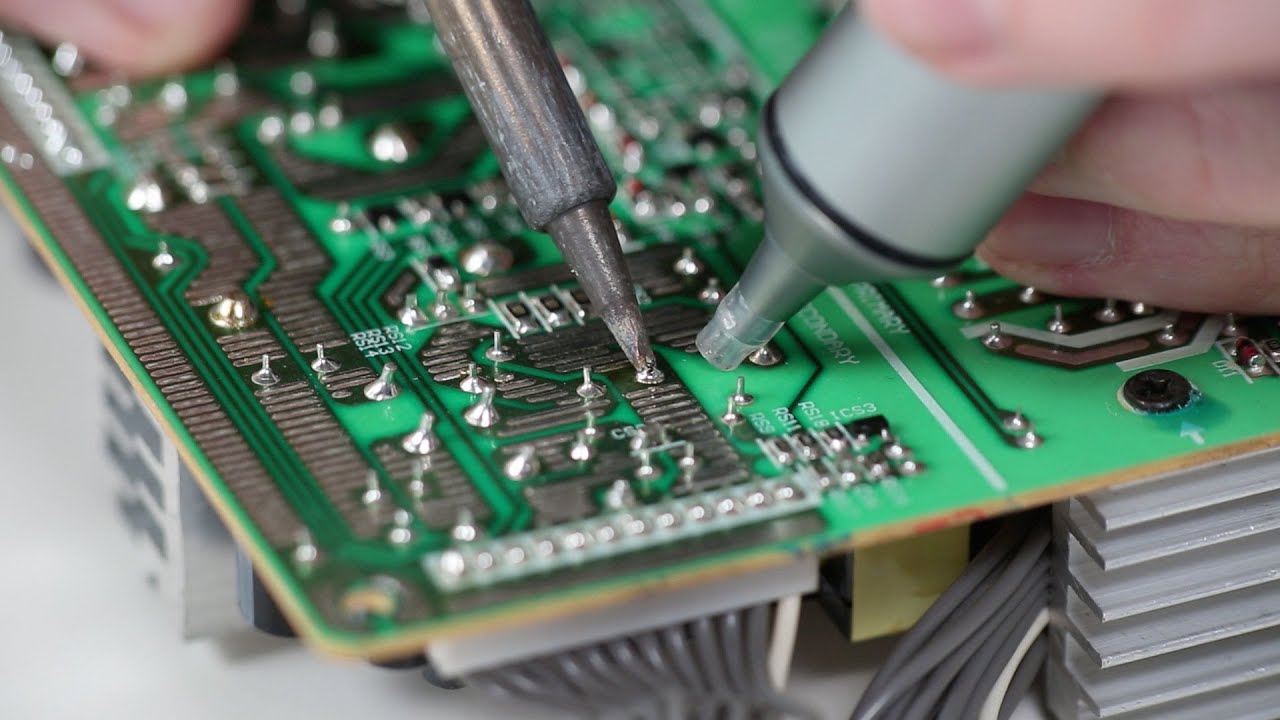
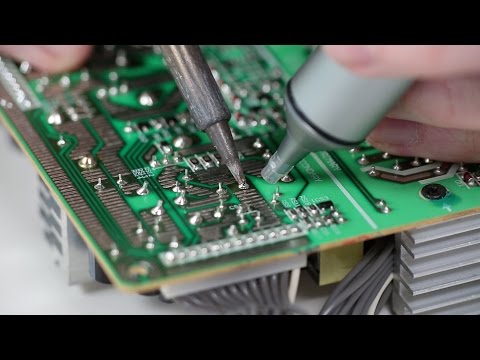
Collin’s Lab: Desoldering

preview_player
Показать описание
Learning to remove a sturdy connection is almost as important as knowing how to make it in the first place. Electronics repairs, modifications, hacking, and salvage all necessitate one important skill - desoldering. Join Collin as he explains the basics of the electronic maker's undo button.
-----------------------------------------

-----------------------------------------
Рекомендации по теме
Комментарии
Автор

thumbs up 10/10. his unique style of electronics education, with his slow/clear voice and simple explanations, is highly accessible i think to electronics newbies, and those who may have english as a second language.. a great asset to humankind!

firstnamelastname
Автор

It's good to see you on YouTube again, Collin. Nice camera work, nice info, nice everything!

AppliedScience
Автор

I'm finding desoldering a real pain. Thanks for the humorous attitude. It's just what I need. And there are some big tips here too.

dangervich
Автор

So this is what Agent Smith is up to these days

theshadowman
Автор

I can't begin to tell you how helpful your videos have been to me Collin. I've been building synthesizer modules for the past year and you've saved me a ton of time and taught me a great deal. Thanks for all the effort!

LowerWestSideStudio
Автор

Great presentation style. Collin you rock. None of the excitable presentation style or product promotion, just to the point and simply explained with a touch of humour. 10/10. More education clips like this are needed!

skar
Автор

I love his suit. He looks like he's ready to take over Wall Street. Or the Matrix.

richardhall
Автор

I've finally been able to replace the switches on my mouse (G Pro Wireless) that started doubleclicking. Thanks buddy. I love slow and clear explanations that give you the time to assimilate the information. The camera work is great too.

MasterOfInfinity
Автор

LOVE Colin's Lab videos! (wish they weren't so infrequent though!)

torjones
Автор

Thank you, you are a hero!! I just replaced the Lclick switch on my Logitech G402 mouse. It took me an hour to remove the 3-pin switch because there was no space to hold on to the switch on the other side as i had planned. I had to de-solder whole prying it. It was a lot of work. I am going to order the Desoldering Pump and Desoldering Braid. Thanks again!! Now my mice will be repaired easily, hopefully.

ultraali
Автор

I know this is super old, but I just did my first solder today. I wanted to do something simple, so got a little blink pack that turns lights on and off. They linked to your channel for desoldering tips. Thanks a lot. This was super helpful. I was wondering what the wick was for and why my setup came with a weird suction thing. Thanks a lot for providing info to newbies like me!

TheUngracefulRider
Автор

He looks like someone out of the matrix and I love it.

HiLo__.
Автор

This is really good. Clear instructions, detailed camera work, and a pinch of goofy humor.
That's funny. I'm gonna see if I can repair my mouse, now; thank you!

LathyrusRoots
Автор

Glad to see new Collin's Lab videos. I enjoy his quirky delivery.

I find it interesting that he was saying to use desoldering braid for "dealing with a large amount of solder". I generally thought of it in the opposite. I would use my solder sucker for quickly sucking up the majority of the solder joint, and then using my solder braid to get the last little bit of solder to free the component lead from the side of the through-hole plating. (Chem-Wik flux impregnated solder wick for the win!) Granted, all my solder suckers have the heat-resistant rigid nozzles so in order to get a good "suck" I had to quickly remove the iron and push the nozzle flat on the PWB just as I'm pressing the button in. I guess I never liked the waste of filling up inches of solder braid on one desoldering action, especially when I was the one paying for consumables. I should get myself one of those solder suckers with the heat resistant flexible tips one of these days...

I also use solder braid for cleaning excess solder from the pads (both THT and SMT pads) before applying new solder. Hold the braid against the board with the iron tip and gently wipe.

Sembazuru
Автор

To remove SMD passives, simply put a large blob of solder on the iron tip, lay the tip on the part, and slide the blob between both joints quickly. The part will wipe off with very little effort.

Always be careful cutting apart headers while they are still soldered to the board. The pins will be forced apart from each other and this puts a lot of stress on the pads. You can easily damage a board. I recommend sliding the plastic separator off of the pins instead of cutting it.

Chip Quik is awesome for removing SMD ICs, but remember that the alloy is specially designed to create WEAK, easily removed joints. You don't won't Chip Quik to remain when you solder on the new part. After removing the old part, you should wick up all of the Chip Quik, then flood the pads with fresh solder, and wick again. This is to ensure that as much of the Chip Quik as possible is gone.

dwDragon
Автор

There is something special in his videos that makes me not forget.

AzVidsPro
Автор

I had a solder-sucker in my beginner’s kit the whole time and I didn’t know what it was for. Thank you!

reeloriginal
Автор

+Adafruit Industries Seriously, we need MORE Collin and MORE frequently.

isaiahnelson
Автор

that music in background 🤩🤩!!! MIB 👍👏🤝🤩 soldering looks cool now after watching this video🤝🤩

kuzuriii
Автор

both videos are quick and straight to the point

zarithevill