filmov
tv
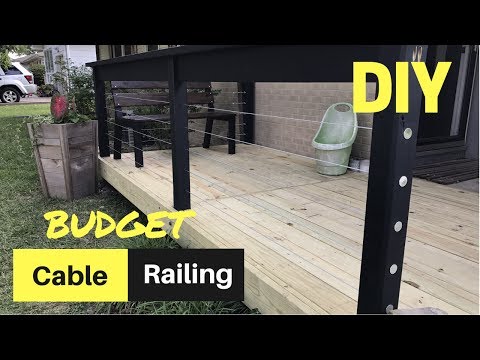
CHEAP & EASY DIY Cable Deck Railing

Показать описание
This is a video of how we installed cable railing on our ground level deck and saved a lot of money in the process by using common hardware store items. Kits to do this can cost hundreds of dollars, and we did it for less than $60. If I was doing it again, I would use stainless steel cable to prevent rusting.
THIS IS A METHOD FOR GROUND LEVEL DECKS, I WOULD NOT RECOMMEND THE SMALL ELEVATOR BOLTS FOR A HIGHER STRUCTURE. I WOULD USE LARGER BOLTS AND RETAIN THE CABLE ON BOTH ENDS TO NOT JUST RELY ON FRICTION FOR AN ELEVATED DECK. ALWAYS CONSULT YOUR LOCAL BUILDING OFFICIAL AND PULL THE REQUIRED PERMITS BEFORE YOU BEGIN WORK.
Tools:
Drill
9/64" all purpose drill bit (to drill through bolt threads). If you flatten the threaded part of the bolt with a hammer or Dremel tool a little bit, it makes it easier to drill and leaves a little more metal on the outside of your hole.
1/4" drill bit (to drill through posts for cable and for eyelet bolts)
Forstener Drill Bit (pick a size that is smaller than the diameter of the bolt head you use) I believe I used a 7/8" or 1" bit.
Bolt Cutters (for crimping cables ferrules)
Fencing Pliers (for cutting the cable)
Crescent Wrench (for tightening eyelet bolt nuts)
Materials:
should be able to find all of this at your local hardware store...
1/8" Cable Ferrules/crimping sleeves (pack of 15)
1/4" x 7-1/2" Steel Hook Turnbuckle with Aluminum Body
1/8" Galvanized Cable
Optional 1/8" Stainless Cable (recommended for rust prevention)
1/4"-20 x 1" Elevator Bolts (or any other bolt of your choice)
3/8" inside diameter-thick washers
 0:08:52
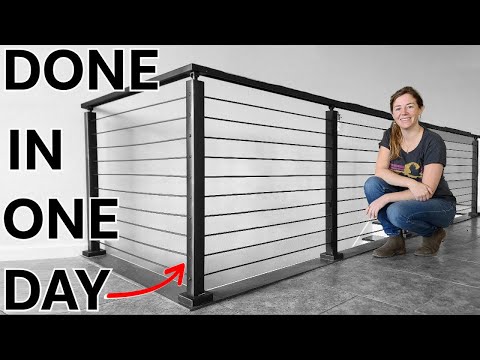
Super cheap DIY Cable Railing
 0:17:12
How To: DIY Cable Pulley Home Gym System for $25
 0:08:02
Easy Cable Stair Railing | The Best DIY System
 0:08:37
CHEAP & EASY DIY Cable Deck Railing
 0:02:14
DIY $1 Homemade Wire Stripper - Copper Cord, ROMEX, & Aluminum Cable Cheap Stripping Device Tool
 0:00:50
DIY Cable Hack: Save $200/Year!
 0:00:55
DIY wire stripper. Simple and SAFE
 0:00:36
Simple DIY cable connection hack 🔧 #diy #shorts
 0:00:27
DIY Dump Trailer Cable Install: Quick & Easy!
 0:00:11
DIY Cable Organizer Hack 😂 #lifehacks
 0:01:00
Easy DIY Snake Cable for 4CM/5CM Setups
 0:00:46
How to connect steel cable without accessories #diy #tips #tipandtricks
 0:00:41
HOW TO ORGANIZE CABLES WITH ZIP TIE #tips #diy #tutorial #youtubeshorts #lifehacks
 0:01:01
FASTEST and EASIEST Cable Railing Installation! #railing #diy
 0:00:36
Modern your deck with DIY cable railing #diyhome #diyhomeimprovement #diyhomerenovation
 0:00:28
DIY Cable Reel | TikTok: @kuvaldaru.ru
 0:00:45
Woman Makes a DIY Cable Organizer With Magnets || ViralHog
 0:00:34
DIY Wire Stripping Jig
 0:00:22
AMAZING TOOLS | DIY Wire Tensioning System #WireTensioning #Tools
 0:00:22
Simple diy cable organiser #cableorganizer #tableorganisers #charger #chargerorganiser #papercrafts
 0:00:21
How to make DIY Cable Organizer
 0:00:29
DIY wire shelf coverings! #diy
 0:00:39
DIY Cable, Clips and Thimbles | Make a Wire Rope with Loops | #shorts
 0:00:16
Easy And CLEVER DIY Cable Organizer #shorts
Комментарии