filmov
tv
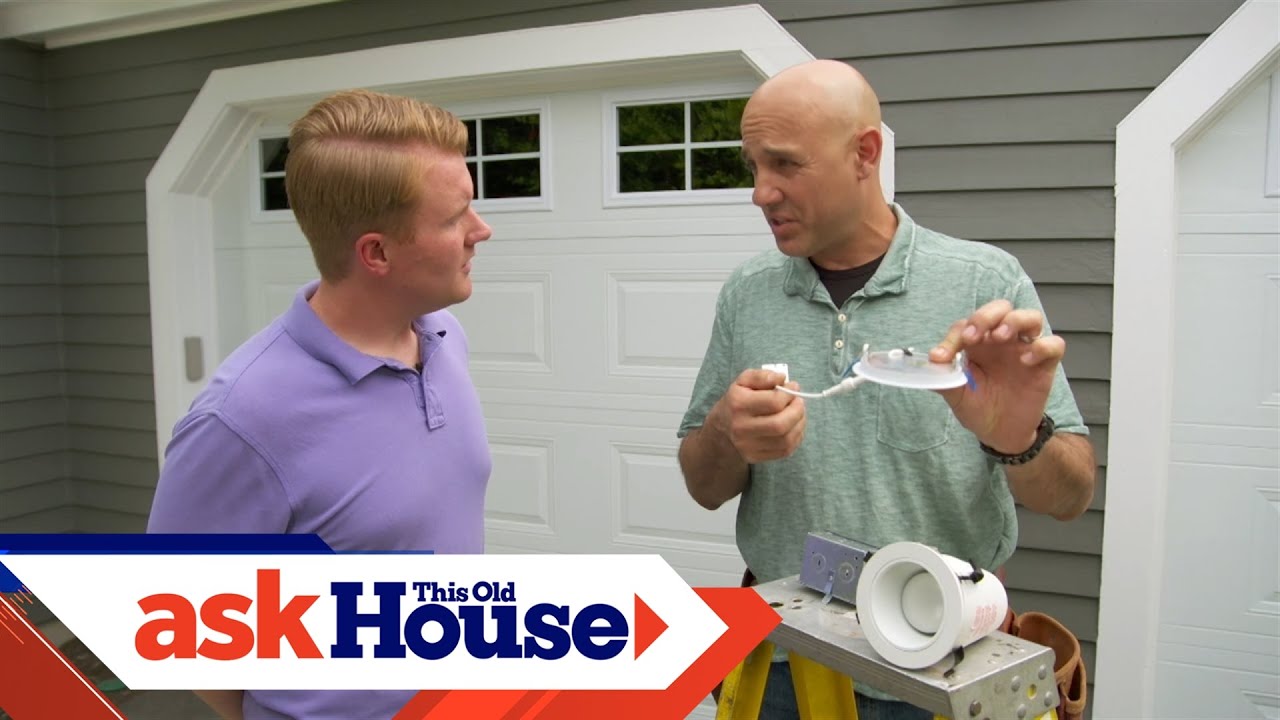
How to Install Ultra-Thin Exterior Lighting | All About Lights | Ask This Old House
Показать описание
Scott installs ultra-thin, LED lights on a garage to replace a broken flood light.
#ThisOldHouse #AskTOH
Time: 2-3 hours
Cost: $120-150
Tools:
Pliers
Hole Saw
Screwdriver
Wire nuts
Shopping List:
LED lights
14-2, NM electrical wire
Astronomic Timer Switch
Steps:
1. Before doing any electrical work, ensure power is turned off at the breaker. Confirm the power is off using an electric tester.
2. Remove the current light fixture and disconnect the wires.
3. Measure and mark where each new light fixture will go, maintaining even spacing.
4. Use a hole saw to drill openings for the new lights.
5. Fish 14-2 electrical wire from the main power source to one fixture. Fish wire to any additional fixtures
6. Make the electrical connections to each junction box and tie the wires together using wire nuts.
7. Clip each LED light into its hole.
8. Replace the existing light switch with an astronomic timer switch that will automatically turn the lights on at dusk.
9. Restore power at the breaker and test the lights and switch.
About This Old House TV:
This Old House is the No. 1 multimedia home enthusiast brand, offering trusted information and expert advice through award-winning television, a highly regarded magazine, and an information-driven website. This Old House and Ask This Old House are produced by This Old House Ventures, LLC and are presented on PBS by WGBH Boston.
Follow This Old House and Ask This Old House:
How to Install Ultra-Thin Exterior Lighting | All About Lights | Ask This Old House
 0:04:02
How to Install Ultra-Thin Exterior Lighting | All About Lights | Ask This Old House
 0:03:47
How to Install an Ultra Thin LED Downlight Outdoors | 1000Bulbs
 0:09:14
How to Install Recessed LED Soffit Lights - Amazon Ultra Thin 4-inch Recessed LED Retrofit
 0:03:48
Upgrade OLD Lights to Modern LED Lights in Under 30 Seconds with NO Wiring !!!
 0:06:28
How to install BAUSTONE | The 3mm Innovative ULTRA-THIN EXTERIOR WALL CLADDING | Nanostone®
 0:04:43
LED Wafer light Warning!
 0:02:59
Easy Formula for Recessed Light Spacing
 0:02:46
How To Install Ensenior Ultra Thin LED recessed Ceiling Light Review
 0:08:51
How To Install An Exterior Light And 3 Common Mistakes To Avoid
 0:05:11
Canless recessed light installation in soffit.
 0:00:29
How to install surface mounted led panel lights?
 0:05:28
LED Recessed Lighting--5 THINGS TO KNOW!! (Can Lights/Downlights/Recessed Lights)
 0:17:17
Recessed Lighting Install with No Attic or Prior Wiring
 0:07:14
How to Install Recessed Lights | Easy DIY LED Install
 0:03:37
Ultra-light natural stone facade | Installation | Stonesize by TINO ®
 0:03:49
Installing Low-profile, Canless LED Lights
 0:05:24
Recessed Light Installation | The BEST LED Wafer Light Is...
 0:06:18
EASY Setup Smart Recessed Lights | Google, Alexa, Siri (OREIN)
 0:02:56
Ceiling Light Installation The BEST New LED Light Is...
 0:26:05
HALO Just Changed the Recess Lighting Game with THIS!
 0:09:21
UPDATED: How to Install Ultra-Slim Recessed LED Lights || No Hole Saw, No Problem
 0:10:04
Eaton Halo Ultra Thin LED Light Installation
 0:00:29
HALO Recessed RL Night Light Canless Direct Mount
 0:03:03
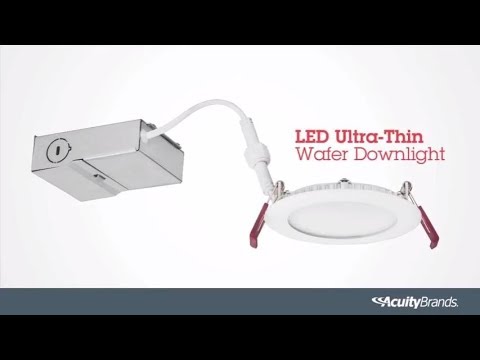
How to Install an LED Ultra-Thin Wafer Downlight | Lithonia Lighting
Комментарии