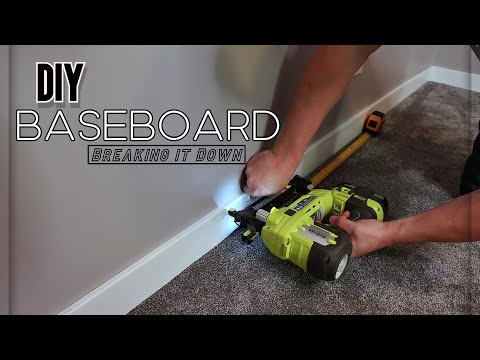
How to install baseboard and corners like a pro

preview_player
Показать описание
Learn how to install baseboard, as well as outside corners for a seamless look. I show little tips and tricks that can make or break a good job from a great job. They aren't overly difficult to do, but professionals won't show you them. It doesn't matter what type of trim you have, the technique is the same.

Help support the channel and the things I can show by using the links below, it costs nothing to use them, but helps me out so I can help you!

- Tools/Materials Used (affiliate)
For Canadian Buyers:

For USA Buyers:

*****************************************
Jesse Does DIY links:

Other Channel with Slade:
Рекомендации по теме
Комментарии
Автор

I just retired and now have time to do things I have never done before around the house and of course, fits into my new budget. Unlike all the other many DYI guys who shoot these types of videos what I like about you is that you go into the detail so many other people assume you have a clue about and make DYI for people like me understandable and relatively easy. Watched several projects of yours which frankly I have found informative and the details matter you do a great job for the underskilled novices like myself so thank you! John in Georgia

JOHNRENAUDETTE
Автор

Little tip: cut your outside corners at 45.5° so that the gap is in the back (against the wall) instead of in the front (where you see it). Nice video man!

sweatygoats
Автор

I’ve watched so many videos on this and not yet has anyone mentioned the mark you made to remind you which way the angle needs to go, THANK YOU!

alexisdunham
Автор

So refreshing to see someone take pride in their work. Excellent job and video!

edwardmanning
Автор

You mentioned 'silicone' as the caulking you were applying in the joint. The product you used is a latex product and paintable - which is great!. Just want to make sure others don't use regular silicone to seal the joint. You'll be in for a surprise when you go to repaint down the road as most silicones are not paintable. Great tips in the video. Kudos.

twowheeledsmurph
Автор

gotta reply back from my previous post to you and simply put keep doing it your way so folks like myself with the tools but no experience can get the most for the buck and you will be successful at what your doing here and what more can anyone ask but know your subscribers and fit there needs. So for so Dam good guy. Once again thank you.

JOHNRENAUDETTE
Автор

I am a full time inside trimmer, and I would recommend using glue and pin nails to nail the corners together and make sure there is no gap, also if there is a bit of over lap where one piece of base is standing a bit further out from the other one I would recommend using car bando, letting it dry for About 30 with the use of a creamer hardener and using a sander to sand out the excess and stains of the bando

trd_jd
Автор

Fantastic video! Thank you! I've been struggling with my baseboards for a while now, I live in a 80+ year old house and the walls and floors are all concrete and a bit wavy and have round corners so it's been a hassle trying to get everything to match perfectly. This definitely helped! Keep up the great work mate 🙂

helgioskarsson
Автор

Nice. Only thing I'd add is that "painting the nail holes" will leave clear sheen blotches where each nail was touched up with such a large brush. Either use a fine artist brush to just cover the filler, or use white putty (Minwax or similar) specifically made for filling nail holes. It comes in various colors. Easiest would be the artist brush. If your intention is to put an entire 3rd coat on, then just use a regular paint brush like in the video. -Awesome dog.

jrmorrissey
Автор

this is one of the best baseboard videos i have seen . Thanks very much.

petefrost
Автор

Painter's Tip: use 33 latex window glazing putty to fill nail holes. No sanding, instantly paintable, doesn't shrink.

paintingbymoyralyn
Автор

Nice video. I would suggest a few things in the finishing process. If you use your finger to fill the holes you will have excess on the surface and your finger can leave the putty indented. I use a putty knife to put the nail filler in to leave it flush with the trim. When it is dry sand lightly with 220. Following that I would suggest painting a quick coat over the whole baseboard to avoid flashing spots. It will have a better final finish. And this would cover all the caulking that was just put on as well. Then cut the wall paint into the trim for a perfect line. I agree that in a perfect scenario to pre-paint the baseboard if possible. That makes it much easier with the final coat to not have to worry about cutting tight to the floor. Nice job!

BorsellinoHomeServices
Автор

This is pretty close to what I do especially with outside corners. Gluing and taping the joint really makes a clean corner.

If you want to speed up your install and reduce finish work rather than running nails and having to fill them, I use liquid nails (or other construction adhesive) in a wave pattern on the back of the baseboard/trim/casing. This speeds up install immensely and with. I nail holes all you have to do is chalk and paint. This is especially helpful on trim elements that have an intricate design.

Just_Chuck_It
Автор

Don’t know how many baseboard videos I’ve watched but yours was so helpful and informative, thank you!!

mydao
Автор

I’m doing baseboards in a week. This video is going to be my go-to reference. Well explained, thanks!

jasonrobinson
Автор

Very good tutorial for *DIY* Homeowners.
Pros never make multiple cuts on the 45*, side too many ways to make a mistake, always cut the other flat 90* side.
Now take both sides outside and glue tape & nail, no need to wait for the glue to dry. Take inside and install.
Also, make two corner samples, place in corners and position till tight fit. Measure from outside corner to other side, do that in both directions. Glue nail install..
Always a perfect fit.

mansardmanor
Автор

I Always Enjoy Watching Other Carpenters How To And Tips And Tricks Videos For That Evolving Door Of Information Within Our Trade...
Maybe Because Of Miami’s Weather, We Have The Tendency To Caulk All Our Outside Corners...
I Will Do Them, BUT The Two Things I Have No Care For Is Plumming And Painting, LoL...My Dad I Believe Dislikes Them More Than I Do...Probly Exactly Where I Got It From!!!
Keep It Goin Man...I Just Subscribed💯🛠💪🏽🛠💯

jacktownmdc
Автор

10 stars for neatness and perfection! I have to do ceiling trim which is actually footing or something, not sure I have the patience or eyesight to do this up so high, lol. Tfs, Laura

littleluluscraps
Автор

If using MDF consider using a bit of oil primer before water based paint because the MDF will suck up all the water - if you seal it you will have better results

SixStringStrumming
Автор

This was a great video. Excellent clear and detailed instructions to help someone go from a good job to a great job with attention to detail. People will find it easy to follow and build skills.

frankloucks