filmov
tv
Baseboards Used to Be Difficult

Показать описание
My favorite tips and tricks for how to install baseboards with perfect corners, inside joints, and more! I spent the last week installing custom milled Sapele baseboards and door casing throughout much of my house. However, I have only done paint-grade baseboards prior to attempting this project. So I had to become an expert finish carpenter quickly. Or at least close enough to an expert that people wouldn't judge me when they came over and saw the work of someone who makes their living as a woodworker. These are my favorite tips and tricks to get perfect baseboards, even if you aren't a professional. Check out my blog post for even more tips and tricks that couldn't fit into this video!
Links to items used in this video:
0:00 Intro
0:19 Finish Baseboards Before Installing
0:57 Easy way to find your miter angle
1:50 Measure Trim In Place
2:07 Glue Outside Baseboard Miters
2:52 Sliding T bevel Finish Carpentry
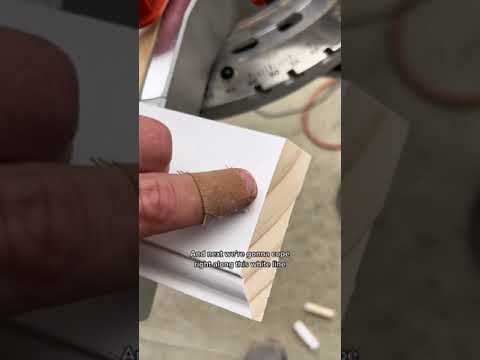
4:24 Coping, The Easy Way
6:15 Adding Cap to Hide Gaps Behind Baseboards
7:15 Fixing Gaps in Baseboard Miters
8:15 Filling Nail Holes In Painted and Stained Baseboards
10:59 Troll of the week
Links to items used in this video:
0:00 Intro
0:19 Finish Baseboards Before Installing
0:57 Easy way to find your miter angle
1:50 Measure Trim In Place
2:07 Glue Outside Baseboard Miters
2:52 Sliding T bevel Finish Carpentry
4:24 Coping, The Easy Way
6:15 Adding Cap to Hide Gaps Behind Baseboards
7:15 Fixing Gaps in Baseboard Miters
8:15 Filling Nail Holes In Painted and Stained Baseboards
10:59 Troll of the week
 0:11:14
Baseboards Used to Be Difficult
 0:07:22
How To Install and Paint Baseboards- It Doesn't Have to Be Difficult!!!
 0:01:00
Don't Cut Your Baseboards at 45 DEGREES! Do THIS INSTEAD!
 0:13:21
How to Install Baseboards - Step-by-Step for Beginners
 0:03:24
BASEBOARDS WITH NO ANGLE FINDER! VERY EASY WAY
 0:05:26
After 30 Years I Finally Learned The Best Way To Remove Baseboards!
 0:06:17
How Pros Cut Molding Inside Corners
 0:00:13
TRIM A WINDOW WITH ME - install window trim and sill #diyhomedecor #homeimprovement
 1:00:01
HSN | HSN Today with Tina & Friends 03.10.2025 - 08 AM
 0:10:19
Should You Caulk Your Baseboards To Your Floor? Pros And Cons! DIYers Great Controversy!
 0:03:39
The Two Things They Don't Tell You About Nailing On Trim!
 0:00:35
Skirting boards or baseboards obtuse external angles
 0:06:22
How To Paint Baseboards- The Easiest Way to Professional Results!!!
 0:01:00
Quick tip on coping baseboard #DIY #Trim
 0:10:44
You're a 'HACK' if you use 1/4 ROUND TRIM or SHOE MOLDING…Right?
 0:04:16
Painting Baseboards like a PRO! The Missing DIY Tip Revealed
 0:00:49
Avoid This Ford Bronco at All Costs
 0:00:19
How I Trim My ANGRY French Bulldogs Nails
 0:04:40
Caulking Trim and Baseboards
 0:03:21
The #1 Beginner Trim Mistake & How to Avoid It / How to Measure & Cut Mitered Corners
 0:17:49
Use THIS Baseboard IDEA on Your Next Project!
 0:02:48
How Hard Is It to Install Baseboards? - LearnToDIY360.com
 0:13:08
EASY FARMHOUSE BASEBOARDS - How to add farmhouse baseboard trim
 0:15:57
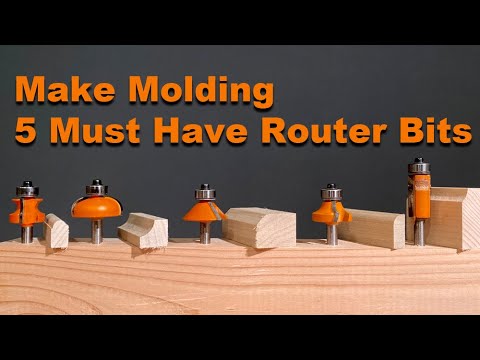
My 5 Most Used Router Bits & How to Make Moulding
Комментарии