filmov
tv
Introduction to Arduino

Показать описание
What is Arduino?
Arduino is an open-source electronics platform based on easy-to-use hardware and software. It is designed for creating a wide range of digital projects, from simple circuits that control lights and motors to complex systems that sense and interact with the world. Arduino makes it accessible for beginners and powerful for experienced users, allowing anyone to bring their creative ideas to life.
Different Types of Arduino Boards
There are many different types of Arduino boards, each suited for different types of projects.
Some of the most popular Arduino boards include:
Arduino Uno: The most common and beginner-friendly board, featuring an ATmega328P microcontroller, 14 digital I/O pins, and 6 analog input pins.
Arduino Nano: A compact, breadboard-friendly version of the Arduino, ideal for smaller projects.
Arduino Mega: A more advanced board with 54 digital I/O pins and 16 analog inputs, suitable for complex projects.
Arduino Leonardo: Features a USB interface directly on the board, making it suitable for creating USB devices like keyboards or game controllers.
Arduino Due: A more powerful board with a 32-bit ARM Cortex-M3 processor, great for high-performance applications.
Arduino Nano Every: A more powerful version of the Nano, designed for efficient, low-power projects.
What Can You Do with Arduino?
Arduino can be used for a wide range of projects, including:
Building robots that can move, sense, and interact with their environment.
Creating smart home automation systems (controlling lights, temperature, and appliances).
Developing interactive art installations.
Prototyping electronic gadgets and devices.
Building scientific experiments, like temperature and humidity sensors.
Learning and teaching electronics and programming.
A Simple Example: Blinking an LED
Let’s start with the simplest Arduino project – making an LED blink. This project will help you understand the basics of Arduino programming and controlling digital outputs.
Components Required
Arduino Uno board
USB cable
Arduino IDE (Software)
The Code
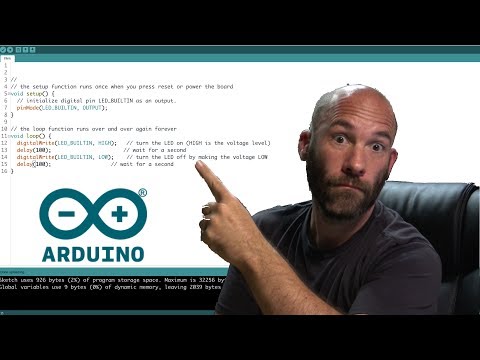
Here is the complete Arduino sketch that will make the built-in LED on your Arduino Uno blink on and off every second:
// Pin number for the built-in LED on Arduino Uno
const int ledPin = 13;
// Setup function - runs once when the Arduino is powered on or reset
void setup() {
// Set the LED pin as an output
pinMode(ledPin, OUTPUT);
}
// Loop function - runs continuously
void loop() {
// Turn the LED on
digitalWrite(ledPin, HIGH);
delay(1000); // Wait for 1 second (1000 milliseconds)
// Turn the LED off
digitalWrite(ledPin, LOW);
delay(1000); // Wait for 1 second (1000 milliseconds)
}
How It Works
The setup() function runs once and sets the LED pin (pin 13) as an output.
The loop() function runs continuously, turning the LED on and off with a 1-second delay between each state.
Uploading the Code
Open the Arduino IDE.
Connect your Arduino Uno to your computer using a USB cable.
Copy and paste the above code into a new Arduino sketch.
Select the correct board (Arduino Uno) and port in the Arduino IDE.
Click the "Upload" button.
Arduino Nano: A compact, breadboard-friendly version of the Arduino, ideal for smaller projects.
Arduino Mega: A more advanced board with 54 digital I/O pins and 16 analog inputs, suitable for complex projects.
Arduino Leonardo: Features a USB interface directly on the board, making it suitable for creating USB devices like keyboards or game controllers.
Arduino Due: A more powerful board with a 32-bit ARM Cortex-M3 processor, great for high-performance applications.
Arduino Nano Every: A more powerful version of the Nano, designed for efficient, low-power projects.
What Can You Do with Arduino?
Arduino can be used for a wide range of projects, including:
Building robots that can move, sense, and interact with their environment.
Creating smart home automation systems (controlling lights, temperature, and appliances).
Developing interactive art installations.
Prototyping electronic gadgets and devices.
Building scientific experiments, like temperature and humidity sensors.
Learning and teaching electronics and programming.
A Simple Example: Blinking an LED
Let’s start with the simplest Arduino project – making an LED blink. This project will help you understand the basics of Arduino programming and controlling digital outputs.
Components Required
Arduino Uno board
USB cable
Arduino IDE (Software)
The Code
Here is the complete Arduino sketch that will make the built-in LED on your Arduino Uno blink on and off every second:
// Pin number for the built-in LED on Arduino Uno
const int ledPin = 13;
Arduino is an open-source electronics platform based on easy-to-use hardware and software. It is designed for creating a wide range of digital projects, from simple circuits that control lights and motors to complex systems that sense and interact with the world. Arduino makes it accessible for beginners and powerful for experienced users, allowing anyone to bring their creative ideas to life.
Different Types of Arduino Boards
There are many different types of Arduino boards, each suited for different types of projects.
Some of the most popular Arduino boards include:
Arduino Uno: The most common and beginner-friendly board, featuring an ATmega328P microcontroller, 14 digital I/O pins, and 6 analog input pins.
Arduino Nano: A compact, breadboard-friendly version of the Arduino, ideal for smaller projects.
Arduino Mega: A more advanced board with 54 digital I/O pins and 16 analog inputs, suitable for complex projects.
Arduino Leonardo: Features a USB interface directly on the board, making it suitable for creating USB devices like keyboards or game controllers.
Arduino Due: A more powerful board with a 32-bit ARM Cortex-M3 processor, great for high-performance applications.
Arduino Nano Every: A more powerful version of the Nano, designed for efficient, low-power projects.
What Can You Do with Arduino?
Arduino can be used for a wide range of projects, including:
Building robots that can move, sense, and interact with their environment.
Creating smart home automation systems (controlling lights, temperature, and appliances).
Developing interactive art installations.
Prototyping electronic gadgets and devices.
Building scientific experiments, like temperature and humidity sensors.
Learning and teaching electronics and programming.
A Simple Example: Blinking an LED
Let’s start with the simplest Arduino project – making an LED blink. This project will help you understand the basics of Arduino programming and controlling digital outputs.
Components Required
Arduino Uno board
USB cable
Arduino IDE (Software)
The Code
Here is the complete Arduino sketch that will make the built-in LED on your Arduino Uno blink on and off every second:
// Pin number for the built-in LED on Arduino Uno
const int ledPin = 13;
// Setup function - runs once when the Arduino is powered on or reset
void setup() {
// Set the LED pin as an output
pinMode(ledPin, OUTPUT);
}
// Loop function - runs continuously
void loop() {
// Turn the LED on
digitalWrite(ledPin, HIGH);
delay(1000); // Wait for 1 second (1000 milliseconds)
// Turn the LED off
digitalWrite(ledPin, LOW);
delay(1000); // Wait for 1 second (1000 milliseconds)
}
How It Works
The setup() function runs once and sets the LED pin (pin 13) as an output.
The loop() function runs continuously, turning the LED on and off with a 1-second delay between each state.
Uploading the Code
Open the Arduino IDE.
Connect your Arduino Uno to your computer using a USB cable.
Copy and paste the above code into a new Arduino sketch.
Select the correct board (Arduino Uno) and port in the Arduino IDE.
Click the "Upload" button.
Arduino Nano: A compact, breadboard-friendly version of the Arduino, ideal for smaller projects.
Arduino Mega: A more advanced board with 54 digital I/O pins and 16 analog inputs, suitable for complex projects.
Arduino Leonardo: Features a USB interface directly on the board, making it suitable for creating USB devices like keyboards or game controllers.
Arduino Due: A more powerful board with a 32-bit ARM Cortex-M3 processor, great for high-performance applications.
Arduino Nano Every: A more powerful version of the Nano, designed for efficient, low-power projects.
What Can You Do with Arduino?
Arduino can be used for a wide range of projects, including:
Building robots that can move, sense, and interact with their environment.
Creating smart home automation systems (controlling lights, temperature, and appliances).
Developing interactive art installations.
Prototyping electronic gadgets and devices.
Building scientific experiments, like temperature and humidity sensors.
Learning and teaching electronics and programming.
A Simple Example: Blinking an LED
Let’s start with the simplest Arduino project – making an LED blink. This project will help you understand the basics of Arduino programming and controlling digital outputs.
Components Required
Arduino Uno board
USB cable
Arduino IDE (Software)
The Code
Here is the complete Arduino sketch that will make the built-in LED on your Arduino Uno blink on and off every second:
// Pin number for the built-in LED on Arduino Uno
const int ledPin = 13;
 0:16:34
 0:02:22
 0:08:02
 0:22:12
 0:09:52
 0:17:45
 0:09:24
 0:01:01
 0:01:33
 0:56:32
 1:25:31
 0:04:25
 0:10:22
 0:23:53
 0:05:10
 0:07:27
 0:17:21
 0:25:40
 0:04:21
 0:00:42
 0:37:12
 0:18:47
 0:00:19
 0:02:19