filmov
tv
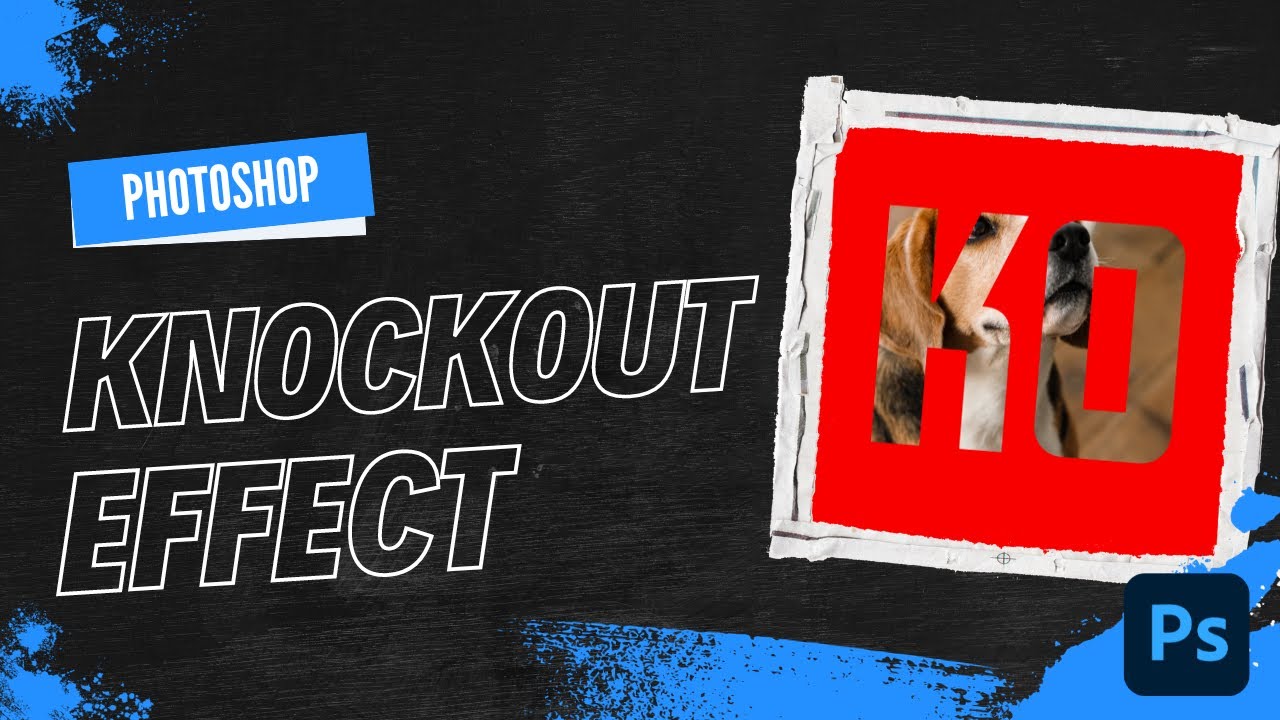
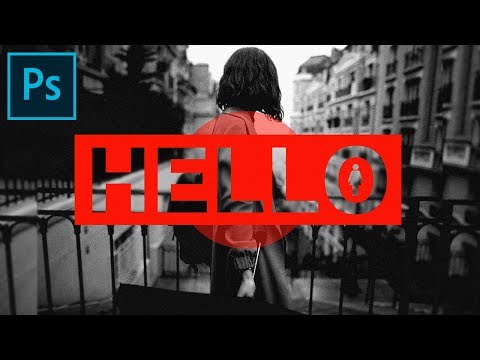
How To Create A Knockout (Text) Effect - Photoshop 2024
Показать описание
Hey everyone! Welcome back to another Adobe Photoshop tutorial. In today's video, I'm going to walk you through the steps to create an amazing Knockout Text Effect in Photoshop. This is a super cool effect that allows your text to act like a window to the background, revealing whatever is behind it. It's a simple process but involves a few steps that may not be immediately intuitive. So, let's dive in! 🎨
📋 Video Timestamps:
00:00 - Introduction
00:20 - Starting with the Background Layer
00:38 - Drawing the Shape
00:52 - Changing the Fill Color
01:08 - Adding Text
01:23 - Resizing Text
01:31 - Advanced Blending Options
01:56 - Adjusting Fill Opacity
02:22 - Grouping Layers
02:35 - Final Result
02:45 - Conclusion
🛠 What You'll Learn:
How to start with a background layer and add shapes to it.
How to use the shape and text tools effectively.
How to navigate through the advanced blending options.
How to adjust fill opacity for the knockout effect.
How to group layers to finalize the effect.
FAQs:
Q: Can I use other shapes instead of a rectangle?
A: Absolutely! Feel free to use circles, polygons, or any other shape you like.
Q: What versions of Photoshop is this tutorial compatible with?
A: This tutorial should work with Adobe Photoshop CC versions. However, the steps are basic enough to be applicable to some older versions as well.
Q: Can I use a different color for the background?
A: Yes, you can use any color you like. Just make sure it contrasts well with your text for the best effect.
If you found this tutorial helpful, please give it a thumbs up, share it with your friends, and subscribe for more awesome tutorials! Don't forget to hit the notification bell 🔔 so you never miss an upload.
 0:02:36
 0:00:43
 0:09:22
 0:02:46
 0:05:19
 0:07:27
 0:02:28
 0:10:51
 0:07:26
 0:04:11
 0:06:05
 0:05:57
 0:09:49
 0:04:07
 0:01:33
 0:05:05
 0:04:55
 0:03:46
 0:01:55
 0:03:35
 0:03:01
 0:01:54
 0:12:41
 0:03:01