filmov
tv
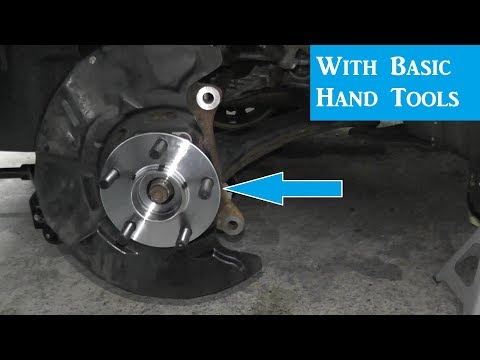
Subaru Wheel Bearing Replacement Without A Press, How To Guide, Quick Version

Показать описание
*Best Priced Tool Links Here!* for Other Tool Options + Time Stamps click OPEN DESCRIPTION
Other Tool Options (Check For Lower Prices Or Higher Quality):
***Slide Hammers***
***Bearing Tools***
The Really Nice Tools:
Note: Prices and brands of linked products may vary. I try to link only currently available products.
Video: Full tutorial on how to change press in wheel bearings. Shows how to replace a bearing without a hydraulic press, and without removing the hub from the car. Please read whole description and look below for time stamped highlights of the procedure.
For more car repair videos, please check out my playlist on the subject:
This is the shorter and more concise version of these steps, though it still includes the full process to change a bearing. I made this version for those who are more mechanically experienced or want to save time. For a longer, more detailed version, please view the video at this link:
I decided to make this tutorial because I could not find a detailed video of the process on YouTube for this type of bearing replacement. Any video I found typically involved removing the entire knuckle from the car and placing it in a hydraulic press. Many videos also show incorrect procedures which may damage this type of bearing.
I attempted to address all these issues by showing how to do this job without a hydraulic press or removing major components from the car. This also means no suspension components are affected and alignment will not change. This is also the cheapest way to change a press in bearing correctly, as the tools needed can be had for around $150.
The car in this video is a 1993 Subaru Impreza. However, this procedure works for many cars from most brands. Especially smaller vehicles from Japanese manufacturers. Even if you have a different car, many of the steps in this video may still apply. Always check the proper procedures for your vehicle, including torque specs. If you have ABS, remember you may need to remove the sensor!
0:00 - Tools required overview
0:20 - Axle nut unstaking
0:48 - Jacking up car, jack stand, wheel removal
0:56 - Axle nut removal
1:05 - Caliper and rotor removal
1:23 - Ball joint castle nut removal
1:44 - Trick for ball joint removal
2:26 - Sway bar link disconnection
2:35 - Ball joint pulling from arm
2:37 - Axle pulling from hub
2:42 - Ball joint reinstallation
2:55 - Hub puller installation
3:02 - Slide hammer installation
3:18 - Hub and bearing pulling with slide hammer
3:47 - Retaining ring removal
3:55 - Outer race removal overview
5:00 - Outer race removal from knuckle
6:43 - Outside seal cutting and removal
7:04 - Inner race cutting and removal
7:56 - Inner race installation overview
9:13 - Outside seal installation
9:50 - Inner race installation on hub
11:18 - Cleanliness and rust note
11:41 - Outer race installation overview
12:04 - Outer race installation in knuckle
13:20 - Retaining ring installation
13:33 - Hub and bearing installation overview
14:05 - Hub and bearing installation in knuckle
15:30 - Inside seal installation
16:36 - Axle and nut reinstallation
17:18 - Ball joint tightening and torquing
17:40 - Rotor and caliper reinstallation
17:56 - Axle nut torque spec and procedure
18:20 - Axle nut tightening and torquing
18:26 - Axle nut staking
18:47 - Sway bar link reconnection
19:11 - Wheel reinstallation, lower car
19:21 - The finishing touch!
19:29 - Thanks! Please like, comment, subscribe!
 0:19:47
Subaru Wheel Bearing Replacement Without A Press, How To Guide, Quick Version
 0:03:55
Subaru Wheel Bearing Removal Hack | All Models 2008 to 2022
 0:20:10
Project 2015 Outback: Wheel Bearing & CV Axle Replacement! Again! No More Noise, For Real This T...
 0:27:06
Removing A Stuck Subaru Rear Wheel Bearing
 0:22:27
How To Change A Press In Wheel Bearing Without A Shop Press.
 0:04:30
2017 Subaru Forester Rear Wheel Bearing Replacement
 0:03:13
The Lisle Hub Remover 40100
 0:04:05
Top 3 Common Mistakes People Make Replacing Pressed In Wheel Bearings on Their Car or Truck
 0:14:39
Why Are Wheel Bearings so Hard to Remove!! Subaru Rear Wheel Bearing Hub Replacement At Home!
 0:45:04
How To Replace Subaru Wheel Bearing Without A Press - Detailed Version
 0:10:11
Is Your Car or Truck Wheel Hub Stuck? Tips on Getting it Loose!
 0:02:51
Trick for Removing stubborn Subaru wheel hub bearing without slide hammer or hub tamer
 0:08:51
Wheel Bearing Removal Trick
 0:05:08
How to remove a rusty stuck Wheel Bearing Hub Assembly. EASY! No sledgehammer required!
 0:05:37
HUB SHOCKER Hub Busters | REMOVE STUCK WHEEL BEARINGS EASILY!
 0:07:28
How to Replace a Wheel Bearing Without a Press - Subaru Wheel Bearing [E46]
 0:09:07
Subaru Wheel Bearing and Hub Replacement | Late Model Subaru
 0:04:53
Subaru rear wheel bearing pulls apart - Promaxx Tommy able to remove it
 0:18:21
PRESS IN Wheel Bearings- LIKE A PRO WITHOUT A PRESS!
 0:53:08
How to Replace Front Wheel Hub 05-14 Subaru Outback
 0:31:09
HOW TO REPLACE FRONT WHEEL BEARINGS without PRESS
 0:08:03
A+ SUBARU Front Wheel Bearing replacement -Forester Outback Impreza Legacy Ascent Crosstrek STI WRX
 0:03:54
Wheel Bearing Noise~~Don't Make This Mistake~~QUICK TUTORIAL
 0:02:32
@SouthMainAuto Shows Off Cheap Yet Effective Hub Removal Tool
Комментарии