filmov
tv
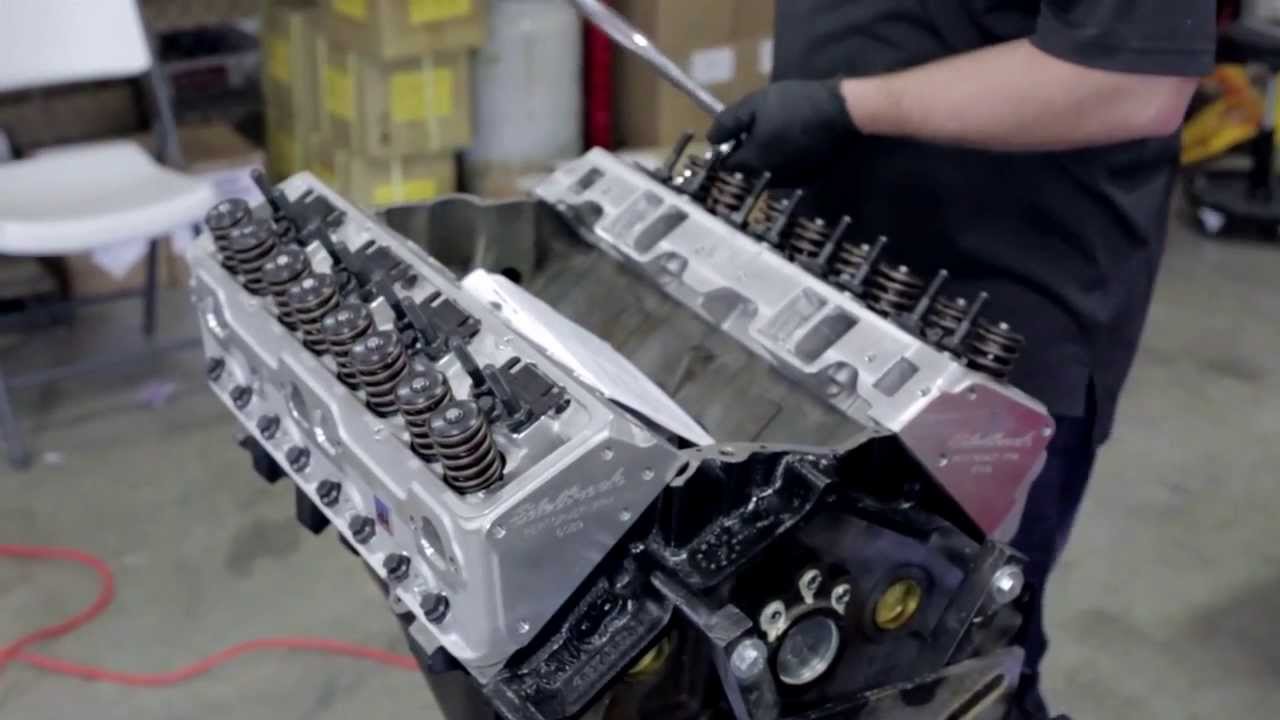
Small Block Chevy Engine Build: Cylinder Heads
Показать описание
Come inside the Parts Pro garage as we take you through the installation of some of today's hottest performance products. In this episode, we install the cylinder heads. Look out for new episodes in this series that will take you through the planning and prep to the actual firing up of this street classic.
Parts used in video:
Edelbrock Aluminum Cylinder Heads (Part# 60895)
Edelbrock Head Gasket Set (Part# 7361)
ARP Head Bolts (Part# 134-3601)
Mr Gasket Oil Pan Gasket (Part# 6560) .
While this is not a paid review, this content has been produced by The AAM Group in support of manufacturers with whom it has a business relationship.
 0:10:26
The Best 350 Chevy Block to Build
 0:41:03
Building a 427ci Pump Gas Small Block for Ultimate Street Domination - Engine Power S11, E15/16
 0:02:41
Modernize Your Small Block Chevy Engine With Holley’s SBC Hi-Ram EFI Intakes
 0:00:47
The Best Chevy LS Engine 🤯 #shorts
 0:41:50
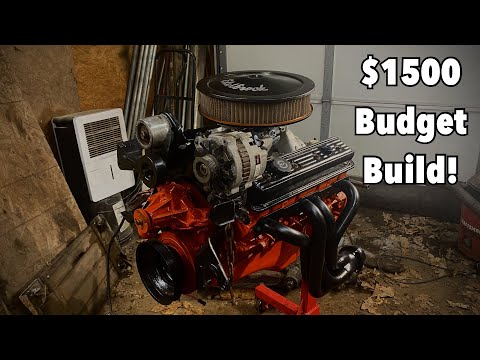
Budget Building a Small Block Chevy 350 for $1,500!
 0:28:37
Stock to Wild? The Budget Small Block Chevy 350 We BUILT at HOME! (The Bankrupt 350)
 0:00:59
Which would you choose? Big Block or LS? #chevy #bigblockchevy #bigblock #ls #lswap #engine
 0:00:35
Blueprint Engines Small Block Chevy 400
 0:02:42
Chevy 283 vs Ford 289 -The Secret Cars Behind America’s Greatest Small Block V8s! USA Cars
 0:08:58
Intake Manifold Shootout for Big Block Chevy! | Engine Masters | MotorTrend
 0:07:59
Small Block Chevy Engine Build: Cylinder Heads
 0:23:41
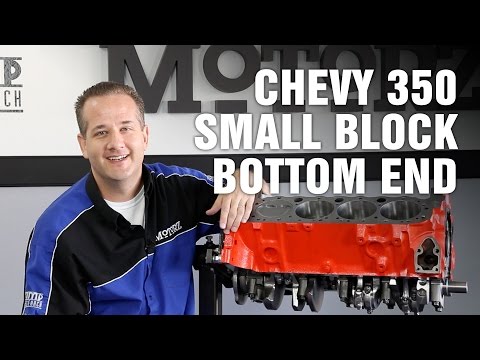
How-To Rebuild Bottom End Chevy 350 Small Block Engine Motorz #66
 0:08:02
Small Block Chevy Engine Build: Cylinder Heads
 0:10:18
Chevy's 1000HP Crate Engine EXPLAINED
 0:38:53
Budget Building a Small Block Chevy 350 Part 2: 375-400 Horsepower!
 0:03:36
BluePrint Engine's NEW Small Block Chevy
 0:10:02
Massive 8K RPM Engine Mods! | Engine Masters | MotorTrend
 0:05:42
Small Block Chevy Engine Build: Valve Train
 0:09:38
Unboxing a Chevrolet Small Block V8 350 5.7L 390HP 410TQ | BluePrint Engines
 0:00:52
Chevrolet 307ci Small Block - Boat Anchor or Economic V8?
 0:08:25
Chevy vs Ford V8 Showdown! Small-Block or Windsor? | Engine Masters | MotorTrend
 0:07:22
Small Block Chevy Engine Build: Intake System (Part 2)
 0:06:36
Small Block Chevy Engine Build: The Camshaft (Part 2)
 0:01:01
Big block vs small block engines! Explaining the difference
Комментарии