filmov
tv
Program an ATtiny45/85 with an Arduino Uno without Any Errors | Complete In-Depth Tutorial (2024)

Показать описание
Welcome to Keon's Lab!
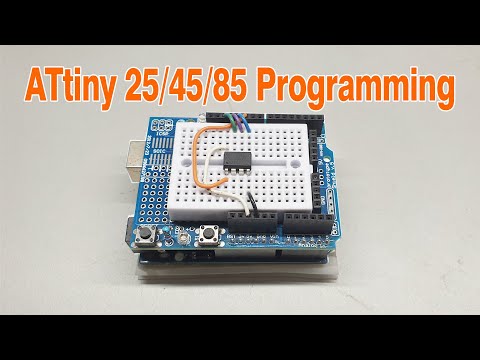
In this video I'll show you how to program an ATtiny 45 or ATtiny 85 using an Arduino Uno as programmer! I'll point out the most common reasons errors occur and how to avoid them to get a successful program upload every time!
When I first learned about the ATtiny, it took me forever to figure out how to upload a sketch onto it because all the tutorials and guides always left out a couple key pieces of information regarding pin numbers and uploading that are critical to successfully uploading a program using Arduino as ISP.
My goal in making this tutorial is to provide an in-depth guide to programming an ATtiny that I wish I had back when I learned about the ATtiny over 10 years ago. I hope this video is useful to anyone having trouble getting their ATtiny to work.
Remember to please Like and/or Subscribe for more videos! :)
Chapters:
00:00 Intro
01:03 About the ATtiny
02:12 Required Materials
02:42 Setting the Arduino as ISP
04:38 Wiring up the ATtiny
08:15 Configuring the Arduino IDE
10:21 Configuring Upload Settings for the ATtiny
11:22 Burning the Bootloader to the ATtiny
12:14 Uploading a Sketch to the ATtiny
14:33 Blink Sketch Running on the ATtiny
16:12 Adding a Second LED
19:08 Powering with a Lithium-ion Battery
20:00 Lithium Super Capacitor Powering the ATtiny
20:38 Outro
 0:21:00
Program an ATtiny45/85 with an Arduino Uno without Any Errors | Complete In-Depth Tutorial (2024)
 0:09:31
How to Program an ATtiny45 or 85 with an Arduino UNO
 0:09:00
Programming ATTINY45 / 85 With Arduino
 0:09:16
Pluggable ATTINY Development Board For ATtiny13A/ATtiny25/ATtiny45/ATtiny85 Programming Micro Usb
 0:05:54
How to program an ATtiny45 / ATtiny85 using Arduino 1.6+
 0:14:25
Bare-Metal MCU #9 - Review; ATTiny85 from scratch
 0:10:09
How to Program an ATtiny with Arduino (Up to Date)
 0:08:05
Programming an Attiny45/85 with Arduino uno and Arduino IDE 1.8.12
 0:03:06
How To Program Attiny85 microchip - Tutorial in 3min
 0:00:53
AttinyDB-C234 | T42 ATtiny13A ATtiny25 ATtiny45 ATtiny85 plug in development program
 0:04:27
ATtiny 85 Programming
 0:06:00
Programming ATtiny85 with Arduino Uno | The Easiest way
 0:06:23
#52 Programming ATTiny Microcontrollers using Arduino IDE | ATTiny13 ATTiny25 ATTiny45 ATTiny85
 0:00:54
Arduino programming Attiny45
 0:04:28
Arduino Tutorial – ATtiny85 explained in 4 minutes!
 0:13:17
What Is An ATtiny 85 & How To Program It With Your Arduino Uno
 0:07:43
Program ATtiny85 directly via USB
 0:06:26
Programming an ATtiny85/45 with an Arduino UNO (Getting started)
 0:08:51
How to program an ATtiny 45/85 and to control a bcd 7 segment Display Simulation Using Proteus 8
 0:03:24
ATtiny85 Board First Look and Review | Install Drivers & Use with Arduino IDE
 0:04:13
05 Arduino Programming the ATTINY85
 0:11:00
HOW TO: Programming an Arduino ATTiny85 made simple
 0:07:41
How To Program An ATTINY85
 0:03:36
Programming ATtiny 85 with Arduino (Controlling LED with ATtiny85)
Комментарии