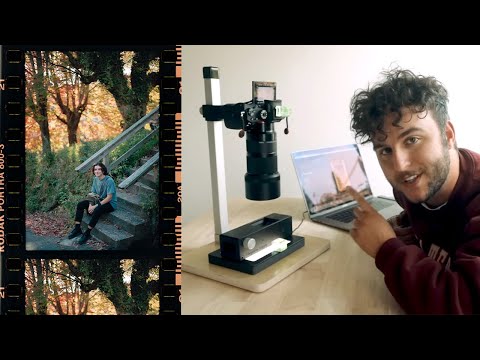
Scanning Film Negatives Vs. Printing In The Darkroom

preview_player
Показать описание


I thought it would be fun to do a little comparison of scanning black ad white negatives vs. printing the negatives optically in the darkroom. I also go through my process of fluid mounting negatives to scan film using the Better Scanning variable height mounting station

=============================
Relevant Links:
=============================

=============================
Go to film photography setup //
=============================

=============================
Go to digital camera setup //
=============================

=============================
Affiliate Links:
=============================
Some of the links in my video descriptions are affiliate links, which means at no extra cost to you, I will make a small commission if you click them and make a qualifying purchase. If you have a different purchase in mind, please consider using these links as it helps create more free content for this channel!

=============================
Music:
=============================

=============================
Follow Me:
=============================

Thank you so much for watching!

=============================

#distphotofilm #darkroom
Рекомендации по теме
Комментарии
Автор

Just as a heads up, the Negafix section is designed to work if you move the boarder in such that the film border is removed. If you snap the frame in you'll notice a pretty big difference (at least on color film). On B&W you can probably get away with clicking the black & white points with the pipette. I would think with B&W the biggest diff would be the border setting too low of a black point. Your mileage may vary :-)

peterfarr
Автор

As a non digital native guy scanning my 6x4.5 negatives meant in the beginning 2k years the end of an episode and the entry into full digital photography. Now I re descovered the analog photography and the darkroom printing and enjoy it. I am not sure if should enter the loop again by scanning my negatives. My opinion is that if I want it digital I shoot it digital.

matneu
Автор

Would be very interested to see your inkjet dodge mask process, something I’ve never tried. I think I’ll always prefer a darkroom B&W print over an inkjet, but I’ve recently started scanning my negs and working digitally in order to more quickly and economically arrive at the ‘look’ I want, without actually printing. I’ll then go into the darkroom with a clearer idea of what I’m aiming for.
I’ve tried some RA4 color printing and it’s a more complex and difficult process, so I generally stick to inkjet for that and I’ve been very happy with the results, particularly from Ektar printed on matt paper. Great video, keep them coming!

mike
Автор

You probably know this but you can create a digital negative from your scans and contact print them in the darkroom. I do screenprinting so I have a roll of inkjet film on my p800. I create a full size digi neg. then contact that to fiber base paper, it's awesome.

myoung
Автор

I use scanning for dodge masks too, a really handy technique, though I also hand paint them or use a combo

faraz
Автор

Please share with us your techniques for this "digital mask" I found it very interesting. Thanks!

joseerazevedo
Автор

thank you for this video. I have used the same scanning equipment using dry mounting. Three things to improve your scans. First (as mentioned below) crop within the image, not outside. this messes up the histogram (showing shadow and highlight clipping) and negafix (especially using colour film). Second you should be scanning with the black and white settings (not 48 to 24 pixel setting) use the lower one 24 to 16 on silverfast..
Third, to rid the dust use the SRDx setting (for black and white film) and Dust setting for colour. For colour negatives it does two scans, one in infra-red to delete the white and black "dust marks" and scratches: it is the best thing about scanning vs. using DSLR camera. The SRDx uses a pixel based setting for identifying "white marks" (dust). You need to adjust the sensitivity and pixels (eg. 12 and 25). You adjust these using x100 to view the mask size and moving the sliders until you get the right combination. Finally, as you are using AI Studio, you can add keywords and copyright information by clicking on ITSP? button in the upper box. This opens up a new menu so you can provide "metadata" to the scan. I use this to identify camera, film, location etc. Handy for batch scanning more than one photo to give it date, time stamp.

glennhunt
Автор

please can you do a video about making the dark room masks digitally... i have just built my first dark room ...did my first print yesterday.. its bad!! but i love it.. your channel is just fantastic..interesting details and watching you work is fascinating. thanks

elizastephens
Автор

I find that scanning to a DNG (RAW) file in SilverFast works great. the scanner scans exactly what it sees (good or bad) on the neg. I then adjust in Lightroom and Photoshop.

davidpalermo
Автор

Scanned negatives of different films look virtually identical. Only in the darkroom can you see the difference between various film stocks.

igaluitchannel
Автор

I have a darkroom as well as a scanner. I can do both. But as you mentioned, I spend enough time during the day in front of the computer, and I end up resenting, if that's the proper word, spending more time on computer. I shoot med format B&W, and have found the Apple Photos software to be more than adequate. I am a heavy user of B&W filters during my shots, and I also use grad filters from SingRay. I want to do as little dodging and burning as possible. Your camera work, split screen of computer program and your commentary is flawless. In the end, I don;t know which is more frustrating, dealing with supplies of grey and black toner cartridges for my Canon Pro-10 printer, and making multiple copies of prints until satisfied, or with the chemicals and the developing baths. One thing is for sure, the input is the same. There are no shortcuts. Scanning negatives is the only way to have presence on the internet. Right?

brucekowal
Автор

Excellent video and good discussion. What are your thoughts about your digitally captured images and making a digital negative for making a silver contact print and comparing that to an optical silver print that was captured on film and printed in the darkroom?

CBSDailyBread
Автор

I did learn several things here. I did not know that the gradient tool could be used in just some spots in ACR. I always used the entire image w/the gradient tool but will try your method. Also, I don't have a scanner for the 4x5 negs so I pay someone to scan those for me.

naturelvr
Автор

Just discovered your channel. I'm glad you are here :) Do you mind telling what monitor you are using for editing?

ucevrim
Автор

Both are valid.

A lot of the greats use inkjet now and the dmax and archival qualities of inkjet paper is now up to par of darkroom printing.

If someone has problems printing in the darkroom, the negative was probably not exposed properly for that film, development, enlarger combination.

The issue with scanning is the flatbed just doesn’t do a good enough job keeping film flat. Especially in smaller formats

ThatShadowHand
Автор

You should change your background in photoshop to light grey or white to judge contrast as black gives you the impression of higher contrast.

friendofarca
Автор

Super nice video. Thanks. And I think darkroom looks better!

gurhanpekuz
Автор

Thank you for this usefull video.
What kind of file come out of your silverfast ?
dng or TIFF ?
Why not going directly with a 16 bit TIFF into Photoshop ?
Did you try the two workflows ?

jean-claudemuller
Автор

I really like the idea of this video, but at the end, I was s surprised and disappointed that there was no discussion about sharpness or grain or pixelation, comparing the two prints. Maybe you can do that in another video? Using the same prints maybe using a magnifying glass.

surreallife
Автор

I find the extra foreground detail in the darkroom print distracting. I realize that’s more a matter of taste than of technical comparison.

steve-
join shbcf.ru