filmov
tv
How to Install IntelliJ IDEA IDE on Ubuntu 24.04 LTS Linux (2024)

Показать описание
How to Install IntelliJ IDEA IDE on Ubuntu 24.04 LTS Linux | Step-by-Step Guide
IntelliJ IDEA is a popular, robust Integrated Development Environment (IDE) for software development, especially for Java. Installing IntelliJ IDEA on Ubuntu 24.04 LTS is straightforward, whether you prefer the Community (free) edition or the Ultimate (paid) edition. This guide will walk you through the process of installing IntelliJ IDEA using the official JetBrains methods.
**Step-by-Step Instructions:**
**Step 1: Update Your System**
1. Open your Terminal by pressing `Ctrl + Alt + T` or by searching for "Terminal" in your applications menu.
2. Update your package list to ensure you have the latest information on the newest versions of packages and their dependencies:
```sh
sudo apt update
```
**Step 2: Install Required Dependencies**
1. Ensure you have `wget` and `curl` installed, as they are required for downloading files from the internet:
```sh
sudo apt install wget curl -y
```
**Step 3: Download IntelliJ IDEA**
3. Alternatively, you can download the file directly using `wget`. Open Terminal and run:
```sh
```
**Step 4: Extract the Archive**
1. Extract the downloaded archive to the `/opt` directory:
```sh
```
**Step 5: Create a Symlink for Easy Access**
1. Create a symbolic link to make IntelliJ IDEA easily accessible from the command line:
```sh
```
- Note: Replace the version number in the path if it differs.
**Step 6: Launch IntelliJ IDEA**
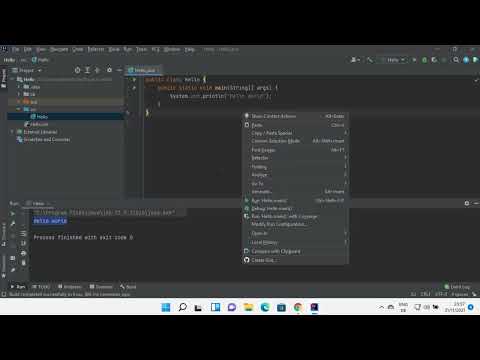
1. Start IntelliJ IDEA by typing `idea` in your Terminal and pressing Enter:
```sh
idea
```
```sh
cd /opt/idea-IC-231.8109.91/bin/
```
**Step 7: Configure IntelliJ IDEA**
1. On the first launch, you’ll be prompted to import settings from a previous installation or start fresh.
2. Follow the on-screen instructions to complete the initial setup, including configuring the UI theme, setting up plugins, and customizing your development environment.
**Step 8: Create a Desktop Entry (Optional)**
1. To create a desktop entry for easier access, open IntelliJ IDEA and go to `Tools - Create Desktop Entry`.
**Additional Tips:**
- **JDK Installation**: Ensure you have the Java Development Kit (JDK) installed, as IntelliJ IDEA requires it for Java development. You can install it using:
```sh
sudo apt install openjdk-11-jdk
```
By following these steps, you’ll have IntelliJ IDEA installed and ready to use on your Ubuntu 24.04 LTS system, providing you with a powerful environment for software development.
Don't forget to like, share, and subscribe for more tech tutorials and tips!
#IntelliJIDEA #Ubuntu #Linux #IDE #SoftwareDevelopment #Java #TechTutorial #HowTo #Programming #Development #TechTips #Tutorial
IntelliJ IDEA is a popular, robust Integrated Development Environment (IDE) for software development, especially for Java. Installing IntelliJ IDEA on Ubuntu 24.04 LTS is straightforward, whether you prefer the Community (free) edition or the Ultimate (paid) edition. This guide will walk you through the process of installing IntelliJ IDEA using the official JetBrains methods.
**Step-by-Step Instructions:**
**Step 1: Update Your System**
1. Open your Terminal by pressing `Ctrl + Alt + T` or by searching for "Terminal" in your applications menu.
2. Update your package list to ensure you have the latest information on the newest versions of packages and their dependencies:
```sh
sudo apt update
```
**Step 2: Install Required Dependencies**
1. Ensure you have `wget` and `curl` installed, as they are required for downloading files from the internet:
```sh
sudo apt install wget curl -y
```
**Step 3: Download IntelliJ IDEA**
3. Alternatively, you can download the file directly using `wget`. Open Terminal and run:
```sh
```
**Step 4: Extract the Archive**
1. Extract the downloaded archive to the `/opt` directory:
```sh
```
**Step 5: Create a Symlink for Easy Access**
1. Create a symbolic link to make IntelliJ IDEA easily accessible from the command line:
```sh
```
- Note: Replace the version number in the path if it differs.
**Step 6: Launch IntelliJ IDEA**
1. Start IntelliJ IDEA by typing `idea` in your Terminal and pressing Enter:
```sh
idea
```
```sh
cd /opt/idea-IC-231.8109.91/bin/
```
**Step 7: Configure IntelliJ IDEA**
1. On the first launch, you’ll be prompted to import settings from a previous installation or start fresh.
2. Follow the on-screen instructions to complete the initial setup, including configuring the UI theme, setting up plugins, and customizing your development environment.
**Step 8: Create a Desktop Entry (Optional)**
1. To create a desktop entry for easier access, open IntelliJ IDEA and go to `Tools - Create Desktop Entry`.
**Additional Tips:**
- **JDK Installation**: Ensure you have the Java Development Kit (JDK) installed, as IntelliJ IDEA requires it for Java development. You can install it using:
```sh
sudo apt install openjdk-11-jdk
```
By following these steps, you’ll have IntelliJ IDEA installed and ready to use on your Ubuntu 24.04 LTS system, providing you with a powerful environment for software development.
Don't forget to like, share, and subscribe for more tech tutorials and tips!
#IntelliJIDEA #Ubuntu #Linux #IDE #SoftwareDevelopment #Java #TechTutorial #HowTo #Programming #Development #TechTips #Tutorial
 0:08:48
How to install IntelliJ IDEA on Windows 10/11 (64 bit) [ 2023 Update ] Java 19
 0:09:13
How to install IntelliJ IDEA on Windows 10/11 [ 2024 Update ] Java JDK 21
 0:04:58
How to Install IntelliJ IDEA in Windows 11
 0:08:36
How to install IntelliJ IDEA 2024.1 on Windows 11 (64 bit) [ 2024 Update ] Java JDK 22
 0:09:46
How to install Intellij IDEA Community Edition on Windows 10 / Windows 11
 0:06:20
How to download and install IntelliJ Idea on Windows 10/11 | Setup and run Java program
 0:09:56
How to Install IntelliJ IDEA on Windows 10
 0:08:27
How to install IntelliJ IDEA 2023.2 on Windows 11 (64 bit) [ 2023 Update ] Java JDK 20
 0:08:17
How to Install IntelliJ IDEA on Mac | Install IntelliJ IDEA IDE on macOS (2024)
 0:09:49
How to Install Intellij IDEA on Windows 10/11 [ 2024 ] | Install Java JDK 21 | Coding Wallah
 0:05:06
How to Download & Install IntelliJ IDEA on Windows & Run Your First Program
 0:13:22
IntelliJ IDEA Beginner Tutorial | Download and Setup
 0:10:48
How to Install IntellijIDEA with Java 18 on Windows 10
 0:09:50
How Download & Install intelliJ Idea on Windows
 0:16:40
How to Install IntelliJ IDEA with Java 17 on Windows 11
 0:05:40
How to install IntelliJ IDEA 2022.3 on Windows 10/11 (64 bit)[ 2022 Update ] Java 19
 0:07:13
How To Install IntelliJ IDEA on Ubuntu 22.04 LTS
 0:04:06
How to install IntelliJ IDEA on Windows 10/11 [ 2024 Update ] Java JDK 21
 0:05:06
How to download and install Intellij Idea on Windows 11/10 for Java | Install IntelliJ for Java
 0:07:10
How to install IntelliJ IDEA on Windows 10/11 (64 bit) [ 2022 Update ] Complete guide for Java
 0:08:37
How to Download and Install IntelliJ IDEA on Windows 10/11 in 2024?
 0:06:22
How to Install IntelliJ IDEA on Ubuntu | 2024
 0:04:58
How to install IntelliJ IDEA IDE zip
 0:10:33
How to Install IntelliJ IDEA IDE on Ubuntu 24.04 LTS Linux (2024)
Комментарии