filmov
tv
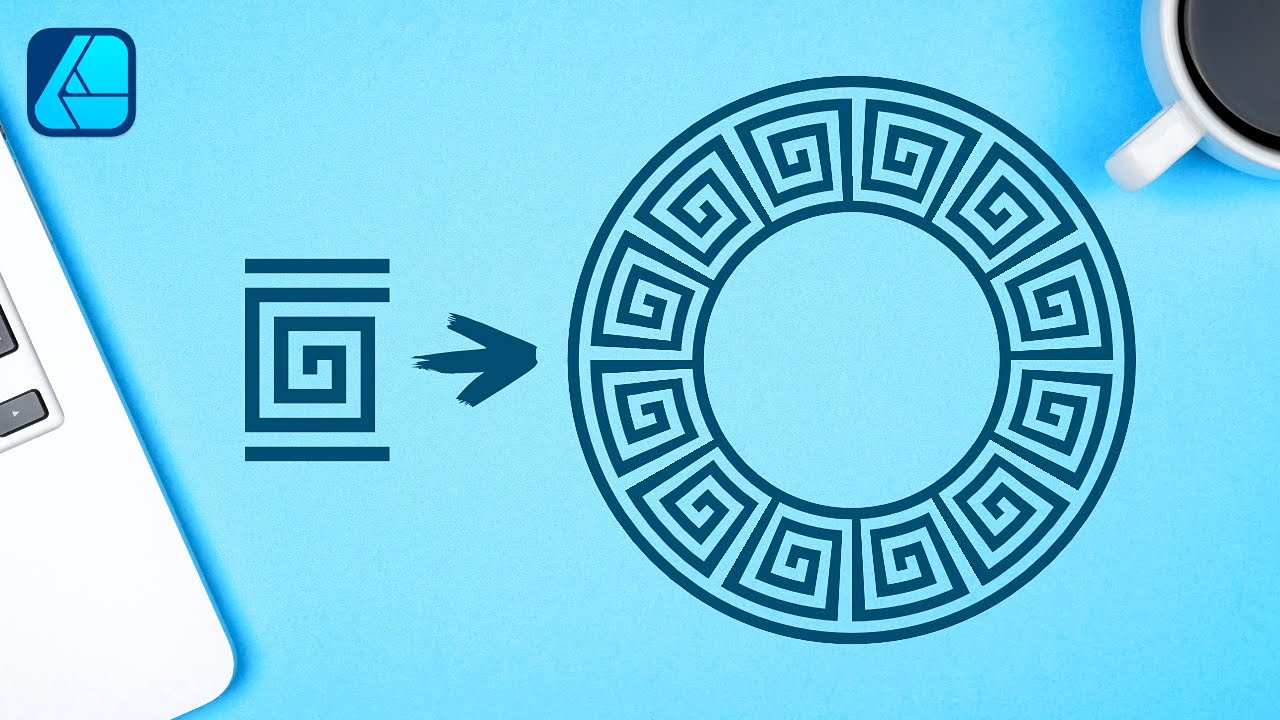
Repeat Objects Along A Path In Affinity Designer
Показать описание
In this tutorial I’ll be demonstrating how you can take a single object and repeat it along a path in Affinity Designer. This can be useful in creating fun patterns and decorative borders.
To accomplish this, we’ll need to create an object to repeat and then make it into a Textured Image Brush.
Once made into a brush, it can be applied to any shape as a stroke, and you can even draw with it using the Vector Brush Tool.
If you don't want to create the PNG image you can download a copy of it here:
🔗 RESOURCE LINKS
🎓 EXPLAINER COURSES
▶️ MY OTHER CHANNELS
💬 SOCIALS
🎵 MUSIC USED
In Da Mood - Combustibles
CHAPTERS
00:00 Intro
00:22 Creating the shape
03:15 Repeating the shape along the path
05:54 Learn more
 0:06:46
Repeat Objects Along A Path In Affinity Designer
 0:07:00
How to Repeat a Shape Along Any Path in Adobe Illustrator
 0:03:48
Repeat A Shape Along A Path with Illustrator
 0:04:24
How to Repeat a Shape Along Any Path in Adobe Illustrator
 0:06:42
Inkscape: Use Path Markers To Repeat An Object Along A Path
 0:00:19
Easy way to repeat objects in circle (Adobe Illustrator)
 0:05:03
REPEAT SHAPES ALONG a PATH in ILLUSTRATOR: How to repeat objects around a circle in Illustrator
 0:01:25
How to repeat an object along a path in Blender
 0:02:29
Repeat Any Shape Around a Circle in Illustrator
 0:10:29
Repeat an Object Around a Shape with Inkscape
 0:00:32
Daily Blender Tip 203 - Repeat object along curve or path with an Array in Blender 2.8
 0:00:31
Repeat Any Shape Around a Circle In Photoshop #photoshop #repeat #shapes #photoshopcc
 0:00:46
Duplicate Multiple Object Along The Path Or Curve IN Blender IN 45 Seconds Beginner #blender
 0:04:38
Photoshop - Repeat shapes along a path (Tutorial)
 0:13:30
How to Repeat Any Shape Along a Path in Illustrator CC
 0:00:34
Repeat Any Shape Around a Circle In Illustrator.
 0:08:07
Copy Objects ALONG PATHS in SketchUp with PathCopy
 0:00:22
💯 Duplicate Object Around Circle - Photoshop
 0:06:26
How to Repeat Any Shape Along Any Path
 0:10:44
FreeCAD: Lattice2 Repeat Sequence of Objects along a Path using Custom Placement
 0:11:06
Using the CURVE AND ARRAY Modifiers to Create Objects Along Paths in Blender!
 0:03:31
Illustrator 2025 Tutorial For Beginners Place Repeat Object On Path
 0:03:15
Pattern Brush / Repeat a custom shape or icon along a path in Adobe Illustrator
 0:01:38
How to repeat an object / shape / pattern along a path | illustrator tutorial
Комментарии