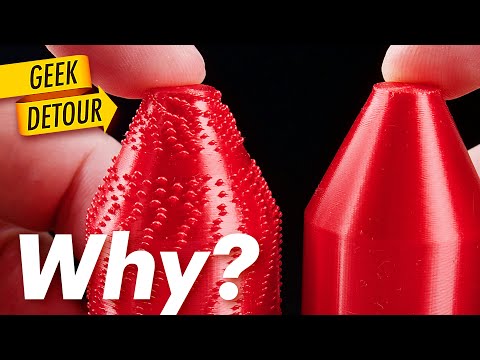
Deburring tool for cleaning 3D printed parts

preview_player
Показать описание
In several videos, when I was cleaning the brim with my knife, I got suggestion to use deburring tool. So, this video is about testing a deburring tool, is it really more comfortable for removing the brim, elephant foot or sacrifice layer.

The tool I used:

Additional summary from comments:
(will be here after 1 months)

If you like my work, you could support me:

Contents:
0:00 about deburring tool
1:30 unboxing
2:04 removing brim using knife
3:36 removing brim using deburring tool
5:00 testing with metal
6:53 removing supports
8:11 conclusions

#deburringtool #3dprinting
Рекомендации по теме
Комментарии
Автор

As a sheetmetal worker we were taught to be very careful not to deburr towards your hands as it is capable of cutting tendons if the tool jumps from a snag.

AxisSage
Автор

I used one of that kind of deburring tool for decades when manufacturing aviation sheetmetal structural parts. I'm retired from the aviation industry now. When looking back, I see a lot of tools I used in aviation that can be directly transferred over to 3D printing. I pulled out my 12 inch steel rule graduated in hundreds on one side and fractions on the other yesterday to take measurements because I needed them for the part I was designing. That steel rule has touched literally 1000s of aircraft parts. Now it has been brought back to life.

This is the coolest hobby ever. My own little computer-aided manufacturing plant. Now I can get busy and start building that time machine I always wanted.

Xenoyer
Автор

Another very good video!! I really like how you approach all of your experiments with an open mind. So many people in Engineering and Manufacturing are rather hard-headed and resistant to change, and don't like being told there might be a better way, instead of "the way they've always done it". And on a separate note, one of the tools that are rarely mentioned, is a small cordless Dust Buster/Vacuum. They're great for cleaning up all the trimmed pieces, metal shavings (if you're working with metal), broken-off support pieces, etc.

RodgerLyle
Автор

Hello Igor, I have been following for a while, this is the first time I think I can teach something instead of be taught: supports are easily removed by hand with the same surface quality, utilizing slicer settings. Depending on filament, I would suggest increasing vertical distance, fan%, and lowering flow.
Of course, this tool is great for brims.

KnooBill
Автор

I use a deburring tool for my 3D prints, angle it at 45 degrees and clean away. I find it works better on internal cleanup, for external I hold the cutter with my fingers to prevent it from spinning, makes cleaning the outside of round shapes etc much easier.

JoesWorkbench
Автор

I've been thinking of buying one of those for ages, and your link made it easy!

EcoHamletsUK
Автор

Apart from my Hungarian comment, here is one for the masses. We use these tools at work and they are extremely handy for cleaning 3d printed tools, cleaning cut plastic sheets (the ones that go into Bosch profiles for example) and a lot of other custom made parts. We have assembly lines for tables that are used to assemble wiring harnesses. These tables have all kinds of plastic sheets, metal brackets and what not. We use the deburring tool on these too, to save the wiring harnesses from damages. They are really handy and I've been wanting to get one for aged, but never saw them available locally.

HuntersOA
Автор

Yes! One of my favorite tools. This is a must have IMHO.

BlackDragonBE
Автор

This is a brilliant tool for general deburring commonly used in engineering and one I use all the time. Worth looking at tools designed for model making like the Revell Precision Scraper Tool. Love the channel ang nice to see you review a range of things for the 3D printer enthusiast.

iandawkins
Автор

I use both the deburring tool and a knife.
I think you got it right, they each have their strengths and neither is good in all situations.

joshsekel
Автор

I mostly use the Deburing tool
Thanks for sharing your experiences with all of us :-)

avejst
Автор

I love using the deburring tool on "inside curves" (like a hole) where the part kind of guides the tool. On "outside curve" (like the perimeter), it doesn't work so well in my opinion. For this, I tend to use the knife but I orientate the edge away from the motion to avoid digging in the part (I scrape, I don't cut)

NicksStuff
Автор

Been wondering about these, looks like it time to get one. Its the little things in life 😃

NathanCroucher
Автор

A deburring tool was one of my best investments. Although less used, a wood burner/old soldering iron also comes in handy

KanielD
Автор

I always enjoy watching your videos, in this one you make a simple deburring tool become interesting. I use the same style of deburring tool (but with a metal body) and find it very useful, the best feature is, as you point out, that it finds the correct angle. I also use a pocket knife for some jobs, the knife blade is made of a material (CPM S110V) of typical hardness 58/61 HRC and so can be used for softer metals, but it can dig into materials unlike the deburring tool. Vote deburring tool +1

Just out of interest, we have fairly strict knife public carry laws in the UK, no assisted opening mechanisms and no locking mechanisms, blade 3" or less, etc.

carlclarke
Автор

I bought a de-burring tool for my 3D prints, and found it tended to dig in and gouge the edge, like you did at 3:52. So I went back to using a hobby knife.

ianhaylock
Автор

The problem with these tools is, that if you get stuck during cleaning and you continue then abruptly, you can get more material out of the part as it happens on your try. Only if you do it in one continuous try, without stucking and always with the same pressure, then you get nice, clean and even results.

billereses
Автор

Thanks for demonstrating how to use the tool, I just bought one but didn’t know quite how to use it.

radish
Автор

great to use on holes but I prefer to use a #11 xacto blade for my cleanups. blade is sharp for small details and inside corners, and I use the back edge as a scraper for bulk clean up. cabinet scrapers or card scrapers work well also.

mhtopspot
Автор

Dear Igor thanks for your video. Hand countersink is also "must have" tool in 3d print debugging box for the same purpose, IMHO.

butdmitry