filmov
tv
How to Replace Front Lower Ball Joint 2007-Present Toyota Tundra

Показать описание
Buy Now!
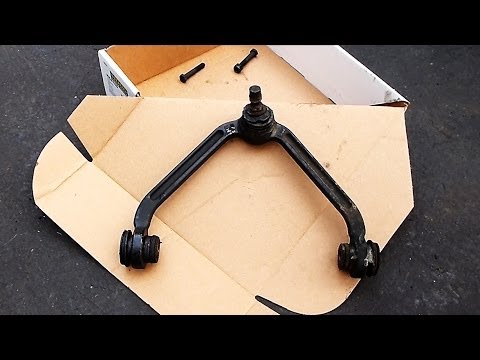
Modern suspensions combine a number of moving parts for safe and stable handling. The ball joint is the crucial moving component that ties those parts together. The ball-in-socket joint can wear out and loosen over time. Or, the rubber protective boot can tear, allowing contaminants to seize the joint. Bad ball joints are a common failure point on vehicle inspections because they lead to unsafe driving conditions. Fortunately, they are relatively easy to replace with the right know-how. This video shows you how to install new, quality TRQ ball joints on your 2007-Present Toyota Tundra.
This process should be similar on the following vehicles:
2007 Toyota Tundra
2008 Toyota Tundra
2009 Toyota Tundra
2010 Toyota Tundra
2011 Toyota Tundra
2012 Toyota Tundra
2013 Toyota Tundra
2014 Toyota Tundra
2015 Toyota Tundra
2016 Toyota Tundra
2017 Toyota Tundra
2018 Toyota Tundra
2019 Toyota Tundra
2020 Toyota Tundra
2021 Toyota Tundra
Tools you will need:
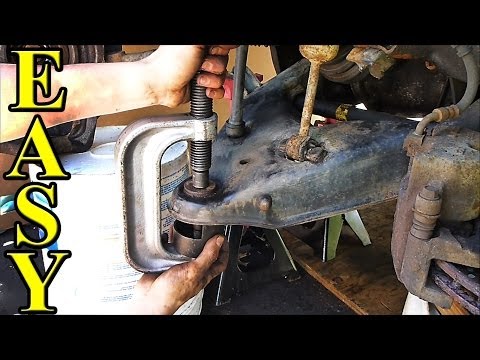
• Ball Joint Press
• Pickle Fork
• Side Cutters
• Rust Penetrant
• Ratchet Strap
• Wheel Chocks
Check out our playlist:
⚠ DISCLAIMER:
While TRQ strives to make the information provided in this video as accurate as possible, it makes no claims, promises, or guarantees about the accuracy, completeness or applicability of the content. No information contained in this video shall create any expressed or implied warranty or guarantee of any particular result. All do-it-yourself projects entail some risk. It is the sole responsibility of the viewer to assume this risk. TRQ is not responsible or liable for any loss damage (including, but not limited to, actual, consequential, or punitive), liability, claim, or any other injury or cause related to or resulting from any information posted in this video.
Modern suspensions combine a number of moving parts for safe and stable handling. The ball joint is the crucial moving component that ties those parts together. The ball-in-socket joint can wear out and loosen over time. Or, the rubber protective boot can tear, allowing contaminants to seize the joint. Bad ball joints are a common failure point on vehicle inspections because they lead to unsafe driving conditions. Fortunately, they are relatively easy to replace with the right know-how. This video shows you how to install new, quality TRQ ball joints on your 2007-Present Toyota Tundra.
This process should be similar on the following vehicles:
2007 Toyota Tundra
2008 Toyota Tundra
2009 Toyota Tundra
2010 Toyota Tundra
2011 Toyota Tundra
2012 Toyota Tundra
2013 Toyota Tundra
2014 Toyota Tundra
2015 Toyota Tundra
2016 Toyota Tundra
2017 Toyota Tundra
2018 Toyota Tundra
2019 Toyota Tundra
2020 Toyota Tundra
2021 Toyota Tundra
Tools you will need:
• Ball Joint Press
• Pickle Fork
• Side Cutters
• Rust Penetrant
• Ratchet Strap
• Wheel Chocks
Check out our playlist:
⚠ DISCLAIMER:
While TRQ strives to make the information provided in this video as accurate as possible, it makes no claims, promises, or guarantees about the accuracy, completeness or applicability of the content. No information contained in this video shall create any expressed or implied warranty or guarantee of any particular result. All do-it-yourself projects entail some risk. It is the sole responsibility of the viewer to assume this risk. TRQ is not responsible or liable for any loss damage (including, but not limited to, actual, consequential, or punitive), liability, claim, or any other injury or cause related to or resulting from any information posted in this video.
 0:07:15
Nissan Rogue How to Replace Front Lower Control Arm / DIY
 0:12:18
How to Replace Front Lower Control Arm 2012-2020 Ford Focus
 0:06:15
How to Replace a Control Arm (upper or lower)
 0:07:17
How to Replace Front Lower Control Arm 2011-2018 Volkswagen Jetta
 0:07:39
How to Replace Front Lower Control Arm 2009-13 Mazda 3
 0:16:12
How to Replace a Ball Joint (in depth, ultimate guide)
 0:18:19
How to Replace Front Lower Control Arm 06-18 Toyota RAV4
 0:09:27
How to Replace a Lower Ball Joint (short, quick version)
 0:07:13
How to Replace Front Inner Fender Liners 2005-2021 Nissan Frontier
 0:07:05
How to Replace Front Lower Ball Joint 2007-Present Toyota Tundra
 0:06:45
How to Replace Front Lower Control Arm 2013-15 Ford Police Interceptor
 0:14:37
How to Replace Front Lower Control Arm 06-18 Toyota RAV4
 0:11:48
How to Replace Front Lower Control Arms 05-15 Toyota Tacoma
 0:06:41
How to Replace Front Lower Control Arm 2008-12 Chevy Malibu
 0:08:35
How to Replace Front Lower Ball Joints 2006-10 Dodge Charger
 0:09:38
How to Replace Front Lower Control Arm 05-12 Ford Escape
 0:07:46
How to Replace Front Lower Control Arm 2003-08 Toyota Matrix
 0:11:39
How to Replace Front Lower Control Arm 2002-09 Dodge RAM 1500
 0:06:06
How to Replace Front Lower Forward Control Arm 2006-10 Dodge Charger
 0:10:42
How to Replace Front Lower Control Arm 03-09 Toyota 4Runner
 0:17:31
How to Replace Front Lower Ball Joint 2007-2013 Chevy Silverado 1500
 0:08:00
How to Replace Front Lower Control Arm 11-13 Honda Odyssey
 0:08:44
How to Replace Front Lower Ball Joint 05-16 Toyota Rav4
 0:10:17
How to Replace Front Lower Ball Joint 1998-2002 Honda Accord
Комментарии