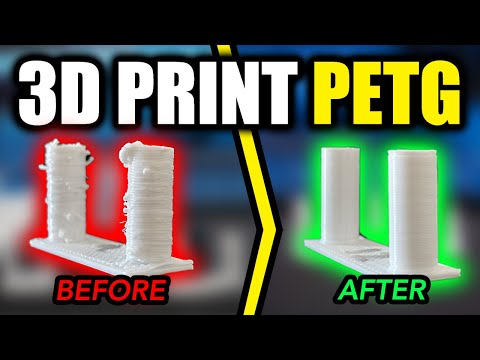
The secret to 3D printing PETG [Adventurer 4]

preview_player
Показать описание
Are you struggling to print PETG? Initially I had a tonne of blobbing and stringing but after changing some settings in my slicer... and changing my slicer, I got these AMAZING results! This is my first success with printing PETG but there is still a lot more I can discover on how to get the best PETG prints!

🇨🇦 Canada 3D Printing Gear

🇺🇸 USA 3D Printing Gear

Hi, my name is Daniel and I like to make stuff. My journey on Youtube began with creating things around the home with my 3D printer. I'm mainly focused on making functional items because I am relatively cheap and don't like to buy overpriced goods. Also, making my own things means that I can customize the item to my specific need. I hope that my channel inspires you to Just Make It!
Рекомендации по теме
Комментарии
Автор

his answer starts at 10:14 if you want to skip the long history. But as far as I know, low fan speeds make for strong parts. I don't the timer method is only good if you don't have long bridges. With all the experiments I had, I found out the fan was cutting out to zero because of my stupid settings. Prusaslicer still didn't explain why the fan would turn off in the middle of making a bridge. So now I have to find a way for it to work again... So back to wasting more material. Also a glue bed, you won't need as hot a temp for the bed. I'm at 45-50 using a glue stick. I'm betting with hair spray, I can go lower (haven't bought it yet).

mikesavad
Автор

Cura's got this "magic" setting too. It's "Minimum Layer Time" under cooling menu.

ardaozbek
Автор

S3D isn't the key.. it just happened to fix your problem because you probably didn't realize how to do the same thing on another slicer. That specific setting you refer to for layer speed change is available on other free slicers (PrusaSlicer for one). It's just a matter of getting comfortable with all the options in a slicer and understanding the requirements of the filament.. PETG tends to require slower speeds and a higher temp than PLA. It also does better with minimal cooling like 30-40% (varies with different cooling fans). There's quite a lot of other variables you need to play around with to get your printer to do well with PETG. Additionally, if you have multiple printers, don't always expect the same print profile to work on the other printer.. it may but not always the case. And finally, even if you think you have the printer dialed in and working solidly for months.. something will happen that will make you doubt the settings and make you go down a rabbit hole of troubleshooting.. When that happens, don't mess with your settings.. it's more than likely, a piece of hardware is causing the issue. Check the hardware first. In fact, backup your settings if you decide to make any changes to test something. Also on a side note, they've been saying S3D v5 was going to be coming out a few years ago and they still haven't done anything.

jamesk
Автор

Just in cast someone is wondering about this setting in Prusaslicer, it is under Filament Settings -> Cooling -> Cooling Thresholds -> Slow down if layer print time is below... By the way, this is not really a "solve all" solution to PETG printing. It is relevant only for small prints and/or small layers.

rajdude
Автор

Thx d00d, the section where you went over everything you tried that didn’t work was very helpful.

floodo
Автор

I have the same printer and have run into the same issues as him. I fixed most of these issues by raising my nozzle higher off the bed then usual, slowing it down, and raising both bed and nozzle temperature. I used Hatch Box in my printing more then any other brand and this solution seemed to work.

keppitfitz
Автор

In my case it isn’t the temperature set for the nozzle. I print PETG with good success on a K1 Max, the key is to use the side fan at least at 50%. It seems that the tip of the nozzle gets hotter than the rest of it causing the PETG to ooze out and cause printing defects!

kevanamjadi
Автор

After +40 hours of trying to fix similar issues what resolved the issue for me was putting to temp up 30 degrees recommended by the printer for PETG and an extra 10 as suggested by the filament manufacturer to 260 celcius.

I got better layer adhesion and less/zero blobbing and stringing.

lobosexual
Автор

I can definitely tell your an engineer cuz you go in depth about the process to get the end result.

johnstewart
Автор

Thank you! Thanks for sharing! This helps tremendously I too am difficulty with PETG.

andrewwood
Автор

I'm brand new to 3D printing. I have an Adventurer 3. I'm glad I came across your video, thanks for the information. I haven't seen many use a flashforge printer.

BlackKryptonian
Автор

thank you very much for posting this, this was the culprit of my petg stringing. finally i can print petg in peace :)

marderman
Автор

Part cooling typically leads to brittle petg parts. Try 0%-30% I typically use 15% or no cooling whatsoever.

LeviathanDPrinting
Автор

Im printing with PETG right now. I have no problems with it. Only a couple of stringing. I heat the bed to 85-90 degrees for the first layer. To get a solid stick to the bed. Then on layer 3-4 I change it to 75 degrees. Also for the first layers I set a speed of 50%. So the extrusion turn out good. Then I set the speed at 95% at layer 3-4. I have only had good results:)

johannesmikkelsen
Автор

YT is funny, was trying to solve the same issue yesterday, searching on YT "how to print with PETG/ retraction settings" etc... this video didn't came up. Today casually scrolling and BAM, here is the solution for yesterday's problem. Thanks for the video.

DPI
Автор

Finally got Overture PETG to work. Had to slow the print down to 10mms, increase the flow rate to 120, increase the hot end temp to 260, increase the bed temp to 100. I'm on Ender 3 with Creality 1.1.4 board.

justapile
Автор

It’s not about bed leveling but simply - PETG likes to be printed in the air. 0.2-0.3 mm z offset from the bed is typically great. PLA likes to be squished but not PETG.
Britleness of parts was not caused by some “stress” on layers, but because of your nozzle being too low for PETG, it caused huge nozzle backpressure, causing under extrusion and extruder wheel skipping to feed the filament.
This is all because of the PETG having huge volumetric flow. Ie if your all metal hotend is able to push like 15 mm^3/s, for PETG it might be even 25 mm^3/s so you can print much faster. Ie. With my high flow Dragon hotend I can print at up to 35 mm^3/s with PETG, which translates to 200 mm/s with 0.6 mm nozzle and 0.3 mm layer height. For PLA it is more likely at 25 mm^3/s in my case.

Nozzle buildup can be prevented by using high quality nickel plated copper nozzle which I consider minimum standard these days. Nickel plating of whole heatblock too is fine for all copper hotend - much higher flow and less tendency for filament to stick.
I personally use tungsten carbide nozzles from Spool 3D as I print lot of carbon fiber. It’s expensive, sure, but it’s nozzle for a whole life.

Regarding carbon fiber - CF PETG on the other hand prints like PLA, no need to rise Z offset as carbon fiber causes less oozing and lowers the flow.

ZhuJo
Автор

I've only made it about halfway through the video at this point... Not long after you decided that "it's definitely not the filament being dry or wet", and I'm screaming at my screen, THE FILAMENT IS WET!! I had all but given up on printing petg after inability to print it from 3 different brands over a few months of time. I tried drying in the oven and all that as well. When I started printing a lot more flexible materials I decided to diy a drybox out of a food dehydrator to reduce stringiness and threw in the petg just cuz I had the room and voila! It prints almost as well as pla and is much stronger. I don't even have to print much slower than with pla on my ender 3v2 ~ 65-70mm/s compared to 80-100mm/s pla. Just use as little part cooling as absolutely necessary so as to not lose layer adhesion but keep the details. I had honestly written off all the money I'd spent on petg and was hesitant to even load it in again but I was pleasantly shocked. I should've been more diligent with moisture control as I live in the hot humid south but I just assumed my machine was the problem and gave up. If you got it printing ok without drying it you will be amazed how it performs when dried. You can get a cheap dehydrator from Amazon for about $40 and there are several videos on how to do it. Drying really only takes an hour or two and if stored ok correctly after dried you don't have to do it constantly. Hope this helps anyone else perusing through here.

RobertD_
Автор

the anycubic Glass bed is best for petg sticks perfectly and releases when cool, wish this printer came with one.

michaelandrews
Автор

If you have a 3d printer with a heated bed and a cardboard box you have a filament dryer. Your bed will heat up to 60-65° also your oven (if it has a halogen bulb) will keep your oven warm possibly around 65° but the bed with a box method works 👌.

ijcarroll