filmov
tv
Ep. 157 THE ST. JOHN MOSAIC EARNS HIS WINGS & BIG METAL BUTTERFLY MOSAICS!

Показать описание
Ep. 157 THE ST. JOHN MOSAIC EARNS HIS WINGS & BIG METAL BUTTERFLY MOSAICS!
Hey Everyone! Welcome to my studio!
0:08 Big push on the St. John mosaic!
I start by piping Laticrete 254 Platinum thinset on the lower left corner mesh, spreading it with my tool and placing the first sky blue pieces. I work back and forth so there is no weird end piece. It keeps the size balanced the best and the edges crisp. This part is goes pretty quickly for me as it is all the same color at this point.
3:00 I stop for the day as I will be cutting the mosaic into 4 parts and I've reached the edge of the bottom section.
3:22 I'm using up my extra thinset on a planter project. Using a donated cooler, I've added alkali resistant fiberglass mesh and I am now layering thinset on top. Once it has a good even coat it will be ready for mosaic!
4:37 Time to start a new project! It is quick and easy, but on the big side! Introducing my big metal butterfly! I will just be adding glass and mirror using clear GE Silicone and NOT GROUTING! The metal substrate is not strong enough to support a full mosaic. The cement would react with the metal, the grout would crack, you name it -there will be problems! Instead I am just blinging it up with glass and mirror and that's it. Fun and easy way to use some scrap glass!
This probably took me two hours start to finish. I'll be putting it in a local shop in a few days.
8:53 Butterfly recap! I used Silicone because
1. I needed a waterproof adhesive.
2. I needed an adhesive that would work well with the metal.
3. I needed a neutral cure adhesive for the mirror.
9:57 Starting on St. John's wing. I start with the lighter brown wing ridge. Then I struggled to figure out how I would portray the feathers. Off camera I laid about three feathers in light brown and tore them out when I saw they lacked depth. Instead I chose a glass that was just a bit darker and had some interesting streaking in it. Every feather has a dark lining on the bottom edge. The second row of feathers I switched to a medium brown so they get darker as they extend out from the eagle's body.
11:45 I finish the sky on the left and proceed up the left edge, finishing feathers as I go.
12:28 Pause as I switch to a new section, the sky next to the head. This is where I need to consider blending in the next color of blue, so I reference my St. Luke mosaic. Measuring 7" down from the top, I see that there are only one or two of the lightest blue pieces of glass. So that is how I begin on the sky in this area for St. John.
13:30 I start on the right wing, building the ridge with light brown glass and then moving to the feathers in the same way as before. It is much quicker as I have already decided how I will move forward with them.
14:56 SURPRISE!!! I have another metal butterfly to work on. This one is red and orange (and a little bit of pink!) I show the second half and then do a photo shoot in my back yard with the finished mosaic! It's so dang sparkly and looks great in person!
That's Putting It Together, Ep. 157! Thanks for watching. See you next time!
WATCH NEXT: Ep. 137 STARTING THE ST. MARK MOSAIC & GROUTING IN DETAIL!
COME SAY HI:
MOSAIC IN PERSON CLASSES (Atlanta metro area)
 0:17:32
Ep. 157 THE ST. JOHN MOSAIC EARNS HIS WINGS & BIG METAL BUTTERFLY MOSAICS!
 0:13:02
“Late Rising Leads to Impure Sins” — St. John Bosco | Ep. 157
 0:53:12
The Evolved Caveman w/ Dr. John Schinnerer - Episode 157: Train Your Nervous System To Release...
 0:12:25
The Gettysburg Address: In Lincoln's Footsteps | History Traveler Episode 157
 0:19:07
Ep. 158 FINISHING THE ST. JOHN MOSAIC & ANOTHER EARTHY CERAMIC MOSAIC STEPPING STONE!
 0:10:25
A Man Covered With Thousands Of Snakes On His Body : EXTRAORDINARY PEOPLE
 0:09:36
How 156 years of British rule shaped Hong Kong
 0:01:18
Boeing C-17 Globemaster Jet Crash All Hell breaks loose
 0:20:34
Ep. 156 ST. JOHN MOSAIC GETS SOME TAIL FEATHERS, PLUS FINISHING FOUR MOSAICS!
 0:14:48
Story of Saint John of God | Stories of Saints | Episode 162
 1:07:15
Ep157: Mountain Yogini - Tseyang Osel
 0:00:08
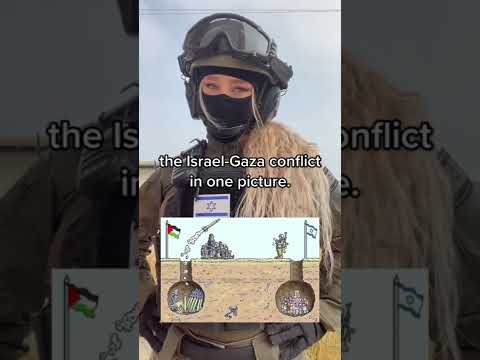
The Israel-Gaza conflict in one picture… #Israel #gaza #idf
 0:24:30
EP32 | WE CALL YOUR PARTNER TO CONFIRM IF THEY DATING YOU | You are expecting a child with someone
 0:43:20
COMEDIAN YY: I stole a tractor at the age of 12 - The Wicked Edition episode 157
 0:02:23
Witness the Unbelievable Cross Pavement Heist!
 0:58:10
ZCC spokesperson speaks out 🙏#he thanks Mr Theology for telling the truth about ZCC 😋
 0:00:06
xavier memes #memes
 0:15:22
Ep. 153 THE ST. JOHN MOSAIC, FIXING MY SUNFLOWER MOSAIC, & THE FIVE YEAR PROJECT!
 0:00:11
TikTok Similar to 9/11 Attacks
 0:00:15
BEST DEFENCE ACADEMY IN DEHRADUN | NDA FOUNDATION COURSE AFTER 10TH | NDA COACHING #shorts #nda #ssb
 5:33:05
2019 Masters Tournament Final Round Broadcast
 0:01:40
Bad News About Xolan Khumalo
 0:00:34
His Son Called and This Happened… #islam #muslim #father
 0:00:05
MY FIRST EVER 3 POINT MISS
Комментарии