filmov
tv
Arduino IOT Cloud + ESP32 | Using Arduino IOT Cloud with ESP32

Показать описание
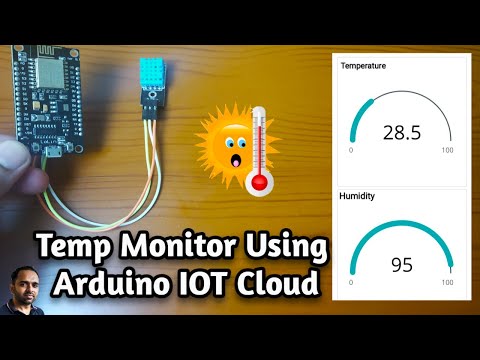
Arduino IOT Cloud + ESP32 | Using Arduino IOT Cloud with ESP32 to monitor temperature and humidity and also to control LEDs. In this project video I use Arduino IDE 1.8.9 , Notepad++ V7.7.1 , LEDs, DHT11 Sensor and ESP32 WROOM-32 Development Board.
00:00 Opening
00:30 Project Preview
01:25 Brief explanation of Arduino IOT Cloud
01:40 Installation of modules and components in this project
01:51 Installation test
03:34 Creating an account on Arduino Web
05:22 Prepare Arduino IOT Cloud
05:38 Add Variable
07:35 Select Device
08:54 Network Configuration
09:28 Build Dashboard
12:07 Open Arduino Web Editor
12:24 Getting Started Program code
17:00 Downloading Arduino Create Agent
17:18 Installing Arduino Create Agent
18:18 Running Arduino Create Agent
19:03 Selecting an ESP32 Board in Arduino Web Editor
19:25 Upload program code to ESP32
20:36 Project demonstration
24:00 Project demonstration with Android App
The code file is saved in the .rar file format. I created a .rar file using Winrar V5.50, so to extract it, make sure you use the same version of Winrar that I use or the latest version or use the winrar extractor online.
Sorry if my English is confusing, I use an online translator.
***********************************************
Thanks for watching & don't forget to like , share, comment and Subscribe.
***********************************************
For other video tutorials on this channel, please see this playlist:
***********************************************
***********************************************
Reference :
and from several other sources.
***********************************************
 0:19:41
Using Arduino IoT Cloud with ESP32 | Is it better than New Blynk 🤔
 0:51:59
Arduino IoT Cloud 2021 - Getting Started with Arduino & ESP32
 0:24:44
Arduino IOT Cloud + ESP32 | Using Arduino IOT Cloud with ESP32
 0:01:00
Arduino Nano ESP32 x Arduino IOT Cloud. #arduinoprojects #iot #diy #esp32project #arduinoprojects
 0:57:43
Exploring the Arduino Nano ESP32 | MicroPython & IoT Cloud
 0:05:10
Getting Started with Arduino IoT Cloud - Electronics with Becky Stern | DigiKey
 0:18:33
Smart 12V Fan Control with ESP32 and Arduino IoT Cloud | WirelessSpeed & ON/OFF Control!
 0:00:56
Arduino UNO R4 x Arduino IOT Cloud #jlcpcb #PCBA #Arduino #ArduinoIOTcloud #iot #technolabcreation.
 0:09:57
DIY Smart Classroom Environment Monitoring System | Arduino IoT Cloud Project | ESP32
 0:00:11
Arduino IoT Cloud + DHT11 = Live Temperature Monitoring! 🌡️ #arduinoproject #arduinounor4wifi
 0:00:20
ESP32 IoT Project- Real time Distance #esp32 #arduino #iot
 0:09:26
Arduino To ESP32: How to Get Started!
 0:05:27
Control LED using Arduino IOT Cloud and ESP8266 | Arduino IOT Cloud Projects
 0:05:45
Weather Monitoring with ESP8266, DHT22 & Arduino IoT Cloud | Real-Time Temp & Humidity Logge...
 0:00:04
IOT Dashboard ESP32 Communication
 0:22:51
ARDUINO IOT CLOUD - Control Devices from Anywhere
 0:45:33
Introduction to Arduino IoT Cloud
 0:12:21
453 Use your Arduino and ESP32/ESP8266 from your Smartphone. No Cloud! (RemoteXY)
 0:00:34
🤯ESP32 IoT Controlled DC Motor
 0:00:27
Led control using Arduino IoT cloud app
 0:00:52
IoT Temperature Monitor using Esp32 and Arduino IoT Cloud #iot #arduino
 0:06:39
Smart Environment Monitoring with ESP8266, Capacitive Soil Sensor, DHT11 & Arduino IoT Cloud
 0:21:43
Arduino - IoT Cloud BETA
 0:10:17
Temperature and Humidity Monitor using Arduino IOT Cloud and ESP8266
Комментарии