filmov
tv
How to fix water-damaged drywall ceiling joint

Показать описание
You'll need: Drywall screws (possibly), Oil-based quick-drying primer (Kilz original), paper drywall tape, joint compound (details below), a mud pan, 4, 6, and 10 " taping knives, a drywall sander [hand or pole---I'm using one with a vacuum attachment (not necessary)], 150 grit drywall sand paper/screen, medium grit sanding sponge.
Except for the paint, you should find all of these things in the drywall section of your home center.
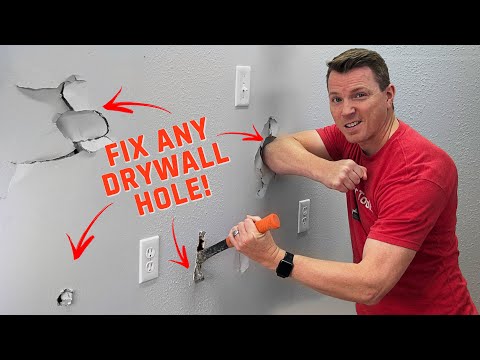
:51 Peel damaged tape off.
1:25 Scrape all loose paint and compound.
1:45 Reattach drywall if necessary I'm using 1.75 inch drywall screws. Set them so the head is just below the surface of the drywall face, but does NOT actually tear the paper.
1:59 Paint everything with a good quick-drying primer. I prefer an oil-base like Kilz Original. It will help glue down any the edges of the scraped paint, and also seal any yellow/brown water stains that might bleed through.
2:09 Mix up or use premixed joint compound. I'm using Easy Sand 20 because it hardens in about 20 minutes and I'm trying to get more coats on as quickly as possible. If you've never taped drywall before, you probably want to use an Easy Sand 90 (90 minutes to set), or an air drying compound. If you use a premixed compound, you'll want to add a little water to it till it's about the consistency of peanut-butter.
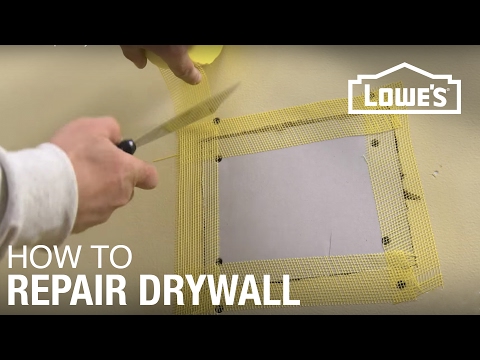
2:20 Cut a piece of drywall tape as long as the crack.
2:32 Use a 4 inch taping knife to fill the crack in the drywall. Lay it relatively thick, and at least as wide as the paper tape.
3:05 Press drywall tape into the wet compound.
3:15 Starting from the middle and working to the ends, take your 4 inch taping-knife and smooth the drywall tape out, pressing firmly enough to squeeze out most (but not all) of the joint compound. It should look nice and flat and smooth. You can wait for this to dry if you want to be cautious, or move directly to the next step if you think you can get it done before the compound starts setting.
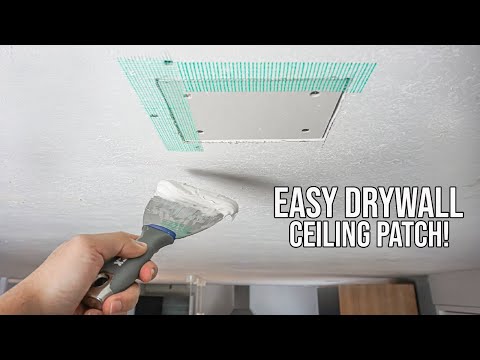
3:32 With your 6 inch taping knife, add more joint compound on top of the tape, then smooth most of it back off again with lengthwise motions. There should be enough compound left on the tape just to cover the edges and make the surface completely smooth. Let it set or dry completely.
4:56 Gently scrape the dry joint compound to take off any high spots.
5:50 Apply more joint compound to the the joint with a10 inch taping knife, and finish it smooth.
7:23 Scrape it again when it sets or dries (not before).
Let it dry completely
9:00 Sand with 150 grit paper or screen. Prime and paint
Disclaimer:
If you choose to imitate, duplicate or copy anything you may have observed in these videos, you do so at your own risk. The creator of this content does not take any responsibility for any action taken as a result of the information or advice on this YouTube channel (or other platforms) and shall not have any liability in respect of any injury or damage that may result.
Kilz spray primer, regular paper tape, USG Easy Sand 20 minute compound, a Hyde vacuum sander, and 3M 120 grit sanding block.
Except for the paint, you should find all of these things in the drywall section of your home center.
:51 Peel damaged tape off.
1:25 Scrape all loose paint and compound.
1:45 Reattach drywall if necessary I'm using 1.75 inch drywall screws. Set them so the head is just below the surface of the drywall face, but does NOT actually tear the paper.
1:59 Paint everything with a good quick-drying primer. I prefer an oil-base like Kilz Original. It will help glue down any the edges of the scraped paint, and also seal any yellow/brown water stains that might bleed through.
2:09 Mix up or use premixed joint compound. I'm using Easy Sand 20 because it hardens in about 20 minutes and I'm trying to get more coats on as quickly as possible. If you've never taped drywall before, you probably want to use an Easy Sand 90 (90 minutes to set), or an air drying compound. If you use a premixed compound, you'll want to add a little water to it till it's about the consistency of peanut-butter.
2:20 Cut a piece of drywall tape as long as the crack.
2:32 Use a 4 inch taping knife to fill the crack in the drywall. Lay it relatively thick, and at least as wide as the paper tape.
3:05 Press drywall tape into the wet compound.
3:15 Starting from the middle and working to the ends, take your 4 inch taping-knife and smooth the drywall tape out, pressing firmly enough to squeeze out most (but not all) of the joint compound. It should look nice and flat and smooth. You can wait for this to dry if you want to be cautious, or move directly to the next step if you think you can get it done before the compound starts setting.
3:32 With your 6 inch taping knife, add more joint compound on top of the tape, then smooth most of it back off again with lengthwise motions. There should be enough compound left on the tape just to cover the edges and make the surface completely smooth. Let it set or dry completely.
4:56 Gently scrape the dry joint compound to take off any high spots.
5:50 Apply more joint compound to the the joint with a10 inch taping knife, and finish it smooth.
7:23 Scrape it again when it sets or dries (not before).
Let it dry completely
9:00 Sand with 150 grit paper or screen. Prime and paint
Disclaimer:
If you choose to imitate, duplicate or copy anything you may have observed in these videos, you do so at your own risk. The creator of this content does not take any responsibility for any action taken as a result of the information or advice on this YouTube channel (or other platforms) and shall not have any liability in respect of any injury or damage that may result.
Kilz spray primer, regular paper tape, USG Easy Sand 20 minute compound, a Hyde vacuum sander, and 3M 120 grit sanding block.
 0:08:04
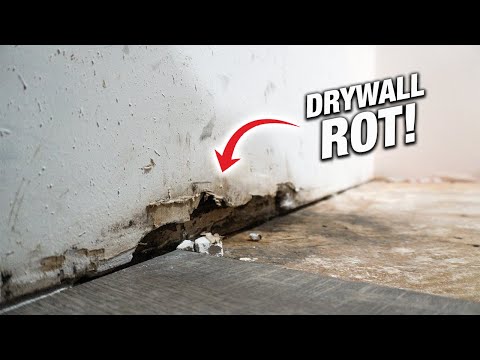
How To Fix Rotten Moldy Drywall From Water Damage! DIY For Beginners!
 0:06:21
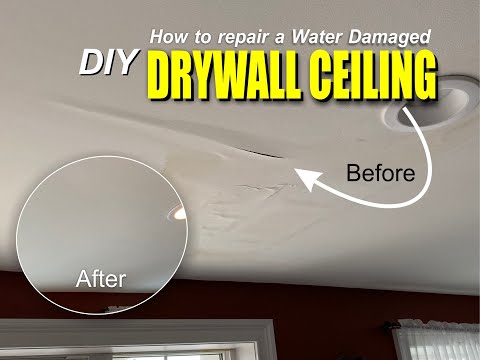
DIY Water Damaged Drywall Ceiling Repair: Easy Step-by-Step Guide
 0:02:17
How To Repair Minor Water Damage. #drywallrepair #waterdamage #handyman #diy #howto
 0:24:08
How To Repair WATER DAMAGED DRYWALL CEILING- Step by Step
 0:10:23
How to repair water damaged drywall in one day!!
 0:19:20
How To Stop A Water Leak And Fix A Water Damaged Drywall Ceiling
 0:04:55
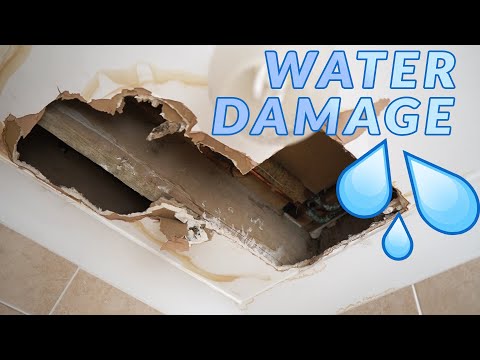
How To Repair a Water Damaged Ceiling After a Leak - Water Damaged Plasterboard / Drywall
 0:10:53
How to fix water-damaged drywall ceiling joint
 0:12:52
How to Repair a Water Damaged Ceiling
 0:26:52
How to DRYWALL REPAIR a Water Damage Ceiling Tutorial
 0:00:33
Is drywall ruined if it gets wet?
 0:03:10
How to Repair Drywall
 0:16:58
🟡How to Repair a Water Damaged Drywall Ceiling - part 2 of 2
 0:15:38
How to Fix Holes in Drywall - 4 Easy Methods
 0:07:35
Wet Drywall - To Repair, or To Replace?
 0:16:58
How To Repair Drywall Water Damage Around Shower The EASY WAY - Ez Pro Texture
 0:07:21
SUPER EASY way to Fix Water Stains on Ceiling or Wall - Without Painting It!
 0:02:02
Water Leak & Drywall Repair
 0:10:04
How To Repair A Drywall Ceiling Hole From Start To Finish | DIY For Beginners!
 0:04:24
How to Repair Drywall NO DUST or SANDING - Fast & Easy
 0:03:06
How to Cut and Repair Drywall | The Home Depot
 0:10:18
How to repair texture on a water damaged drywall ceiling step by step
 0:05:07
How To Fix Messed Up Drywall Work! Bubbles And Craters! DIY
 0:15:44
Shower wall water damage wall repair - Tub wall water damage drywall repair How to repair sheetrock
Комментарии