filmov
tv
How Do I Avoid Glare When Photographing My Artwork?
Показать описание
Q: How Do I Avoid Glare When Photographing My Artwork?
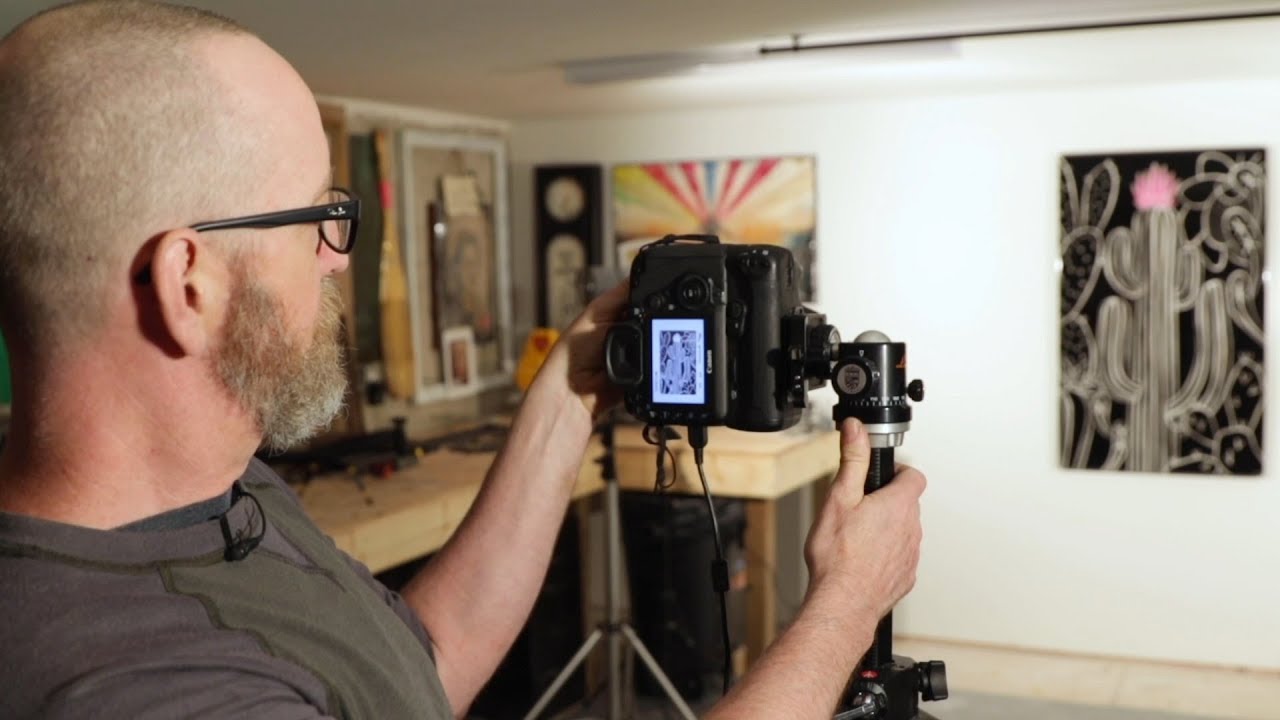
A: Photographing your finished high gloss ArtResin pieces can be challenging due to glare and reflection. So we called upon our friend Geoff George, who is a professional photographer, to show us just how to do it.
1. Work in a controlled environment:
Taking a shot with both studio lights and ambient lighting ( daylight or from lamps/ceiling lights ) can cause glare and uneven lighting. Close curtains and blinds and adjust room lights as necessary in order to control all the light hitting your piece.
2. Set up your lighting:
To get an equal, even wash of light, set up two identical lights on either side of your artwork at 45 degree angles. Use the brightest lights you can and ensure both lights are the same in order to provide even amounts and even colour. Never use your camera's flash or light your work from the same angle as the camera or else you'll end up with a hot spots in your work.
3. Set up your artwork:
Whether you hang your artwork, lean it on a wall, or lay it on the floor, it's important that the camera is positioned at a perfectly parallel angle and that the lens is centred to the middle to avoid making your piece look distorted. Using a tripod locks the camera in and offers the most control.
4. Adjust your lights and your artwork for reflections:
Examine the way your artwork looks through the lens, identifying any unwanted sources of light and finding a way to minimize them. You may need to adjust the positioning of your lights or adjust your artwork
5. Take a few test shots:
Once you're happy with what you see, you're ready to shoot!
To learn all the tips and tricks, check out our blog, How To Photograph Your Resin Art Like A Pro
ArtResin: Made For Artists, By Artists
 0:04:58
The Easy Way to Light People With Glasses and Avoid Glare
 0:05:15
How to Avoid Glare on Glasses | Understanding the Law of Reflection
 0:06:39
How to Light People With Glasses and Avoid Glare
 0:03:52
How To Avoid Glare On Glasses In Photos
 0:00:32
3 EASY Ways To Avoid Glare on Glasses
 0:08:09
How Do I Avoid Glare When Photographing My Artwork?
 0:05:04
Erin Manning: How to Avoid Glare When Shooting Portraits
 0:06:46
How to Avoid Glare on Glasses in Video
 0:10:07
How to avoid glare in eyeglasses. Photographing people with glasses and minimizing reflections
 0:01:50
How to light people with glasses (to avoid glare)
 0:00:33
How to reduce glare on windows?
 0:01:53
5 Photography Tips to Avoid Glare from Glasses in Portraits
 0:02:07
Reduce Glare from Glasses on Video/Zoom
 0:01:09
Cinematography Tip: Remove Glare from Reflective Objects with Dulling Spray
 0:07:48
STOP THE GLARE in Your TikTok, YouTube, Insta Vids!
 0:01:00
BEST Way to Avoid Glare on Glasses 🤓
 0:05:57
How to Photograph People with Glasses (& Avoid Glare)
 0:00:10
How to Avoid Lens Glare
 0:04:24
How to Minimize Glare From Glasses in Photographs
 0:04:35
Photographing Subjects with Glasses | Avoiding Lens Glare
 0:05:10
How To Light People With Glasses | Avoid Glare & Reflections!
 0:03:40
How to Stop Glare on Ipad when Filming Overhead
 0:00:59
How To Remove Glare from Artwork
 0:02:38
REMOVE COMPUTER SCREEN GLARE FROM GLASSES WITH THIS
Комментарии