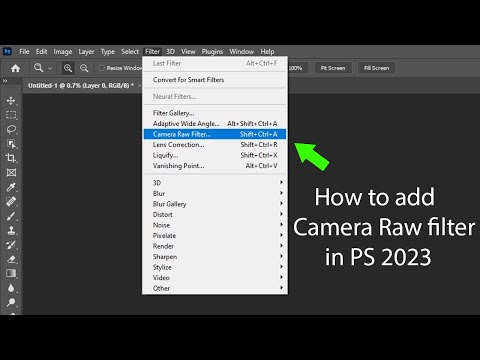
MASTER the Camera Raw Filter In Photoshop 2022

preview_player
Показать описание
Part of my ongoing series on my channel, MASTERCLASS. In these tutorials, I will show in-depth on how to create a professional look in your photos using photoshop, Lightroom and Photography. In this tutorial, I will go through how to master the Camera RAW filter in photoshop 2022.

0.00 Intro
2:26
Basic Sliders
11:11 Tone Curve
14:39 Details Sliders
17:20
Colour Mixer
20:42
Colour Grading
24:03 Optics Sliders
26:16
Geometry Sliders
28:21
Effects Sliders
29:57
Calibration
31:42
Crop Tool
33:02
Healing Tool
34:42
Select & Mask
36:10
Red Eye Removal
37:27
Snapshots
38:36 Presets

I hope this video helps and don't forget to subscribe for more awesome videos just like this :)

LINKS:

🎥 How to Use the TONE CURVE in Photoshop 2021

🎥 Whats the best way to Sharpen an Image /// Lightroom or Photoshop

🎥 How to Reduce ISO Noise Grain in Photoshop CC

🎥 How to Use The HSL COLOUR PANEL in photoshop 2021

🌇 Filmmaking LUTs & Lightroom Presets Shop:

🔗 Gear I Use To Film:

🟣 Video Feaver YouTube Channel:

👕 Official Merchandise

🌐 Website

📺 Instagram @photo_feaver

Рекомендации по теме
Комментарии
Автор

Thank you for your knowledge and the detailed descriptions of your editing. Stay safe Mate.

niftytwo
Автор

Great job👌😊Very clear, easy to follow ...

mehmetnasuhogullar
Автор

Thank you so much for helping me finally begin to understand the full potential of Camera RAW and how to use it. I only shoot in RAW so your advice will be extremely valuable.

erik
Автор

My compliments for the way you present the video! I'm Dutch myself and my English is certainly not bad, but I really didn't miss a word from you. You speak so clearly, without being interesting with difficult words. That is very often the case in other presentations. I will definitely follow you.

deal
Автор

Very useful tutorial - nice update! Thanks.

weisskm
Автор

Very nice video and great explanation. Thank you

rorjackson
Автор

Was trying to have all in one video about camera raw filter in photoshop. And I found this video. Truly helpful.

melonggamingchannel
Автор

Thanks for a great informative video! 🙏🙏

MelindaGallo
Автор

My color management experience dates back to working in the mid-1970s as a lab tech at National Geographic where I was a beta tester of DuPont’s first CYMK Cromalin color proofing system and had the PhD who invented it tutor me about 3D color space. I later worked as production manager at a high quality magazine printer which was on the committee which established SWOP standards for process control of color. I started using Photoshop with V1 in the early 90s and ACR when it was added. I’d like to compliment you on this overview and offer some historical perspective and advice flor noobs based on my experience.

Historically Photoshop preceded ACR and Lightroom, which is why they are separate applications but all three share the same color management engine. Edits made to the RAW file in ACR and Lightroom don’t change the RAW file, they simply add metadata to tell Photoshop to make the same changes when initially opening it.

One of the basic principles of process control is objective measurement and the best tools for that for a photographer are a 12% gray card and a Xrite or MacBeth color checker carried in the camera bag and used as references when shooting, to as you said repeatedly “get it right in the camera”. Color vision is HIGHLY adaptive and you will not see color biases such as green tint around and under green foliage or the cooler tone of open shade. But you will be able to visualize in the camera playback if you do this: Fill the viewfinder with the 12% gray card and shot it with camera set to the baseline of Daylight WB; use that photo to set Custom WB; then shoot the card again with camera set to Custom WB adding the color checker. By toggling between the two frame you will be able to visualize, from the Daylight baseline, the ambient Y-B color temp and any G-M tint biases.

With that “Custom WB to neutral at capture” approach, which takes less than a minute up front, all the RAW files will be displayed that way in ACR or LR when opened. You will know, “by the numbers” the color balance in neutrals is R=G=B instead of needing to trust your “lying eyes” (adaptive color vision). For example if your monitor isn’t perfectly color balance and has a magenta bias, your eyes will adapt to it and recalibrate to neutrals even of they are not neutral in the files. But if you set Custom WB and open the “after” shot of the target first which is R=G=B by the numbers you should notice any monitor color balance problems initially, at least until your brain adapts your color perception.

The alternate approach to setting WB is to keep the camera set to Daylight at all times and just shoot the gray card + color target under the same lighting. Then open the that photo first in ACR, correct card to neutral in with the eye dropper, and then adjust styles from “normal” or “neutral” to the other settings and observe how the colors shift on the Xrite chart but the neutrals don’t. That provides a more objective view of how the styles change things than just looking at the scene by itself.

The “big picture” of getting exposure, DR and noise reduction optimal in the camera at capture for the lighting conditions is using that same target to set ISO of the camera to expose the solid white of the Xrite target 1/3 stop under clipping if possible at the desired aperture desired for DOF and Shutter speed desired to freeze or depict movement.

Ideally you would want use the “baseline” ISO of the camera — which varies with camera — for the least amplification of the signal and noise during the analog voltage to digital tonal value process in the camera under lighting contrast in the scene which fits the DR of the sensor. The sensor is like a array of RGB buckets with the highlights being filled with a fire hose and the deepest shadows with a eye dropper. The camera must close the shutter when the brightest highlight “bucket” is full and in high contrast lighting the shadow sites my not record enough photons to create any signal and only the noise is amplified.

When ISO is raised from underexposure to the point the file is exposed “to the right” with solid whites 1/3 stop below clipping with eyedropper values of 240-250 looking at the left side of the histogram will inform whether or not the camera’s DR at the ISO actually captured any image detail in the shadows.

When shooting in camera it is best to display the RGB version of the histogram because in caucasian skin the RED channel will clip before the GREEN and BLUE resulting in loss of subtle gradations which is why overexposed skin gets a waxy, yellowish appearance in the non-specular highlights.
The same is true when making editing adjustments in ACR. Notice in the video when red is added to the sky a red triangle appears in the histogram at the top in the highlights which indicates the RED channel has been pushed to the point of losing detail in the highlights.

Again getting in the habit of at least including the gray and color checker card in a test shot and using it for setting optimal exposure based on the known highlight reflectance in the white patch of the chart 1/3 below clipping will make the editing process much simpler and more objective. Start by correcting the test shot including the target to taste to create the desired mood in the photo with contrast and color, then copy/paste the settings to all the other photos taken under the same lighting conditions and it will speed up the workflow.

TeddyCavachon
Автор

Great video of detailed descriptions on using Camera Raw Filter settings you have a new SUB.👍

VintageForYou
Автор

re: vibrance vs. saturation
I will use images with people in them as an example. I prefer the subtle weight increase that Vibrance offers. It's very subtle, whereas Saturation really punches up the colors too much and results in an image that will most likely be too intense, and run out of gamut when converting to 4C for print.
I only use RAW to process the image to a point, and shun masking in RAW, this has created huge problems. I stop myself at the Black slider. I prefer to adjust the saturation, sharpening etcetera as adjustment layers within the file.

To test my preference I added a Vibrance adjustment layer to the file. Ironically this has both Vibrance and Saturation sliders to gauge ones own preference. I only use the Vibrance slider in this instance and not the Saturation slider. If Saturation is what's called for then I will add a Hue/Saturation adjustment layer, which has more options to choose from than camera RAW. I work non-destructively by using adjustment layers for each move such as brightness/contrast, hue/saturation, and use create a 50% grey smart object that I hit with a high pass filter for sharpening to make smaller moves, echoing your advice. This allows me to use masks to brush in where its needed, and keeps the file fully editable should the client want to pull back on a move.

Thank you for posting this!

jojo-iyuc
Автор

Thank you. I was so confused what Camera Raw was. It’s not easy to find.

JK-jlbf
Автор

Great Video. Can you create Profiles in the new Camera Raw? I understand how to save presets but I would like to be able to create my own Profiles also. I have found how to do it in the last version of Camera Raw but I can't find the icon that you used to alt click on to bring up the Profiles menu. Thank you!

judimichalikphotography
Автор

This is an amazing and most informative video as always. Thank you!

lindaferrell
Автор

Thank you for video. Simple and clear. Quick question. How do you rename a preset in camera raw filter? I can't seem to find this simple solution. Thank you for help. Best.

thepictureroom
Автор

amazing. so much work goes into making mediocre photos seem interesting

StanleyKubick
Автор

Could you please tell us what the preferences should be. Thank you.

simonekoffman
Автор

Can you tell me how to fix the Moire in the new update?

primarypower-barberacresed
Автор

Hi, I was wondering if you could help me. My photoshop cs6 still open up camera raw version 7, how do I get photoshop to open with the latest version 14.2? I have downloaded and installed the latest version of camera raw, but only version 7 keeps opening up. Any help much appreciated, thanks.

pricklypickles
Автор

Pls I can't find the link to the photos?
Help!!!!

Ayandipupo