filmov
tv
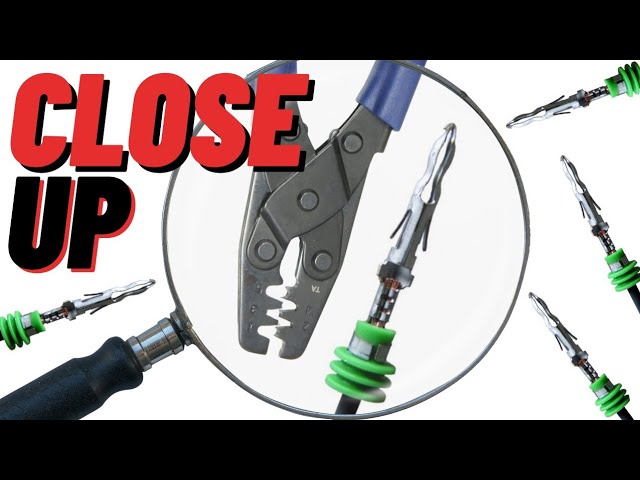
🔎 Weather Pack Connector Assembly CLOSE UP 🔍 DIY Crimping Terminals How To
Показать описание
You asked, and here it is! We're crimping Delphi Weatherpack terminals again, but this time zoomed in up close so you can see EVERY detail of the process. Tool and supply links below 👇👇👇
⏰ Timestamps: ⏰
00:00 Intro
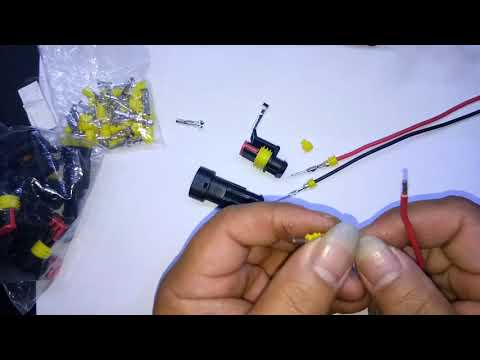
00:17 Tools & Crimper Detail
00:40 Sil-Glyde and Fresh Cuts
01:12 Add Seals
01:21 Strip Wire
01:31 Measure and Trim
01:44 Cut Terminals
01:57 Terminal Setup/ Crimping
02:49 Review Crimping
03:10 Connector Bodies
04:52 More Info
👍👍👍 Thanks for watching! 👍👍👍
🛠 Featured Product Links ⚙️
You can buy a complete set with everything included like this 👇:
OR piece it together like I did for a specific project 👇:
Self Adjusting Wire Strippers:
(NOTE: I don't recommend the orange pair seen in the video. I do however recommend either pair offered from Klein Tools or Irwin with a slight edge to the Klein.)
Seal-All Connectors/ Terminals:
Single-
Seal-All Terminal Kits:
🎥 My Filming Setup📸
#leftseatlife #weatherpack #diy #crimpingtool #wiring #close #closeup #delphi #crimping #wirestripper
⚖️ Legal Disclaimer ⚖️ - Some links found in the description box of my videos may be affiliate links, meaning I will make commission on sales you make through my link. This is at no extra cost to you to use my links/codes, it's just one more way to support me and my channel. Any commissions earned will be turned into AVGAS and adventure!
⏰ Timestamps: ⏰
00:00 Intro
00:17 Tools & Crimper Detail
00:40 Sil-Glyde and Fresh Cuts
01:12 Add Seals
01:21 Strip Wire
01:31 Measure and Trim
01:44 Cut Terminals
01:57 Terminal Setup/ Crimping
02:49 Review Crimping
03:10 Connector Bodies
04:52 More Info
👍👍👍 Thanks for watching! 👍👍👍
🛠 Featured Product Links ⚙️
You can buy a complete set with everything included like this 👇:
OR piece it together like I did for a specific project 👇:
Self Adjusting Wire Strippers:
(NOTE: I don't recommend the orange pair seen in the video. I do however recommend either pair offered from Klein Tools or Irwin with a slight edge to the Klein.)
Seal-All Connectors/ Terminals:
Single-
Seal-All Terminal Kits:
🎥 My Filming Setup📸
#leftseatlife #weatherpack #diy #crimpingtool #wiring #close #closeup #delphi #crimping #wirestripper
⚖️ Legal Disclaimer ⚖️ - Some links found in the description box of my videos may be affiliate links, meaning I will make commission on sales you make through my link. This is at no extra cost to you to use my links/codes, it's just one more way to support me and my channel. Any commissions earned will be turned into AVGAS and adventure!
 0:05:25
🔎 Weather Pack Connector Assembly CLOSE UP 🔍 DIY Crimping Terminals How To
 0:16:43
Weather-Pack Connector Basics | Wiring Wednesdays
 0:03:59
QuikGuide: How To Crimp and Assemble Weather Pack Connectors
 0:08:32
Weather Pack Connectors, Assembly Instructions, Disassembly, Crimp Tool
 0:11:42
Connector comparison and wiring tips. Deutsch, Delphi, Weatherpack, etc.
 0:03:28
#136 - How to Assemble a Delphi Metripac Connector
 0:06:56
How To Crimp Weatherpack Connectors With Seal-All / Delphi Crimper
 0:04:50
Weather pack (waterproof) Connectors Assembly without using special tools
 0:01:56
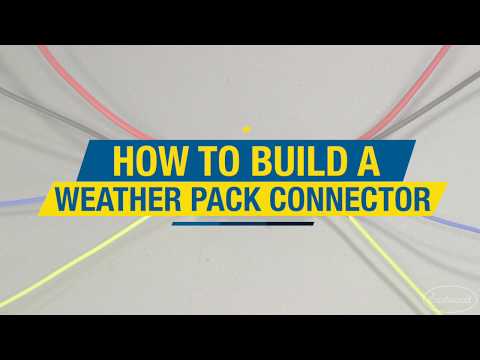
How to Build a Weather Pack Connecter - OEM Style Weather Tight Connections for Your Car! Eastwood
 0:00:44
Weather Pack Terminal Crimping and Connector Assembly Instructions
 0:07:31
IWISS Crimping and Assembling a Packard Weather Pack Connector and Open Barrel Terminals
 0:13:26
Waterproof Wire Connectors
 0:05:06
Professional Crimping of Weather Pack Terminals
 0:07:53
Weather pack Connectors
 0:07:43
Waterproof Connections a Step-By-Step Guide (make your own)
 0:00:49
S & G Tool Aid 18580 Release Tool for Weather Pack Terminals
 0:01:41
How to use Crimper for Weather Pack & Metric-Pack connectors & Seal ( Licrim: No.P78)
 0:03:43
Crimping and assembling Pico brand Weather pack (GM style) automotive connectors. Weather tight
 0:00:55
Waterproof Automotive Connector #shorts
 0:03:40
Remove Weather Pack Terminals | StreetRodElectrics.com
 0:03:33
Two Minute Tech: Weatherpack Connectors
 0:05:33
Crimping and Assembling a Packard Weather Pack Connector
 0:00:39
555-10761 JEGS Weatherpack Connector 2 Pin Male Female Connector
 0:00:10
JRready DRK-DWP01 Weather Pack Terminal Extraction Removal Tool for Delphi Weatherpack connectors
Комментарии